

Edit an image without starting over
- Guide
- Step 1 Learn
On this page11 sections
- Before you start
- Step 1: Open Edit with Prompts
- Step 2: Choose an editing model
- Step 3: Write the one change, then what must stay
- Step 4: Check that nothing else moved
- Step 5: Retouch one small area
- Step 6: Expand to a wider format
- Step 7: Check the expanded image
- Photoroom Expand or Smart Reframe
- Common problems
- What's next
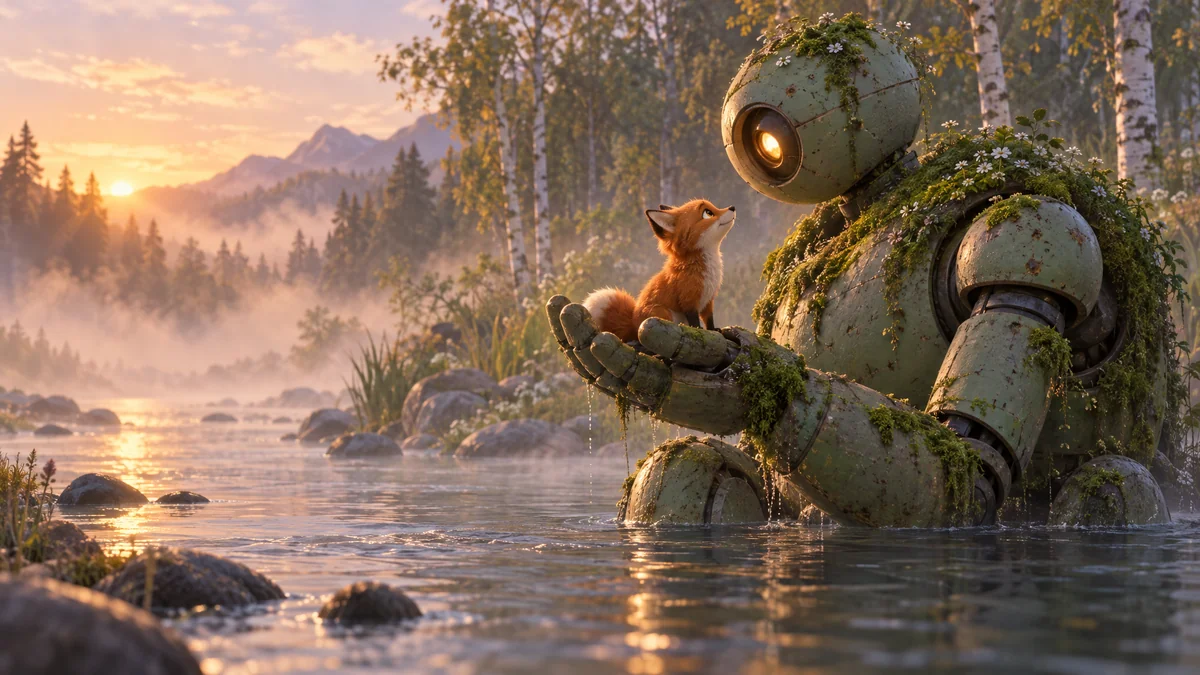
When most of an image is right, edit it instead of starting over. This lesson takes one image, a moss-covered robot holding a fox cub in a misty river, and edits it three ways: Edit with Prompts with Nano Banana 2.1 to change one element or the whole scene, Retouch to repaint one small area under a mask, and Expand with Photoroom Expand to grow it into a wide banner. Each edit makes a new image, so the original stays safe.
Quick version
- Open the image, click the three dots in the bar above it and choose Edit with Prompts, Retouch or Expand.
- To change one thing anywhere in the image, use Edit with Prompts: write the one change, then list what must stay, and click Generate.
- To change one small area, use Retouch: draw a mask around it with the lasso, say what goes there, click Generate, then Select.
- To fit a wider or taller format, click Use as Reference, pick Photoroom Expand, set Output Width and Output Height, and click Generate.
- Compare the result with the original and check that nothing else moved.
Before you start
- You need an image in your library. Any image works: one you generated in Scenario or one you uploaded.
- Edit, don't regenerate, when most of the image is right. A new generation changes everything at once. An edit changes the part you name and keeps the rest, so you don't lose the composition, the light or the character you already approved.
- Pick the tool by the size of the change:
| You want to | Use | How you point at the change |
|---|---|---|
| Change one element, the season, the light or the style | Edit with Prompts | In words |
| Change one small area and keep every other pixel | Retouch | With a mask you draw |
| Fit a wider or taller format | Expand | With the output size |
- Every edit is a new asset. The original stays in your library, untouched, so you can always go back and try again.
Step 1: Open Edit with Prompts
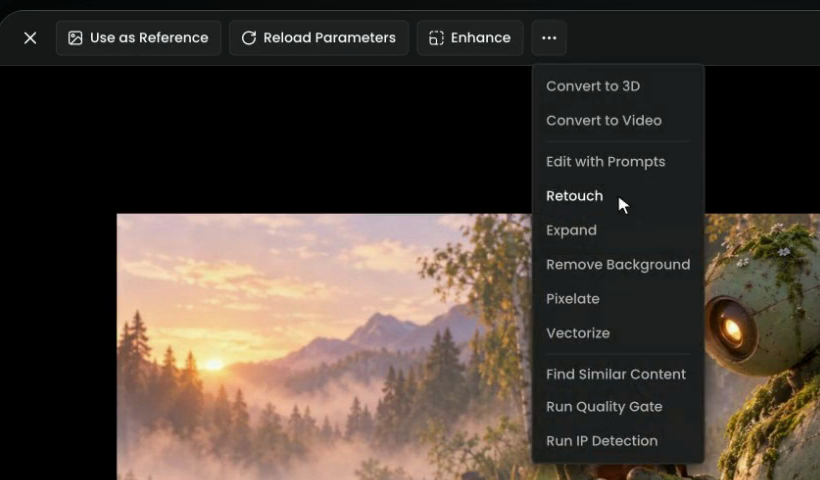
Open the image. In the bar above it, click the three dots to open the menu, and choose Edit with Prompts.
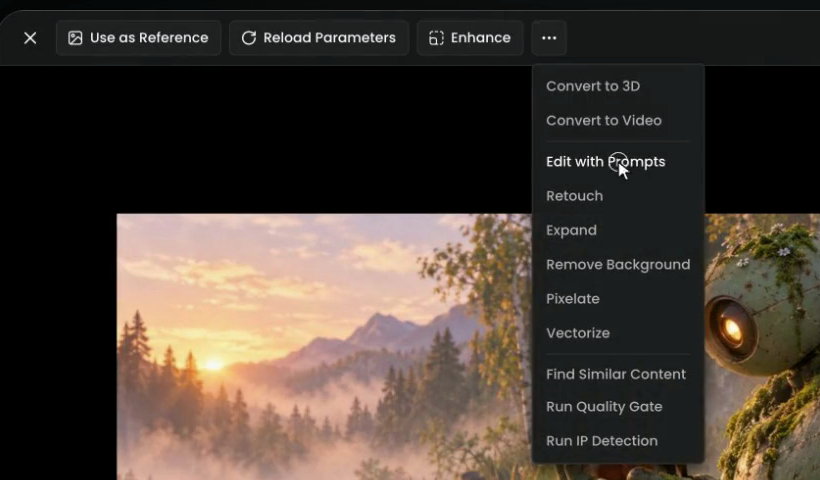
The same menu holds Retouch, Expand and Remove Background, used later in this lesson and the next. You can also reach Edit with Prompts from the three dots on a thumbnail in your gallery, or from Create in the top bar with no image loaded.
Edit with Prompts opens with your image under Reference images, ready to edit. It also picks a model for you, here Nano Banana 2.1.
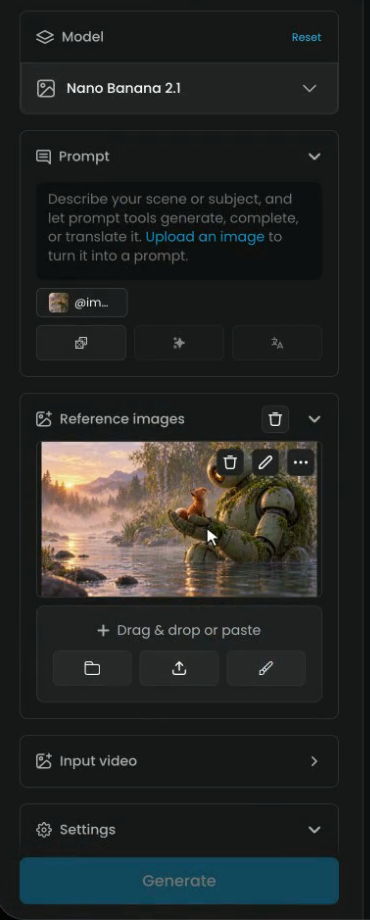
Under the image you can add more references (drag and drop or paste, choose one from your library, or upload one), and the pen icon lets you draw on the image to show the model where to work.
Step 2: Choose an editing model
To use another model, click the model name, then View model library. Under Capabilities, tick Edit with Prompts to see only the models made for editing. In the film the filter shows 47 models, among them GPT Image 2.5 Flare and Sunburst, Seedream 5.0 Pro, Ideogram 4.5, Gemini 3.0 Pro and Nano Banana 2.1.
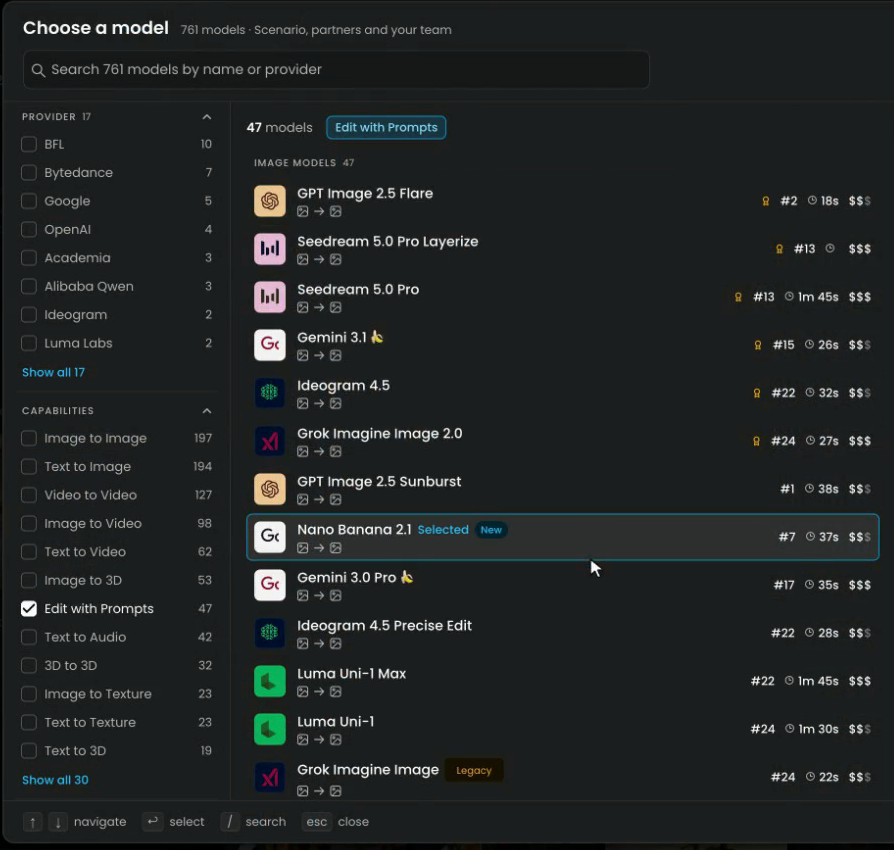
This lesson keeps Nano Banana 2.1, so close the library. Editing models differ in how strictly they keep what you didn't mention: some are precise and keep the style, others redraw more freely. When one changes too much, try the same prompt on another.
Step 3: Write the one change, then what must stay
An editing prompt has two parts:
- The one change, said precisely: what changes, into what, and where it sits.
- What must stay, listed by name: the subject, its pose, the light, the framing. Models keep what you name more reliably than what you leave out.
Here, the fox becomes a small snowy owl chick:
Change only the fox cub into a small fluffy white snowy owl chick with big round amber eyes, sitting in the same place on the robot's palm and looking up at the robot. Keep everything else exactly the same: the robot, its moss and flowers, its glowing eye, its hand, the river, the stones, the trees, the mist, the sunrise light and the framing.
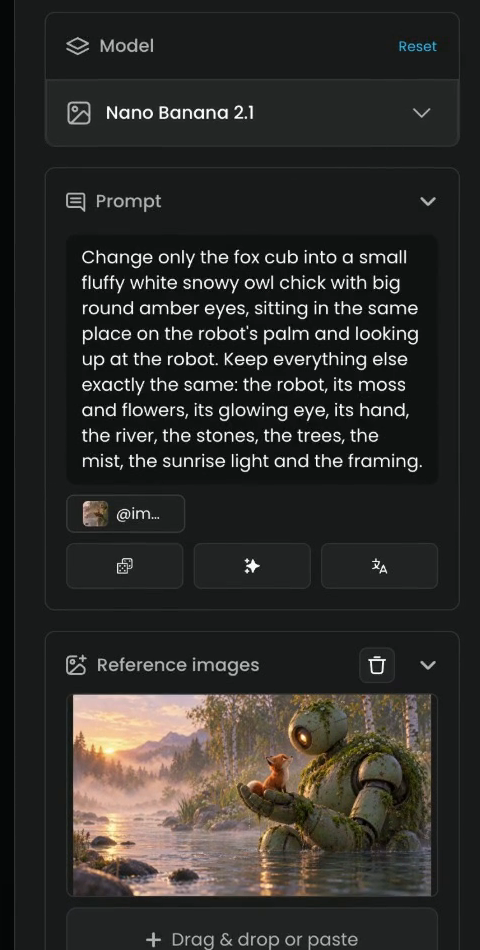
Click Generate. The price of the run shows on the button.
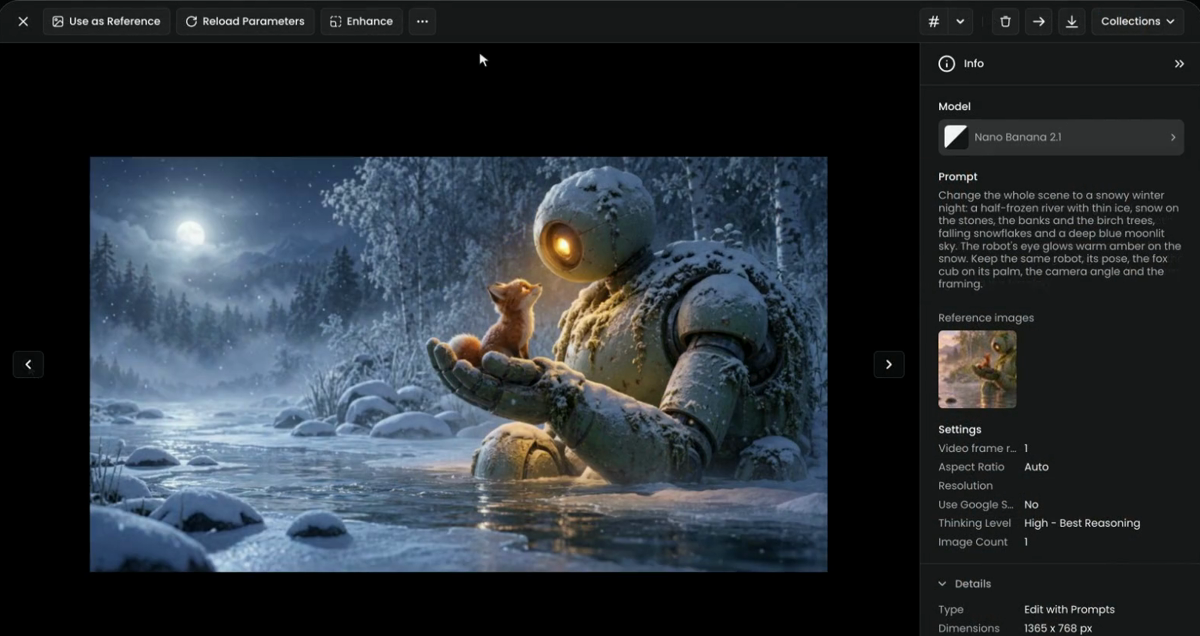
The same kind of prompt can change the whole scene too. Make it a snowy winter night, keep the robot and the fox, and click Generate:
Change the whole scene to a snowy winter night: a half-frozen river with thin ice, snow on the stones, the banks and the birch trees, falling snowflakes and a deep blue moonlit sky. The robot's eye glows warm amber on the snow. Keep the same robot, its pose, the fox cub on its palm, the camera angle and the framing.
Keep each prompt to one or two changes. If you need more, run them one after the other on each new result: small steps are easier to check and to undo.
Step 4: Check that nothing else moved
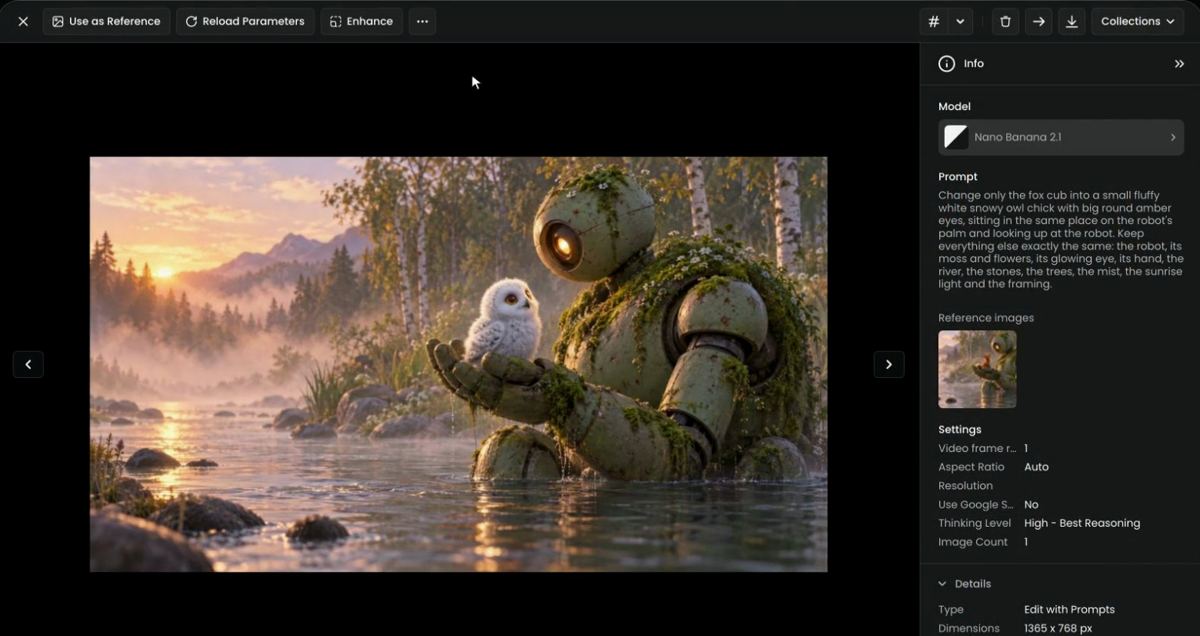
Open the result. Here is the owl, sitting in the robot's hand, and nothing else moved: the same moss, the same eye, the same river and light. The Info panel keeps the prompt, the model and the reference image the edit was made from.
And here is the same moment on a frozen winter night. The robot, its pose, the fox and the framing all held.
Compare each edit with the original side by side, at full size:
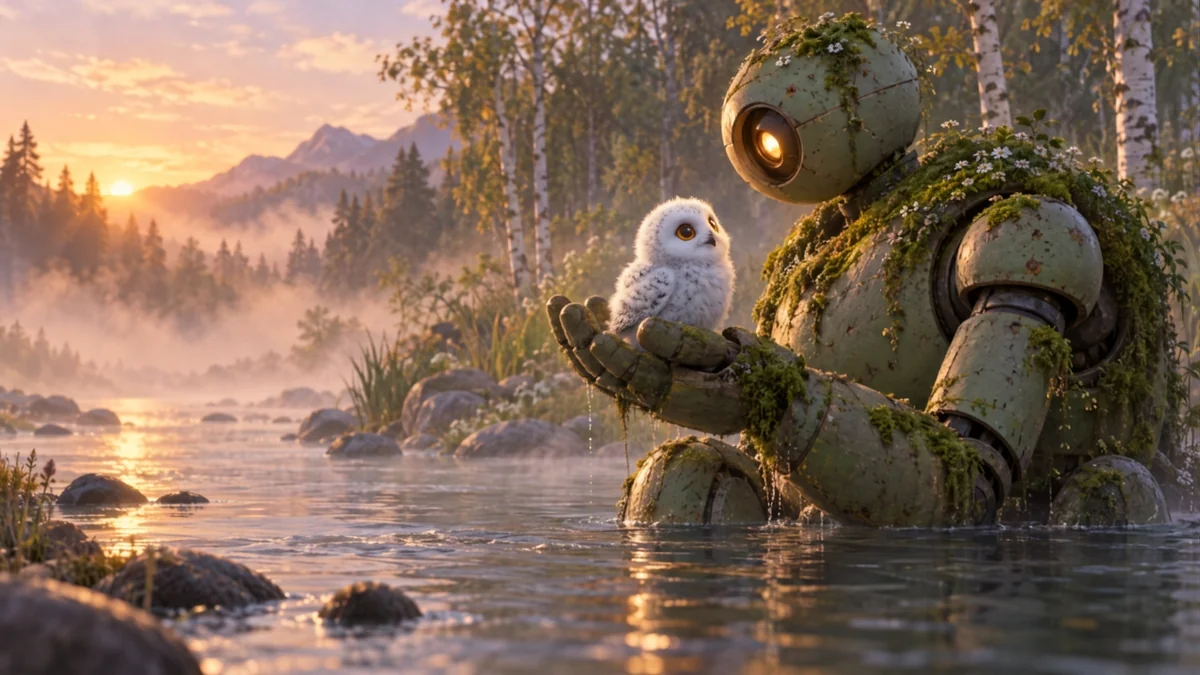
only what you named changed, the subject is the same character, the pose and framing match, and the light falls the same way on everything you kept.
something you didn't name changed (a color, a face, the background), the new element floats or has the wrong light, or the image was reframed. Name the part that moved in the keep list and generate again, or try another editing model.
Step 5: Retouch one small area
For a small area you can point at, open the three-dot menu and choose Retouch. It is Scenario's inpainting tool: it repaints only the area you mask.
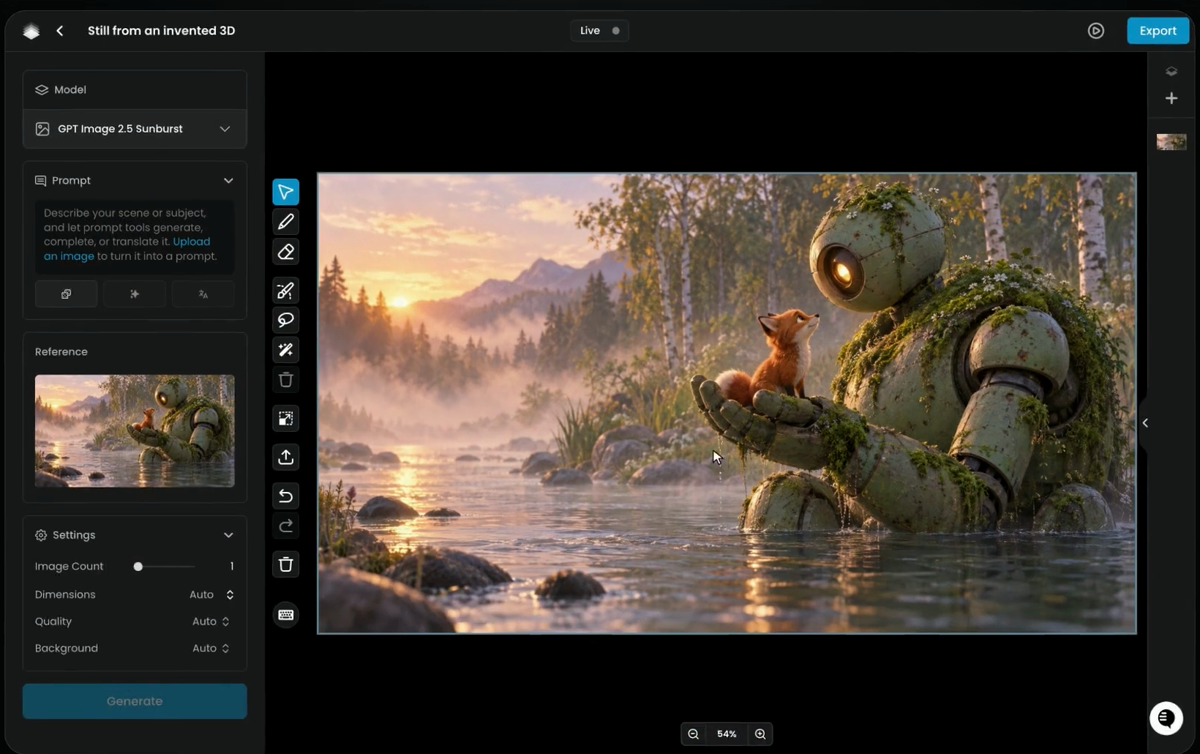
The image opens on a canvas. On the left are the Model, Prompt, Reference and Settings; the vertical toolbar next to the image holds the selection tools (brush, lasso and smart selection), the sketch and erase tools, import, undo and redo.
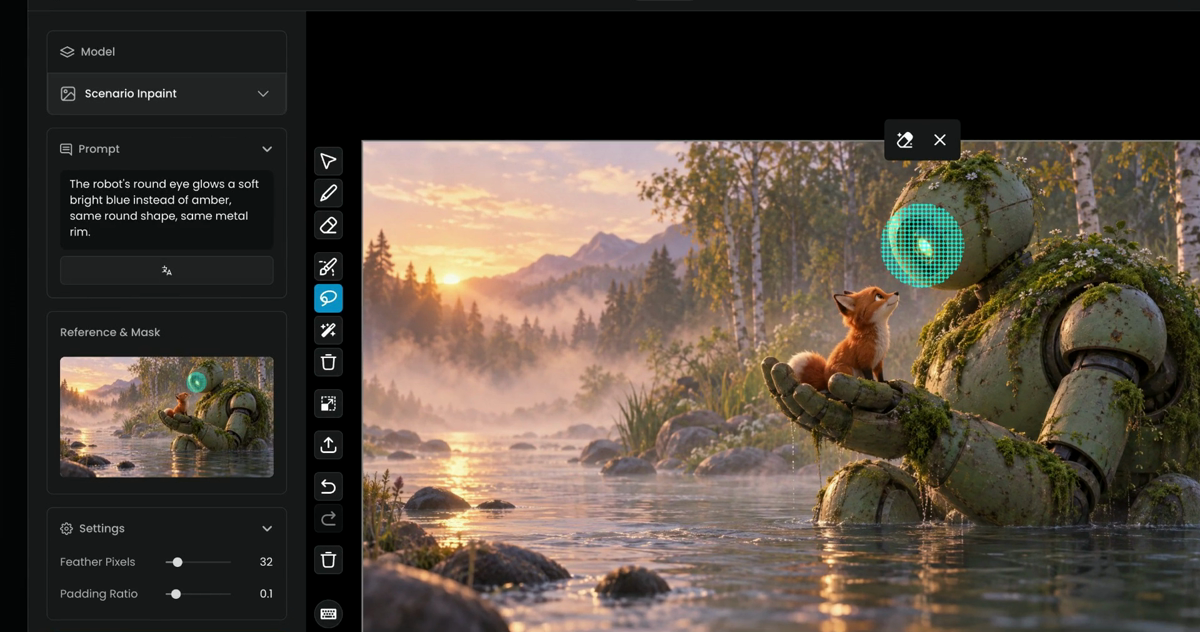
- Pick the lasso and draw around the robot's eye. Only the masked area can change. The mask shows over the image and in the panel under Reference & Mask, and the model switches to Scenario Inpaint.
- Say what goes there. The prompt describes only the masked area, not the whole scene:
The robot's round eye glows a soft bright blue instead of amber, same round shape, same metal rim.
The film leaves the two Settings of Scenario Inpaint, Feather Pixels and Padding Ratio, at 32 and 0.1. Click Generate.
- The result appears on the canvas, with its thumbnail at the top left. The eye glows blue, and the rest is untouched. Click Select to keep it, or Cancel to drop it and try again.
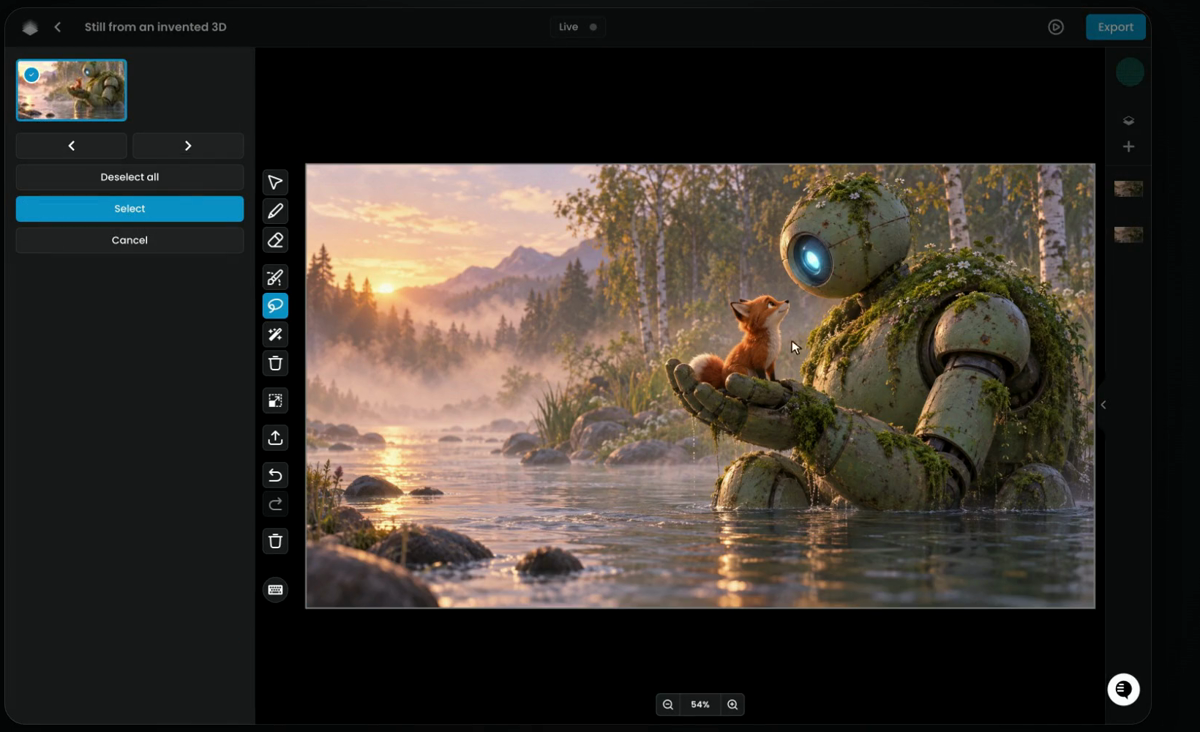
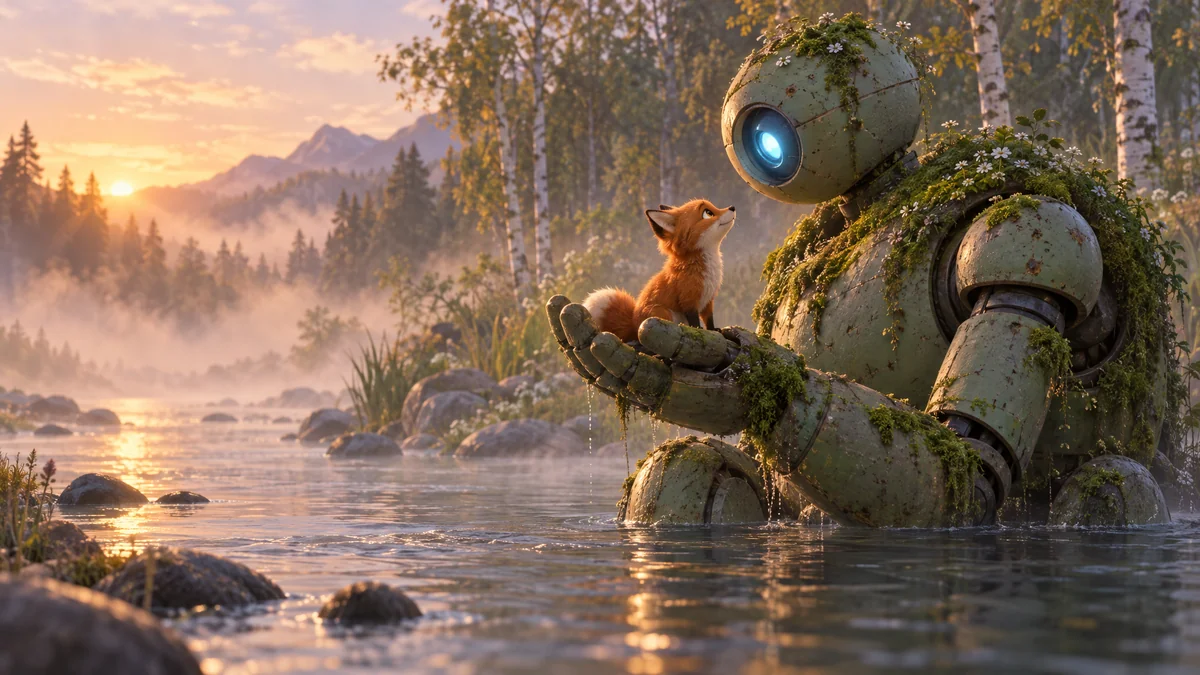
Draw the mask a little larger than the thing you change, so the new pixels blend into the old ones. The area around the mask guides the result, which is why the new eye keeps the same light as the rest of the robot.
Step 6: Expand to a wider format
To fit a wider format, open the image and click Use as Reference in the bar above it. Your image goes into the panel as the reference, with the current model, here GPT Image 2.5 Sunburst.
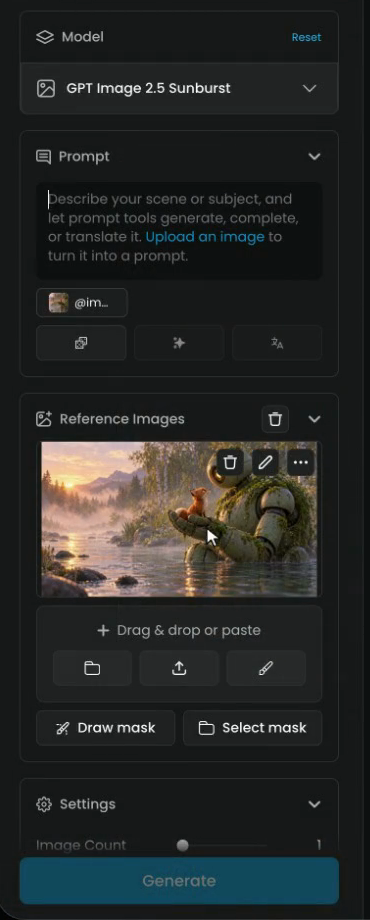
- Click the model, then View model library.
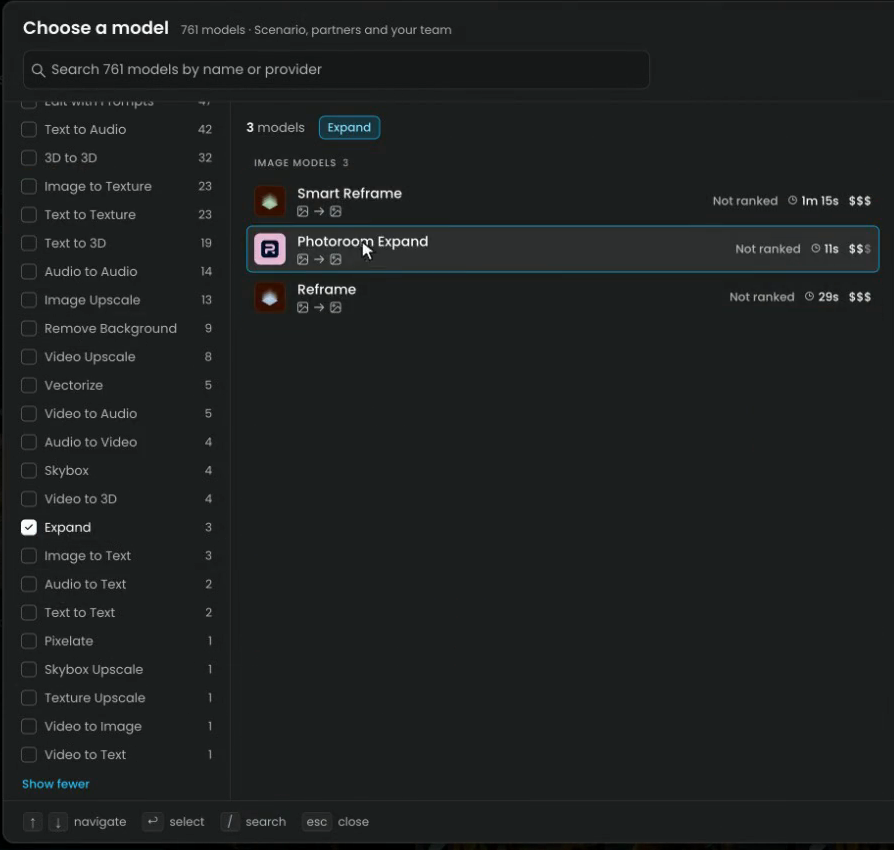
- Under Capabilities, click Show all and tick Expand. Three models do it: Smart Reframe, Photoroom Expand and Reframe. Pick Photoroom Expand.
- Photoroom Expand puts your image under Image and has three settings: Output Width, Output Height and Seed. Set the Output Width to 2688 and the Output Height to 1152, a wide banner, and click Generate.
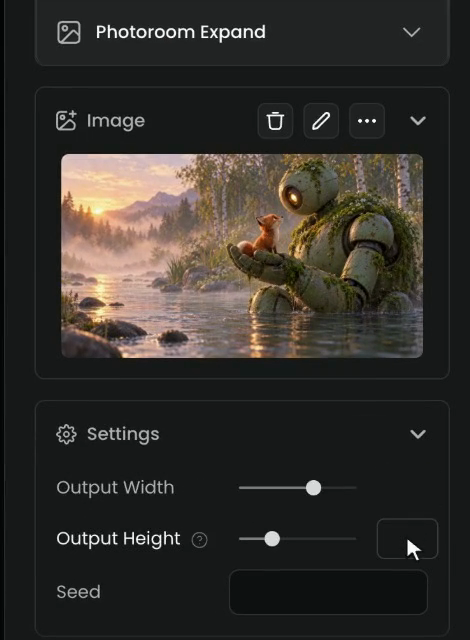
The original is 2048 × 1152, so the height stays the same and the width grows by 640 pixels. The model keeps the original pixels and draws new ones in the space around them. The output must be at least as large as the original on both sides: Expand never shrinks an image.
Step 7: Check the expanded image
Your original is untouched, and the river and the forest carry on in the same light. The Info panel shows Photoroom Expand, the Output Width and Output Height, and the seed it used.
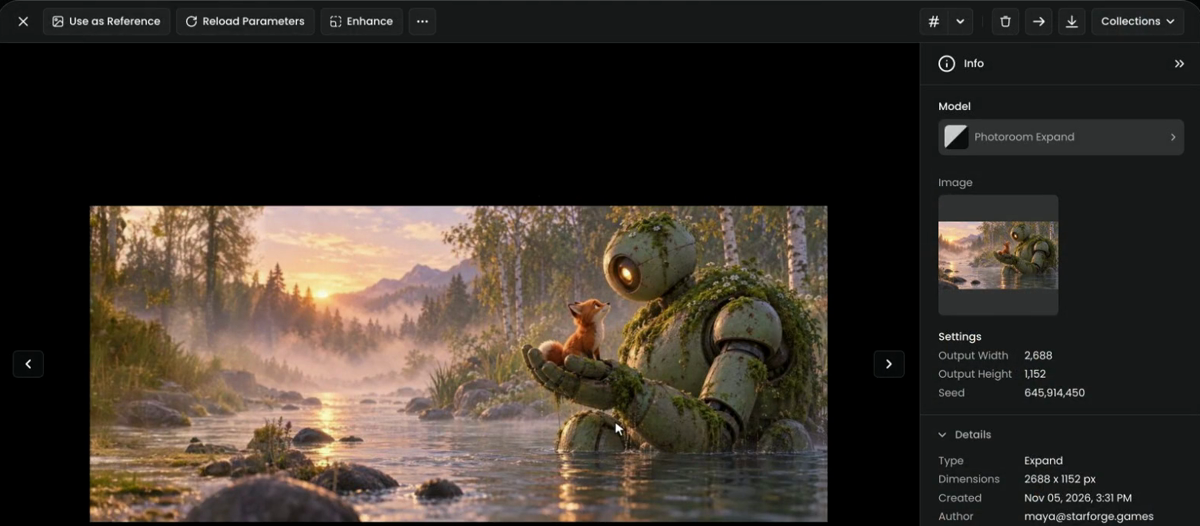
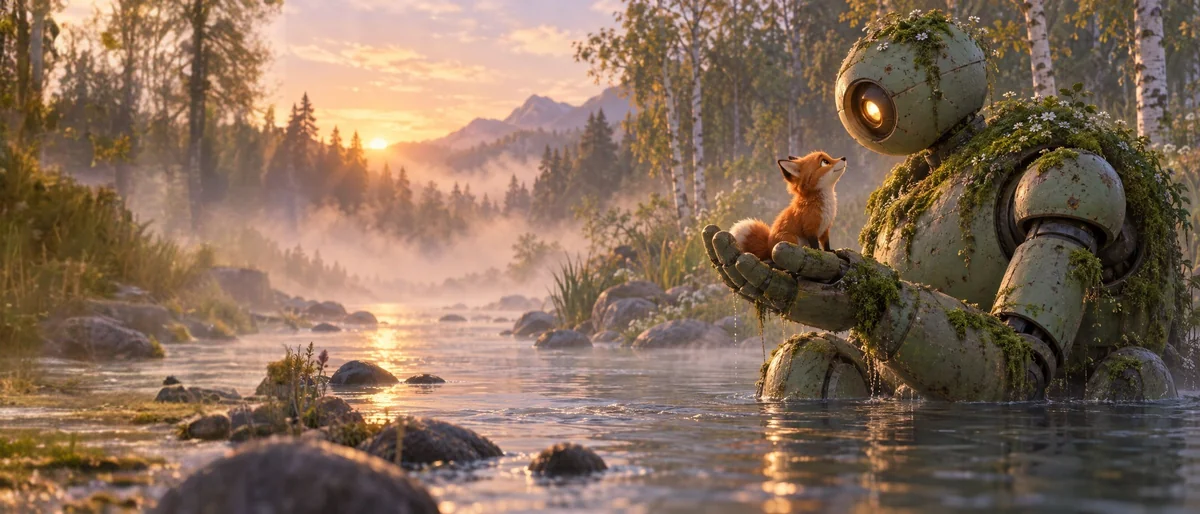
Look at the seam where the old image ends and the new part starts. The water, the mist and the shadows should carry across it without a line or a change of color.
Photoroom Expand or Smart Reframe
| Model | What it does | Settings |
|---|---|---|
| Photoroom Expand | Keeps the original as it is and draws new background around it. Good for turning a square shot into a banner or a post into a story. | Output Width, Output Height, Seed |
| Smart Reframe | Recomposes the frame to an exact size instead of only adding to the sides, and keeps the style, the subject, on-image text and the camera angle. | Width and Height (with presets), an optional prompt, Text Density, Image Count, Thinking Level |
The filter also lists Reframe. Use Photoroom Expand when the original must stay pixel for pixel. Use Smart Reframe when the layout can move, for example to fit text or a logo into a new format.
Common problems
| What you see | What to do |
|---|---|
| The edit changed things you didn't ask for | List them in the keep part of the prompt by name, or try another editing model |
| The new element looks pasted on, with the wrong light | Say where the light comes from and ask the model to match it, or use Retouch with a slightly larger mask |
| The edited image is smaller than the original | Some editing models return their own size: check Dimensions in the Info panel, and set Aspect Ratio or the resolution in Settings if the model has them |
| Retouch left a visible edge around the mask | Draw the mask a little wider so it takes in some of the surroundings, and generate again |
| Retouch changed nothing | Make the prompt say what is different ("blue instead of amber"), not only what is there |
| A seam shows where Expand added pixels | Generate again with another seed, or try Smart Reframe |
| Expand won't run | The output must be at least as large as the original on both sides |
What's next
To cut a subject out or put it somewhere new, go to Remove and replace backgrounds. When an edited image is approved, upscale it as the last step.