

Upscale and finalize video
Upscale the video you keep, check it against the source, grade the color, keep the frame rate, and export in the format the destination needs.
- Guide
- Step 1 Learn
On this page12 sections
Finalizing is the last pass on the video you keep: upscale it, check it against the source, then grade the color so the shots of a scene match. This lesson upscales a 720p skateboard clip to 4K with Gemini Omni 1.2 Flash Upscale, then grades it with 3D Color LUT (Video) and shows Color Correction (Video) for finer control.
Quick version
- Choose the video you keep first: shots picked, trimmed, edits done.
- Open the model library, tick Video Upscale under Capabilities, and pick an upscaler.
- Load the clip, set Target Resolution (1080p for the web, 4K for big screens) and click Generate.
- Compare the upscale with the source on faces and clothes.
- Search the library for "LUT", pick 3D Color LUT (Video), choose a LUT Style and its LUT Intensity, and use the same settings on every shot of the scene.
Before you start
- Finalize once, at the end. Every upscale or grade made before you choose is paid again for each take you later throw away. Trim and edit first: see Edit video.
- Where it lives. Upscalers and grading models run from Create › Videos. Click the Model card, then View all models. You can also open a video and click Enhance in its toolbar.
- Know the size and frame rate you need. 1080p is enough for the web and social; 4K is for big screens. Keep the source frame rate (usually 24 or 30 fps) unless the destination needs another.
The order of operations:
- Choose the video you keep.
- Upscale it.
- Keep the source frame rate.
- Grade the color so the shots of a scene match.
- Add or replace sound, then export for the destination.
Step 1: Find the video upscalers
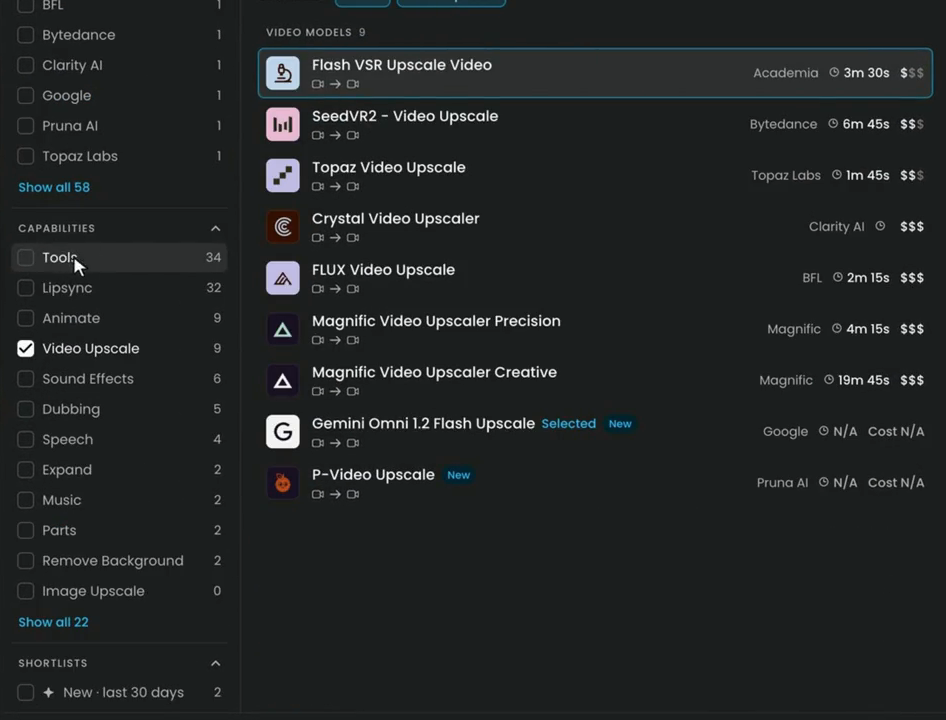
Open the model library. Under Capabilities, tick Video Upscale: the list shows the video upscalers, here 9 of them, with their provider, typical time and a relative cost.
Step 2: Load the clip and choose the resolution
- Pick Gemini Omni 1.2 Flash Upscale and click Use this model.
- Load the clip under Input Video. The example is the edited ride from Edit video: 1280 × 720, 24 fps, 9 seconds.
- Under Settings, set Target Resolution: 1080p for the web, or 4K for big screens. The example uses 4K.
- The price shows on Generate. Click Generate.
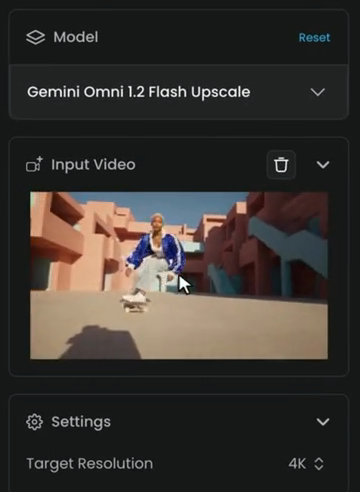
Gemini Omni 1.2 Flash Upscale takes sources that are 16:9 or 9:16 at exactly 360p, 720p or 1080p, up to 15 seconds, and keeps the audio.
Step 3: Compare the upscale with the source
Open the result: the viewer shows the source and the upscale with a slider between them. Side by side, the upscale is sharper: the hair, the face and the satin of the jacket. Compare a face first, then the finest detail you care about, at 100% or closer.
Compare it with the source for what's new, too: an upscaler can add details that weren't there. Here, Gemini Omni 1.2 Flash Upscale added a zipper to the jacket and curls to her short hair.
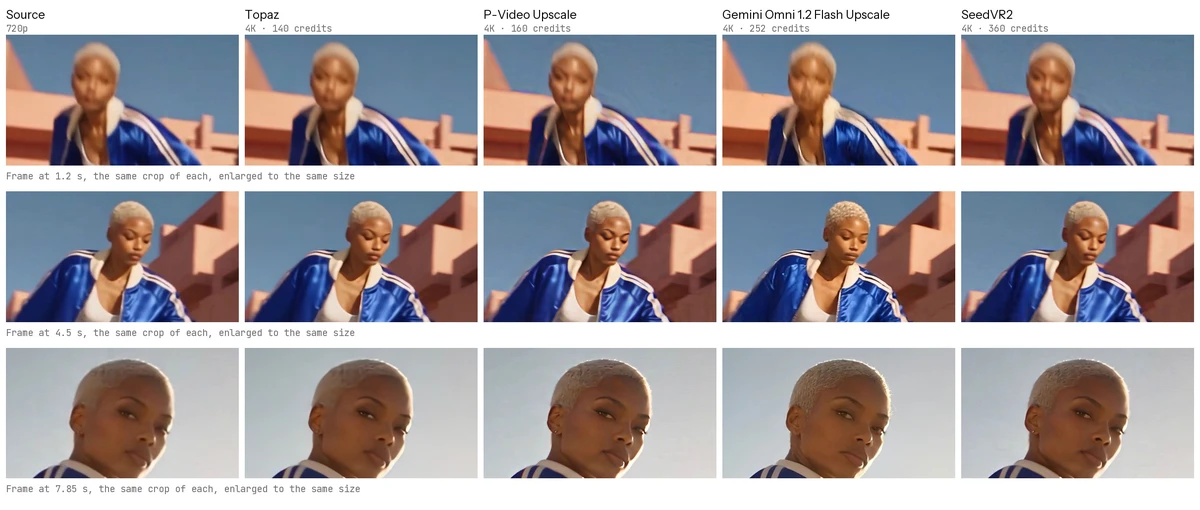
P-Video Upscale is another option, and it costs less.
Four upscalers on the same clip
The same 9-second ride, upscaled to 4K by four models, once each:
| Model | Time | What changed |
|---|---|---|
| Gemini Omni 1.2 Flash Upscale | about 3 min | The most detail: hair strands, skin texture, folds in the satin. It also added a zipper to the jacket and curls to her short hair |
| P-Video Upscale | about 2 min | Hair texture, crisper eyes and stripe edges |
| Topaz Video Upscale (24 fps) | about 1 min | The softest of the four. Came back as HEVC |
| SeedVR2 - Video Upscale (2160p) | 24 min | Clean and natural, close to P-Video |
All four kept the 24 fps and every frame. Motion blur in the source stayed blurred in all of them: an upscaler sharpens what is in the frame, it can't rebuild what the clip never had.
Check the output size before you place it in a timeline. A clip that is not 16:9 keeps its own shape (SeedVR2 at a 1080p target returned a 3:2 clip at 1776 × 1184, not 1920 × 1080). Scenario Resize Video with Fit set to Cover crops it to an exact size.
the upscaled frame is sharper with the same faces, clothes, text and shapes, and motion is as smooth as the source with no added judder or warping.
a face, an outfit or a product changed in the upscale, edges shimmer between frames, or motion stutters after a frame rate change.
Video upscalers compared
As of November 2026. The price of each shows on Generate; it follows the output size and the duration, so 4K costs several times 1080p on the same clip.
| Model | Output | Notes |
|---|---|---|
| P-Video Upscale | 720p to 4K | Keeps the aspect ratio and the audio; frame rate kept or raised to 60 fps |
| Topaz Video Upscale | 720p, 1080p or 4K | Frame rate defaults to 60 fps: set it to the source rate. Returns HEVC (H.265) |
| SeedVR2 - Video Upscale | Factor (2x to 10x) or target 720p to 2160p | Removes blur and noise in one pass; slow |
| Crystal Video Upscaler | 1.5x to 3x | Faces, skin and products |
| Magnific Video Upscaler Precision | 1K, 2K or 4K | Strength blends the upscale with the source (60 by default) |
| Gemini Omni 1.2 Flash Upscale | 1080p or 4K | Sources 16:9 or 9:16 at 360p, 720p or 1080p, up to 15 seconds; keeps the audio |
| FLUX Video Upscale | 1.5x to 3x | Precise or Creative; clips up to 20 seconds and 50 MB |
| Magnific Video Upscaler Creative | 1K, 2K or 4K | Creativity (0 by default) sets how much it invents; Vivid or Natural flavor |
| Kandinsky 6.0 VSR | 2x, 2.25x or 4x | Clips up to 5 seconds, resampled to 24 fps |
| Flash VSR Upscale Video | 2x to 4x | Fast; keeps audio only with Preserve Audio on |
- Both Magnific variants have a frame rate boost that doubles the frame rate, a sharpen setting (10 to 20 is a good range; above 60 looks harsh on faces) and a film-grain setting. Use 2K to test and 4K for the final.
- Also in the catalog: Viggle Video Upscale (2x, clips up to 10 minutes) and the LTX-2.5 spatial upscalers (2x, with a prompt).
- Seedance 2.5 drafts don't need an upscaler: Finalize in 1080p (Seedance 2.5 Draft Complete) finishes the same take at 1080p within 7 days.
Frame rate
- Keep the source rate in the upscaler. Topaz Video Upscale defaults to 60 fps, which adds interpolated frames and costs more: set it to the source rate.
- Interpolate only on purpose, after checking it on fast action.
- Scenario Resize Video can also change the frame rate (1 to 120 fps) and the container.
Step 4: Grade the color with a LUT
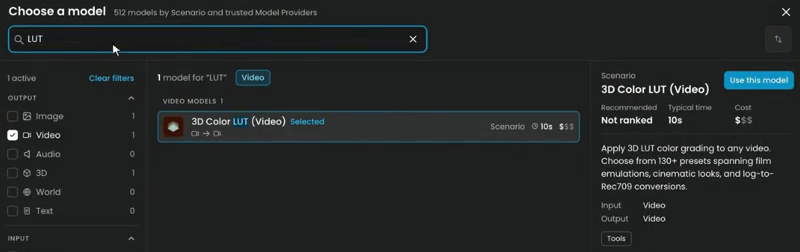
- In the model library, search for "LUT" and choose 3D Color LUT (Video). It applies a LUT color grade to any video, from more than 130 presets: film stocks, cinematic looks and log to Rec.709 conversions.
- Load the upscaled clip under Input Video.
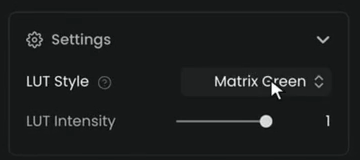
- Under Settings, pick a look in LUT Style and set LUT Intensity. The example uses Matrix Green at full intensity (1).
- Click Generate.
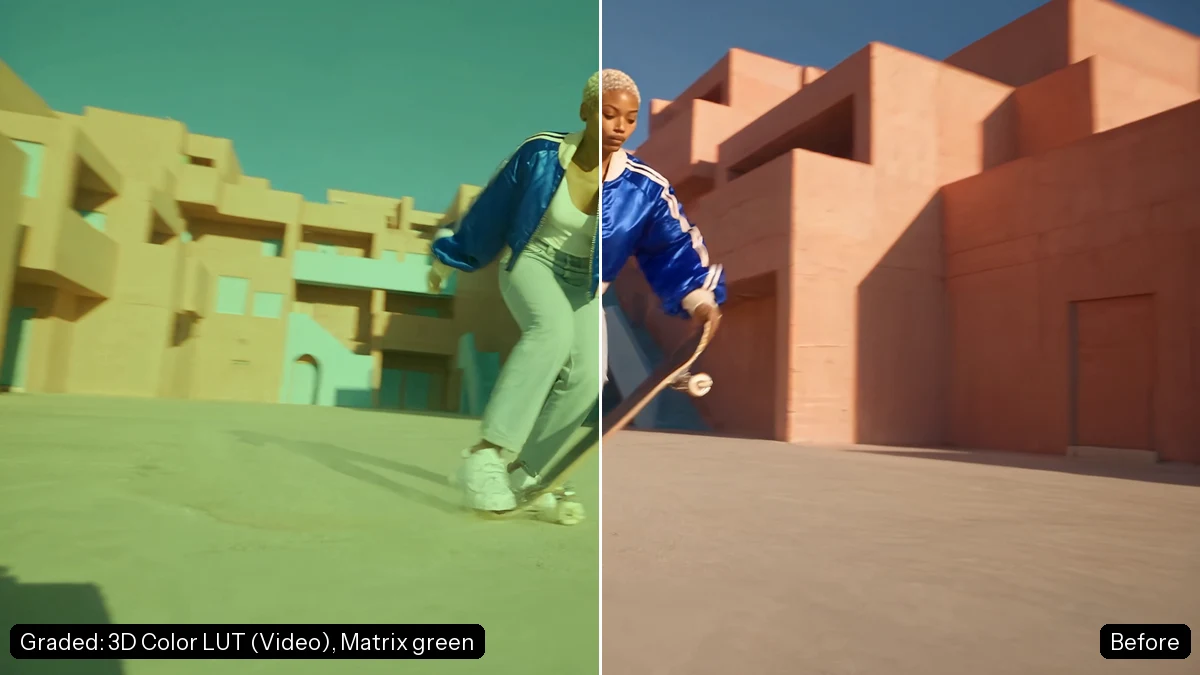
Use the same look and the same intensity on every shot of a scene. Shots from different models or seeds often differ in white balance and contrast; one shared grade pulls them together.
Step 5: Fine-tune with Color Correction
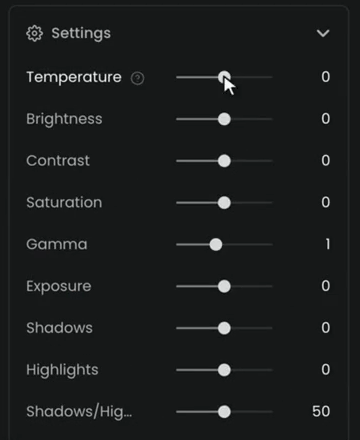
For finer control, pick Color Correction (Video) instead. Its Settings are sliders: Temperature, Brightness, Contrast, Saturation, Gamma, Exposure, Shadows, Highlights and a shadows and highlights balance. They all start at neutral (0, Gamma at 1), so move only the ones you need.
Two more finishing models:
- HDR. Runway Ruby converts SDR video to HDR10, HLG or HDR ProRes (422, 422 HQ or 4444), and can export 16-bit EXR sequences, for clips up to 40 seconds.
- Grain last. Grain (Video) adds film grain from 22 film stocks and looks; a light, uniform grain hides small texture differences between shots. Add it after upscaling.
Export
| Destination | Format |
|---|---|
| Web and social | MP4 (H.264) at the platform's aspect ratio |
| Editing in a professional timeline | MOV |
| Overlays with transparency | WebM VP9 or MOV ProRes 4444 (MP4 can't carry alpha) |
| Previews and stickers | GIF, short and small |
- Seedance 2.5 can output MP4 or MOV directly.
- Scenario Resize Video converts between MP4, MOV, WebM and GIF, resizes to exact dimensions (Contain, Stretch or Cover), and can shrink a file under a size limit. See Video tools.
shots in a scene match in color, and the export plays in the destination with the right size, frame rate and audio.
a shot's color jumps against its neighbors, or the export lost the audio or the alpha channel.
Make it repeatable
Finalize at the end of the workflow, after the approval step, and note the settings (upscaler, resolution, frame rate, grade) in its description.
Common problems
| What you see | What to do |
|---|---|
| The upscale added something that wasn't there (a zipper, a pattern, curls) | Compare with the source and try a more faithful upscaler (P-Video Upscale, SeedVR2, Magnific Precision), or avoid creative modes on faces |
| Fine detail shimmers between frames | Lower the upscale factor, or try another model on a 2-second trim |
| Motion judders after upscaling | The frame rate changed: set it back to the source rate |
| Gemini Omni 1.2 Flash Upscale refuses the clip | It needs 16:9 or 9:16 at 360p, 720p or 1080p, up to 15 seconds. Resize or trim it first |
| The upscale is not 1920 × 1080 or 3840 × 2160 | The clip kept its own shape. Crop it with Scenario Resize Video, Fit set to Cover |
| A grade on a 4K clip never finishes | The basic LUT presets (Teal Orange, Kodak Portra, Fuji Velvia, Bleach Bypass, Matrix Green) finished in 1 to 3 minutes on the 4K example, while some looks from the larger preset packs stalled. Use a basic preset, or grade before you upscale |
| The file is too large for the platform | Run Scenario Resize Video with a maximum file size |
| The transparent background turned black | The preview shows MP4. Download the WebM or ProRes file and check it in the target tool |
What's next
To trim, join, resize or convert the finished clips, see Video tools. To upscale still images the same way, see Upscale images.