

Tour of the workflow editor
Find your way around the node editor: the Workflows page, the canvas, the node palette, ports, models, running, outputs and the workflow menu.
- Guide
- Step 2 Repeat
Use this page the first time you open the editor, or when you cannot find a control. Labels match the product as of October 2026. Looking around is free; only Run spends credits.
Quick version
- Open Workflows in the top bar, choose Workflows, and click a card on the Platform tab.
- Read the cost badge next to the title: the estimated credits for one full run.
- Duplicate a Platform workflow, or click Switch to Edit Mode on one in your project, then add a node with Add node (+).
- Wire an output port to an input port of the same color.
- Hover a node and use Run This Node to test one step before you Run the whole graph.
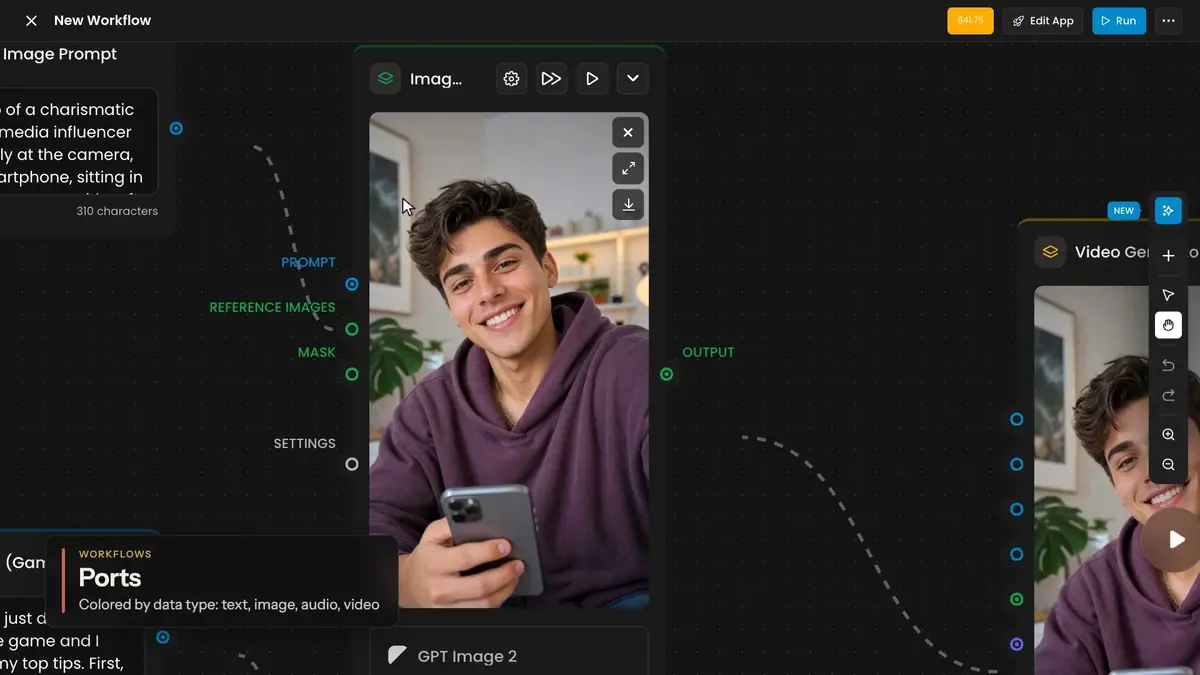
Watch the video: https://ufgc0c9mhl4ueq76.public.blob.vercel-storage.com/academy/d91328f0ca1fafb01b30ab6093d055df85eb2c601aacc0fb56c1c049cfece185.mp4
The Workflows page
Open Workflows in the top bar, then Workflows (the same menu holds Apps), or use Create > AUTOMATE > Node Editor.
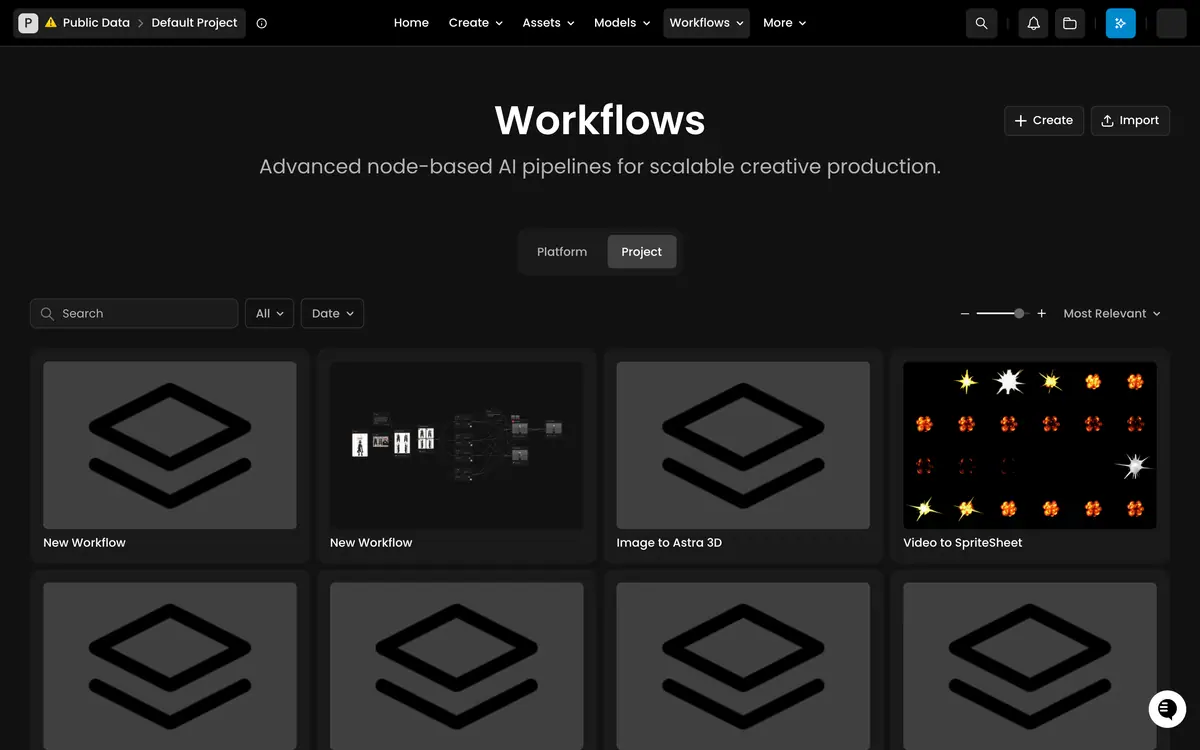
| Control | What it does |
|---|---|
| Create | Opens an empty New Workflow in your current project |
| Import | Loads a workflow from a JSON file exported earlier |
| Platform / Project | Workflows built by Scenario / workflows of the project you are in |
| Search, All, Date, size slider, Most Relevant | Find a card to open |
The editor at a glance
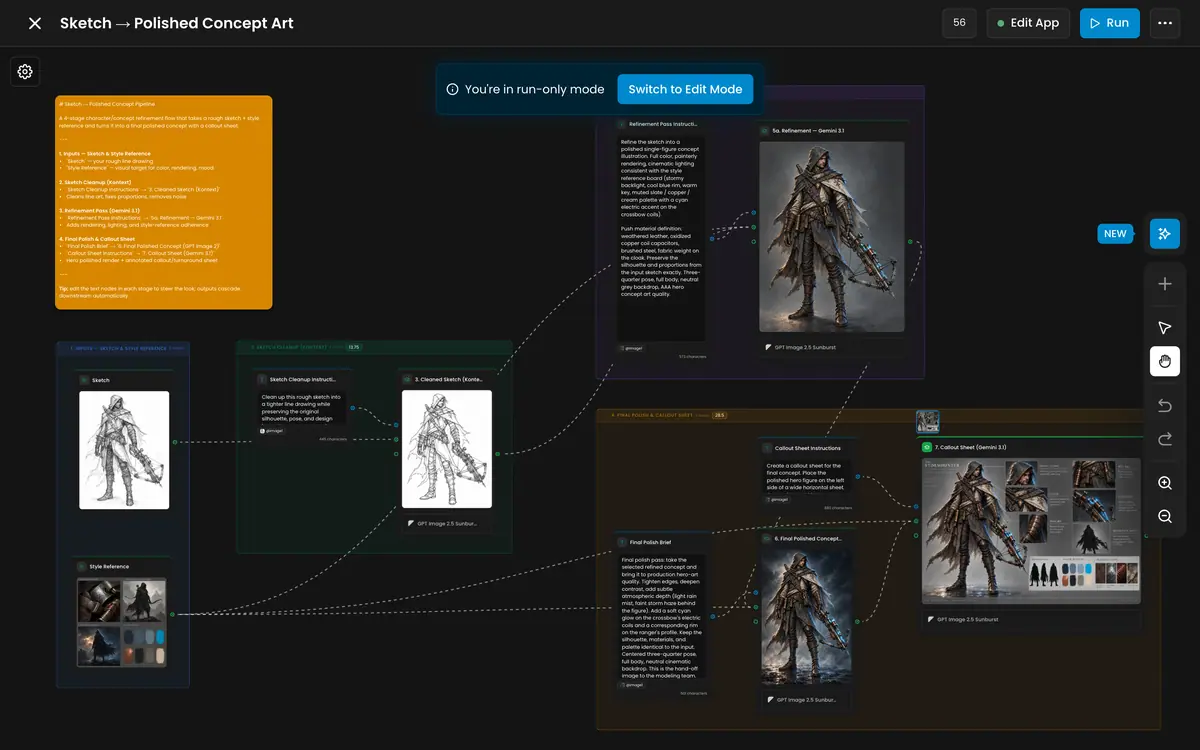
Top bar, left to right:
- Close (x) and the title, which you click to rename your own workflow.
- Cost badge: the estimated credits for one full run; each group shows its own share. Budget with it: on the runs measured for this Academy, the bill came in at or a little under the badge.
- Edit App turns the workflow into an App. See Publish a workflow as an App.
- Run runs the whole graph.
- ... opens the workflow menu (below).
Run-only banner. A workflow opens in run-only mode: you can fill the inputs and run. A Platform workflow reads Run-only Mode, "The workflow cannot be edited": to change it, click Duplicate Workflow for a copy in your project (see Platform workflows and templates). A workflow in your project reads You're in run-only mode: click Switch to Edit Mode to change it.
Gear icon at the top left opens the workflow settings.
Right toolbar, top to bottom: Agent Mode (sparkle icon, the Node Agent), Add node (+), Select, Pan, Undo, Redo, Zoom in, Zoom out.
Add nodes
Click Add node (+). The palette opens with a search field and four categories.
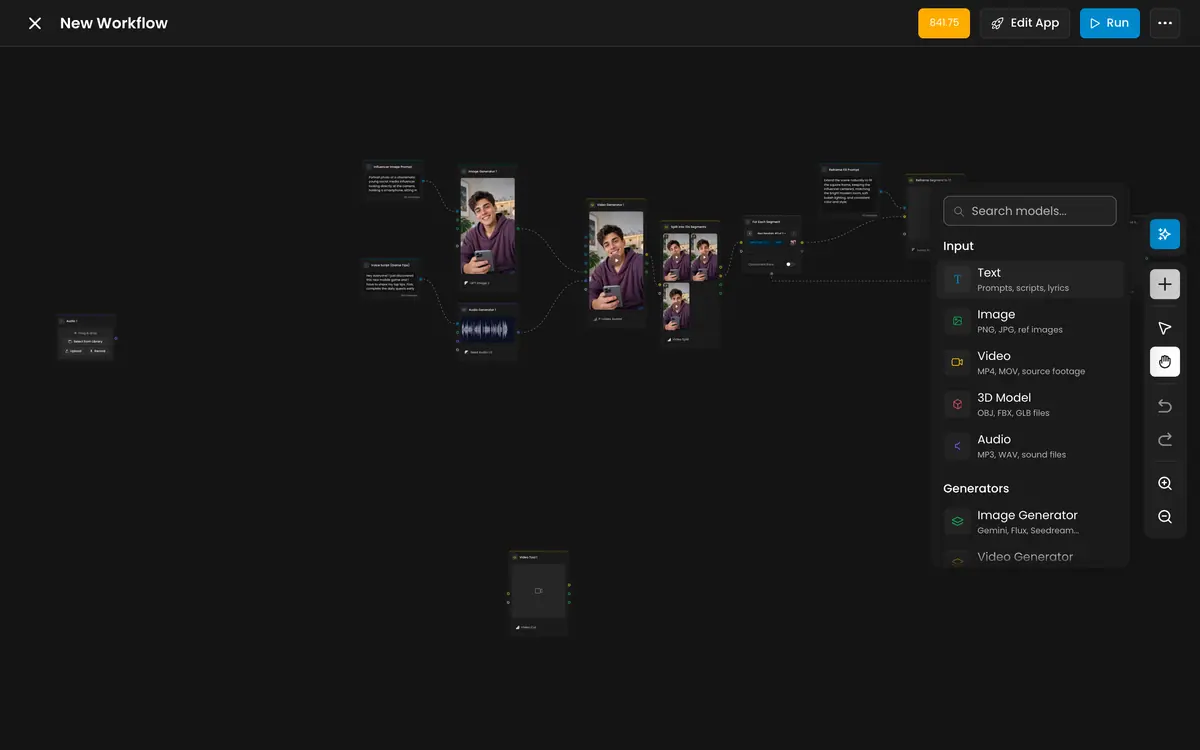
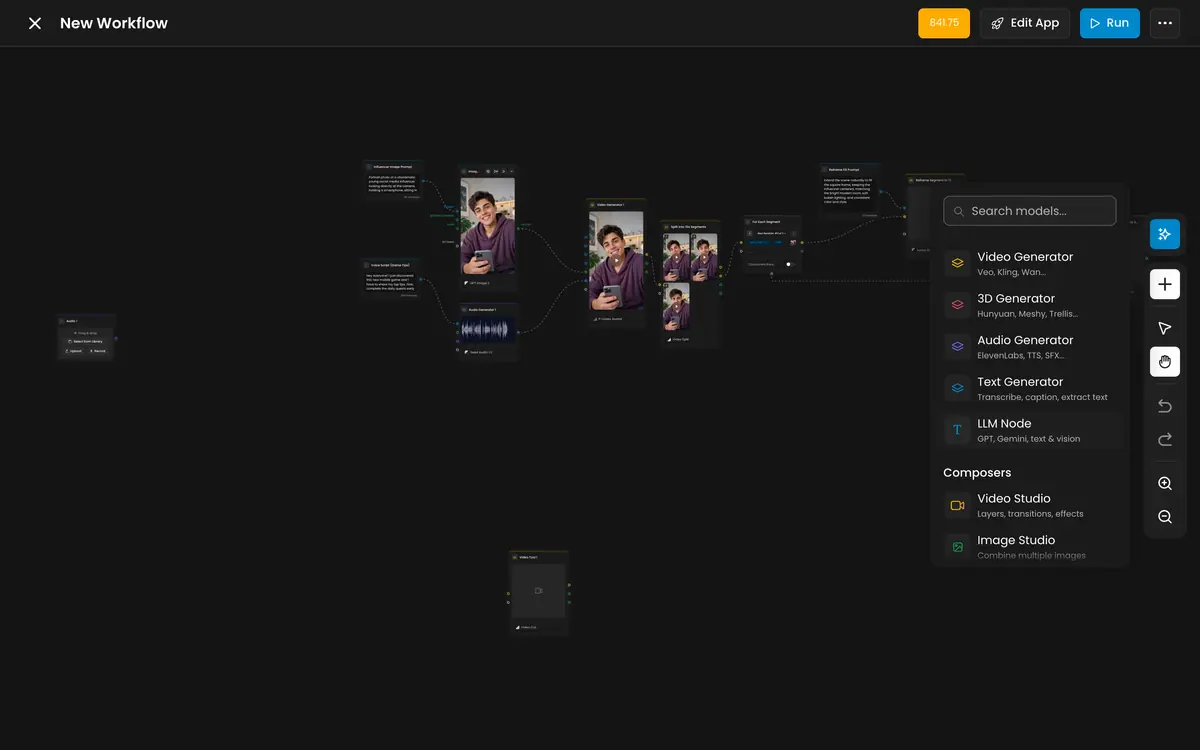
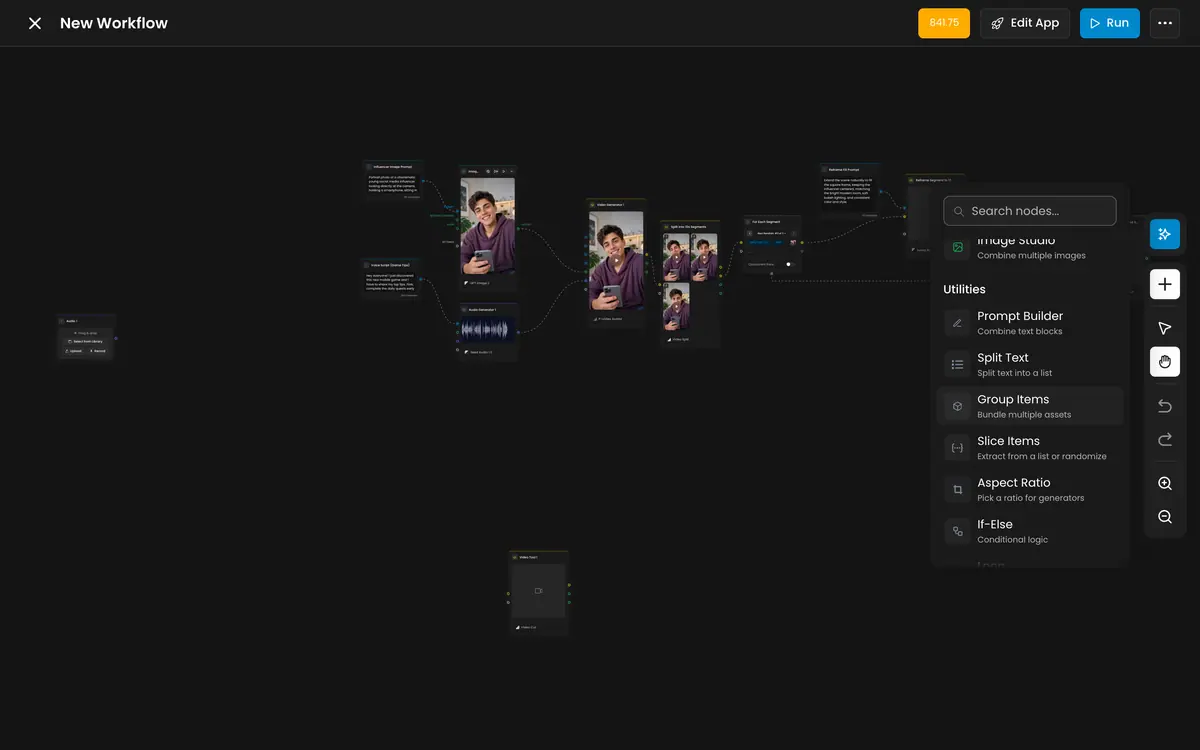
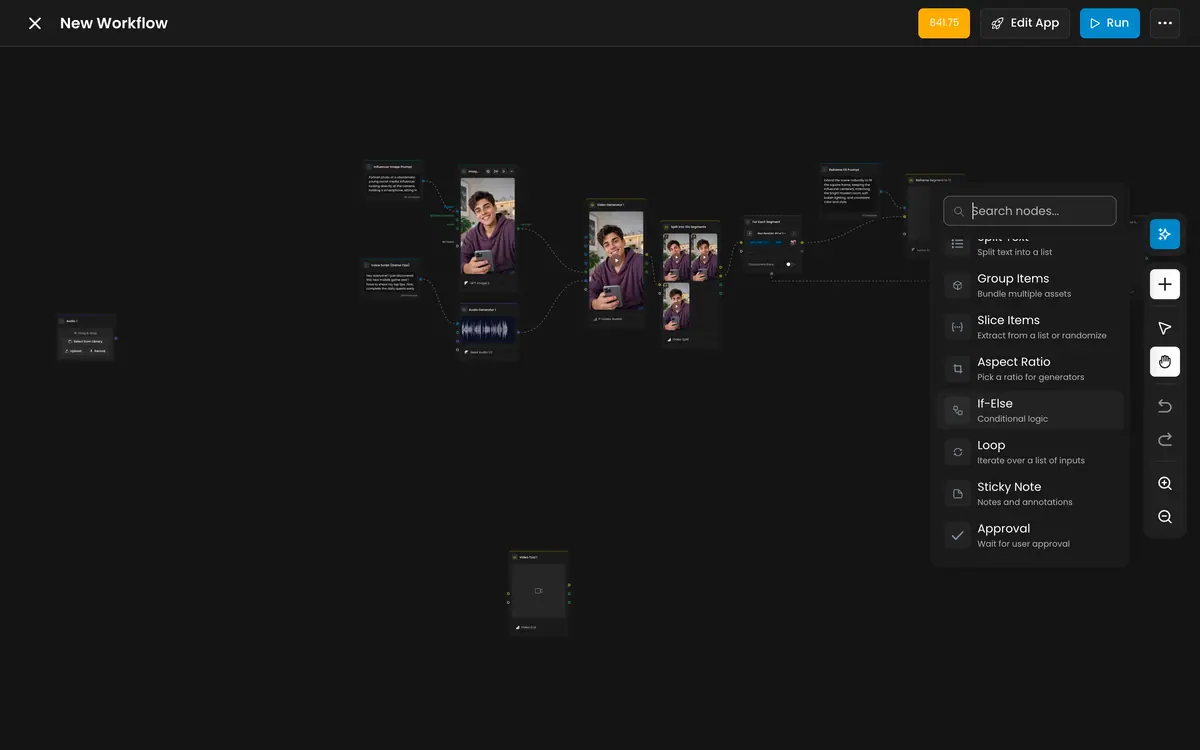
- Search finds nodes, models and tools. Node types come first, then a Models group with providers.
- Tool nodes are search-only: Video Cut, Video Split, Audio Cut, upscalers (for example Runway Upscale V1), background removal and vectorizers.
- Two shortcuts from the help center: right-click the canvas to add a node, or drag a wire from an output onto empty canvas to list compatible nodes.
Read a node
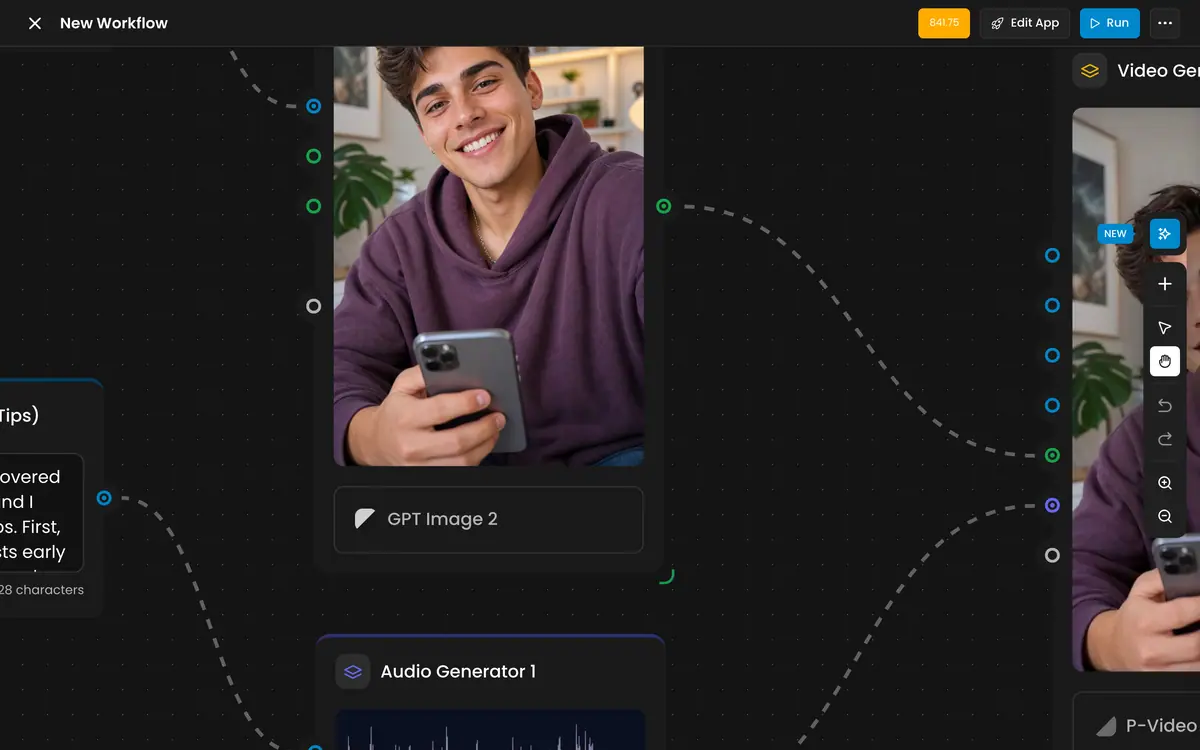
| Part | What it shows |
|---|---|
| Title bar | The node name. Rename it after the step ("Write variation prompt", not "LLM Node 1") |
| Ports | Inputs on the left, outputs on the right. Image green, video yellow, 3D red, audio purple, text blue; gray for settings and control |
| Body | The text, image or preview |
| Model footer (generators) | The model name. Click it to open Choose a Model |
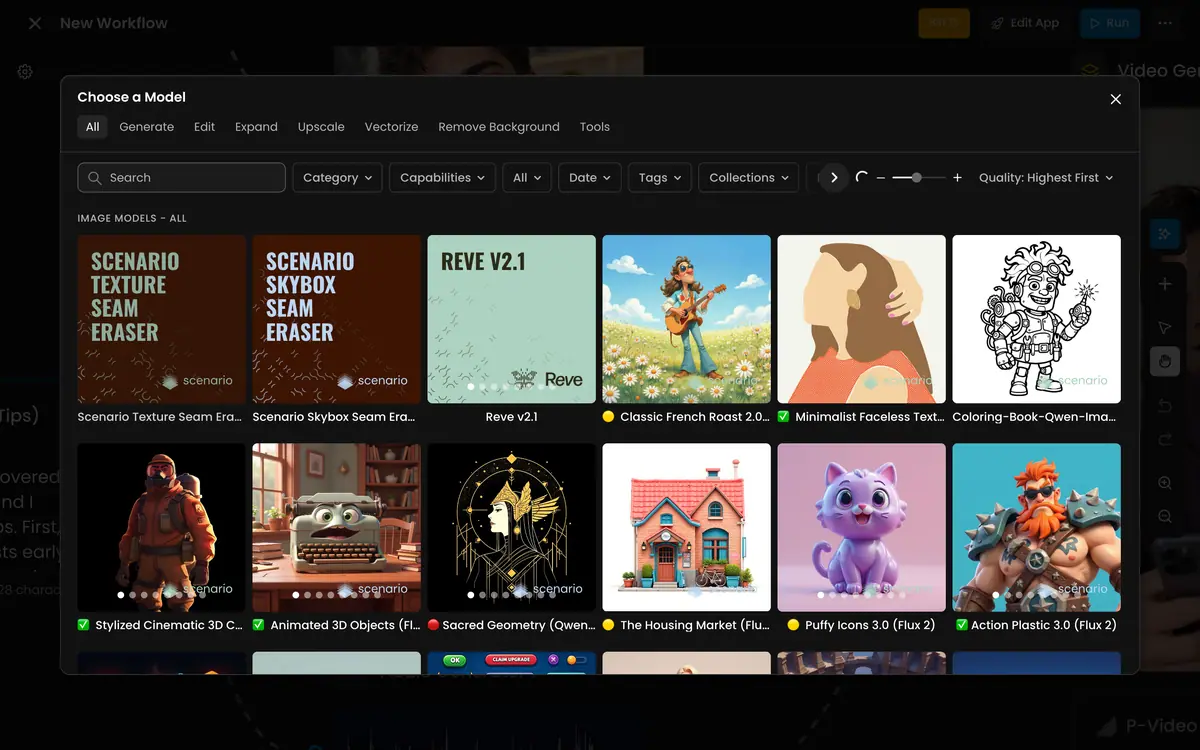
The tabs filter by task, so an Image Generator can also run an upscaler or a background remover. Model parameters appear on the node as fields and gray ports.
Connect nodes
- Drag from an output port to an input port of the same color. One output can feed several inputs.
- Remove a wire by hovering it and clicking it.
- A wire that will not attach means the types do not match: see Debug a workflow.
- Group nodes to label a stage. A group has its own run button and cost badge, and can be locked against edits.
Run and see results
- Run (top right) runs the whole graph; a node starts when its inputs are ready.
- Test one step cheaply. Hover a node for Run This Node or Run From Here (that node and everything after it).
- Find the results inside each node or in View Outputs; they are saved in your project like any generation.
The workflow menu
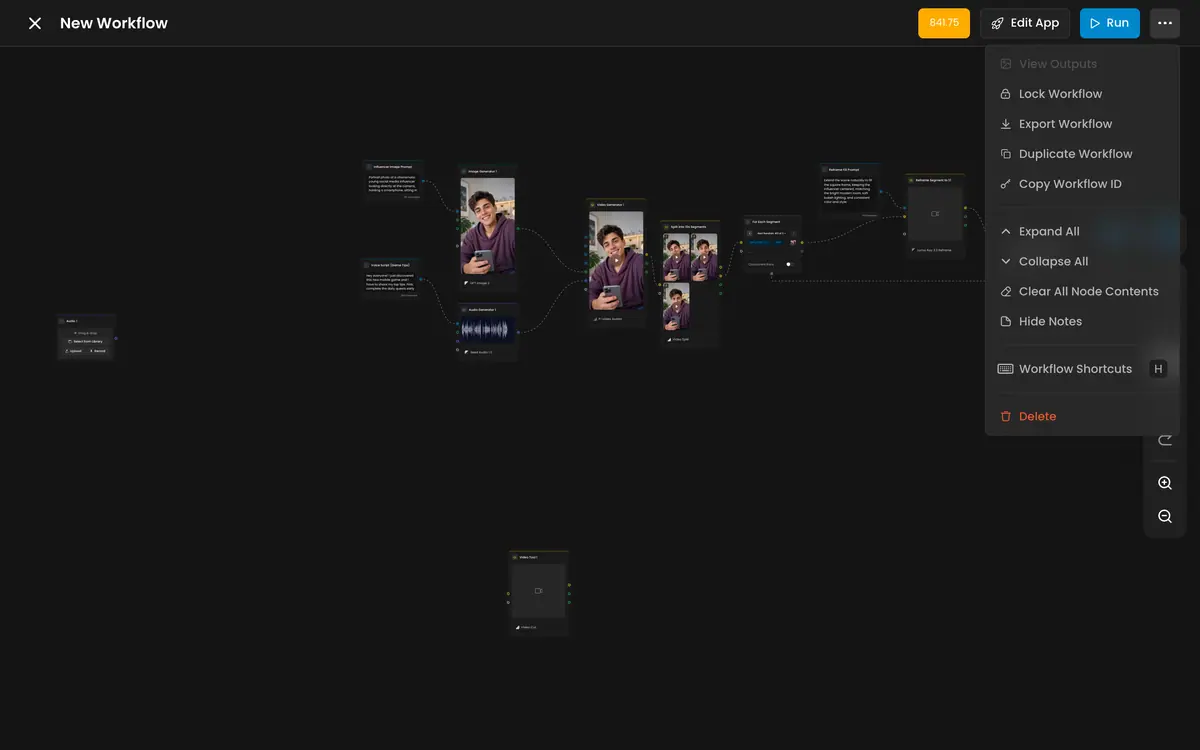
| Item | What it does |
|---|---|
| View Outputs | Lists the assets produced by runs of this workflow |
| Lock Workflow | Stops edits; people can still run it |
| Export Workflow | Downloads the graph as a JSON file |
| Duplicate Workflow | Makes an editable copy in your project |
| Copy Workflow ID | Copies the ID used by the API and the Scenario MCP |
| Expand All / Collapse All | Shows or folds node bodies |
| Clear All Node Contents | Empties prompts, inputs and results; keeps models and wires |
| Hide Notes | Hides sticky notes |
| Workflow Shortcuts | Lists keyboard shortcuts (H) |
| Delete | Deletes the workflow |
Edits save automatically.
you can read a platform workflow's cost badge, open the Add node palette, open Choose a Model from a generator's footer, and find Duplicate Workflow and Copy Workflow ID.
you cannot tell input ports from outputs, or you clicked Run without reading the badge.
If it breaks
| Symptom | Fix |
|---|---|
| Nothing happens when you edit a workflow | It is in run-only mode. Duplicate a Platform workflow; on one in your project, click Switch to Edit Mode |
| You cannot find a node in the palette | Type its name in the search field |
| The canvas is slow on a large graph | Use Collapse All, or collapse finished groups |
| The cost badge looks too high | A loop, several outputs per node or a video model multiplies it. The group badges show the expensive stage; see Control cost |
| You deleted a node by mistake | Use Undo in the right toolbar |