

Generate video
Use the video panel: choose a model in the library, then the prompt, First Frame and Last Frame, references, duration, resolution, aspect ratio and the price before you click.
- Guide
- Step 1 Learn
On this page11 sections
- Before you start
- Step 1: Open Videos
- Step 2: Choose a model in the library
- Step 3: Write the prompt
- Step 4: Load the first and last frame
- Step 5: Know the reference inputs
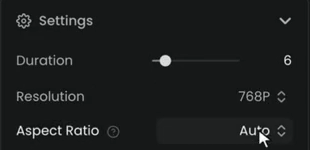
- Step 6: Set duration, resolution and aspect ratio
- Step 7: Check the clip
- Choose a model for first and last frame
- Common problems
- What's next
This lesson makes a 6-second clip of a temple door opening, from a first frame and a last frame, with Minimax H3 in Create › Videos. You'll pick the model in the model library, write a one-shot prompt, load the two frames, set the duration and resolution, and check the clip.
Quick version
- From the top menu, choose Create, then Videos.
- Click the Model card, then View all models. Search "last frame", pick Minimax H3 and click Use this model.
- Write the prompt: what happens, what the camera does, and the sound.
- Load the First Frame and the Last Frame.
- Under Settings, set Duration and Resolution, and leave Aspect Ratio on Auto.
- Check the price on the Generate button, click it, and watch the clip from start to end.
Before you start
- Approve the frames first. In a first and last frame clip, the model only invents the motion between two pictures you give it. If a frame is wrong, the clip is wrong. Make and approve both frames as images before you open Videos. The last frame is usually an edit of the first, so the character, style and place match.
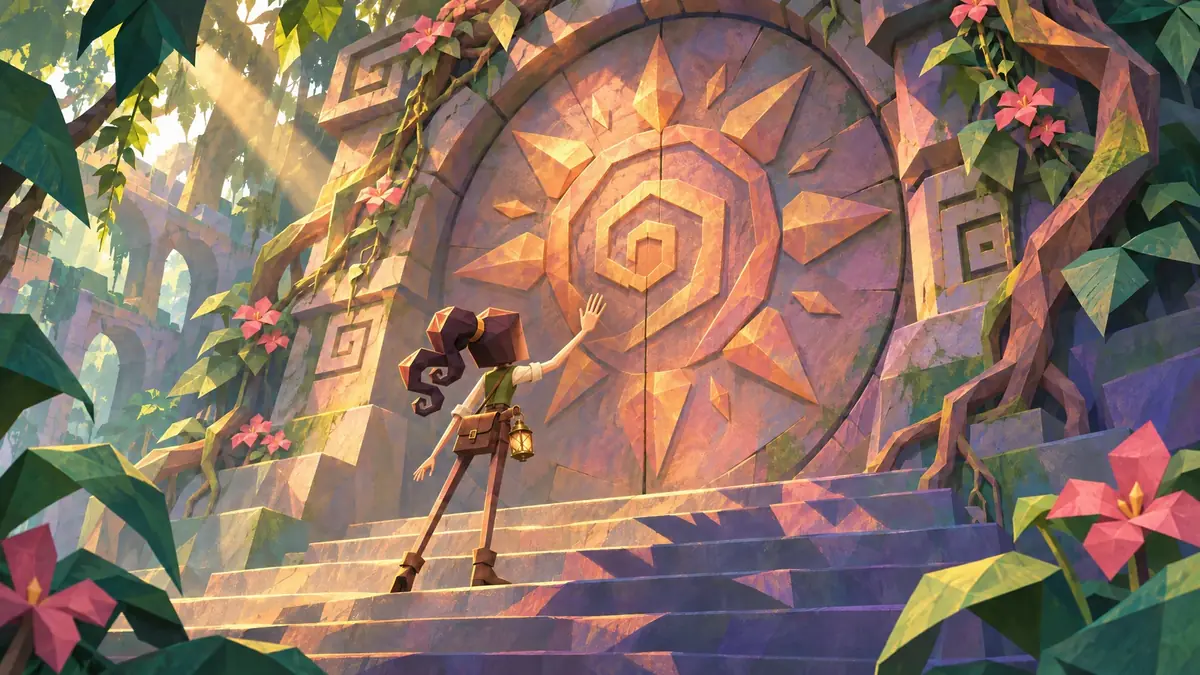
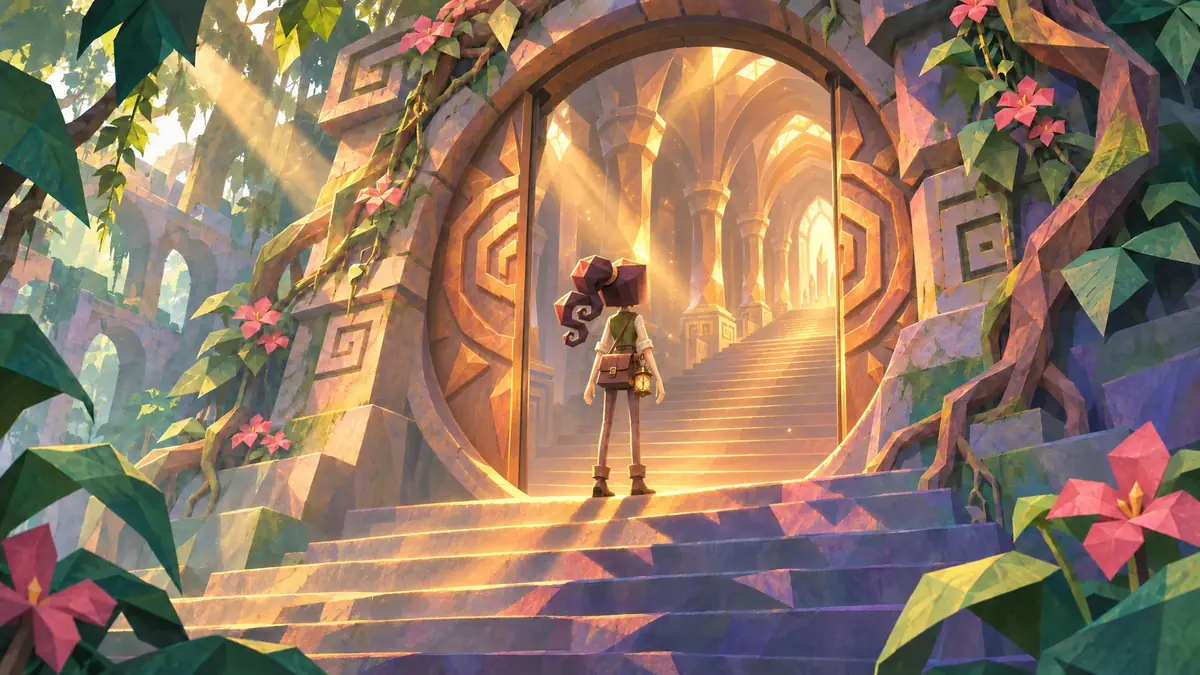
- Know the three ways to drive a video model. Most models take one or more of these:
- Text only: the prompt alone. Good for open exploration, hard to control.
- First and last frame: the clip starts on one image and, if the model supports it, ends on another. The most control over what the clip shows. This is the lesson's example.
- References: images, videos or audio that tell the model who and what to show, without fixing the first picture. See Reference to video.
- Not every model takes a last frame. That's why you choose the model by what it accepts, not only by name.
- Video costs more than images. The price depends on the model, the duration and the resolution, and it shows on the Generate button before you click. Test at a lower resolution, then make the final take.
Step 1: Open Videos
From the top menu, choose Create, then Videos. It sits in the Generate column, next to Images, 3D, Audio and the other generators.
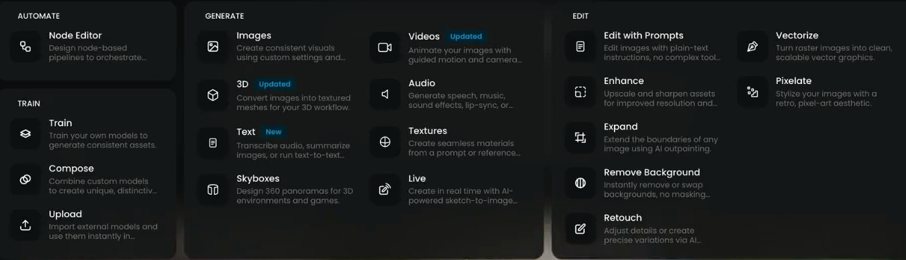
The video panel opens on the left: Model, Prompt, First Frame, Last Frame, Reference Images, Reference Videos, Reference Audio and Settings, with the Generate button at the bottom. Your takes appear on the right, under Session.
Step 2: Choose a model in the library
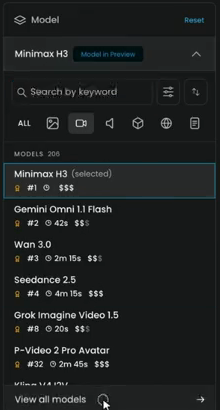
The panel opens with the last model you used. To choose another, click the Model card. A short list opens with a search field (Search by keyword), filters by output type, and the top-ranked video models: here Minimax H3, Gemini Omni 1.1 Flash, Wan 3.0, Seedance 2.5 and others. Each line shows a rank, a typical time and a cost level from $ to $$$.
To see every model, click View all models at the bottom of the list.
The library opens as Choose a model. The filters on the left narrow it by Output, Input and Provider; the Video output filter is already on.
To find the models that take a first and a last frame, type last frame in the search field. The list shows only those (20 when the film was made), for example FLUX.3 First Last Frame to Video, Minimax H3, Veo 3.1, Veo 3.1 (Fast), Vidu Q3 Pro I2V, Kling V3 I2V Pro, Luma Ray 3.2 and Kling O1 I2V.
Click a model to read about it in the panel on the right: what it does, its Recommended rank, Typical time, Cost level, and its Input and Output. For Minimax H3, the panel says it generates video from text, first and last frames, or multimodal references, with native stereo audio, and makes 5 to 15 second clips at up to 2K and 24 fps.
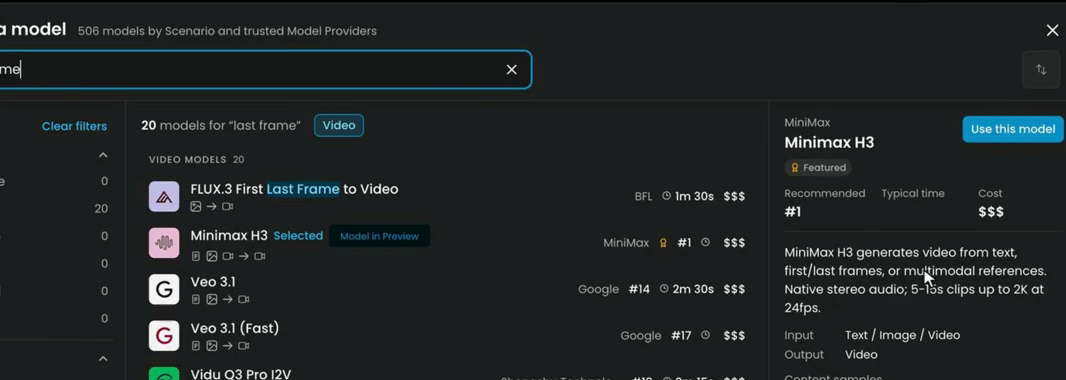
Click Use this model. The library closes and Minimax H3 is now on the Model card.
Step 3: Write the prompt
The prompt describes one shot: what happens, what the camera does, and the sound. With a first and a last frame, it describes the motion that carries the first picture to the last one. It doesn't need to describe the place or the character again in detail: the frames already show them.
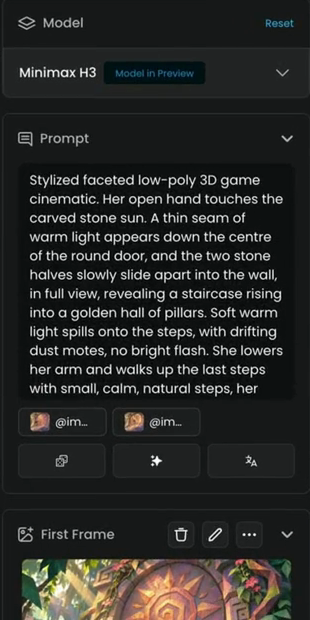
The prompt the film uses:
Stylized faceted low-poly 3D game cinematic. Her open hand touches the carved stone sun. A thin seam of warm light appears down the centre of the round door, and the two stone halves slowly slide apart into the wall, in full view, revealing a staircase rising into a golden hall of pillars. Soft warm light spills onto the steps, with drifting dust motes, no bright flash. She lowers her arm and walks up the last steps with small, calm, natural steps, her arms swinging gently, then stops on the top stair at the threshold and stands still with both arms down at her sides, looking into the hall. Static camera: the camera does not move. Same faceted hand-painted style, same character and temple from start to end. Real-time pace. Sound: deep stone rumble and grinding as the door slides, a soft shimmer as the light spills out, jungle birds in the background. No music, no speech.
What each part does:
- The look first. "Stylized faceted low-poly 3D game cinematic" tells the model to keep the style of the frames.
- The action, in order. The hand touches the door, light appears, the door opens, she walks up, she stops. Each beat leads to the next, and the last beat matches the last frame.
- The camera. "Static camera: the camera does not move." Say it plainly, or many models add a slow push in. To move the camera on purpose, see Direct the camera and motion.
- Continuity. "Same faceted hand-painted style, same character and temple from start to end" keeps the model from drifting.
- The pace. "Real-time pace" avoids slow motion.
- The sound. Minimax H3 makes audio in the same pass. Describe it, and say what you don't want: "No music, no speech."
For more on writing video prompts, see Prompt video.
Step 4: Load the first and last frame
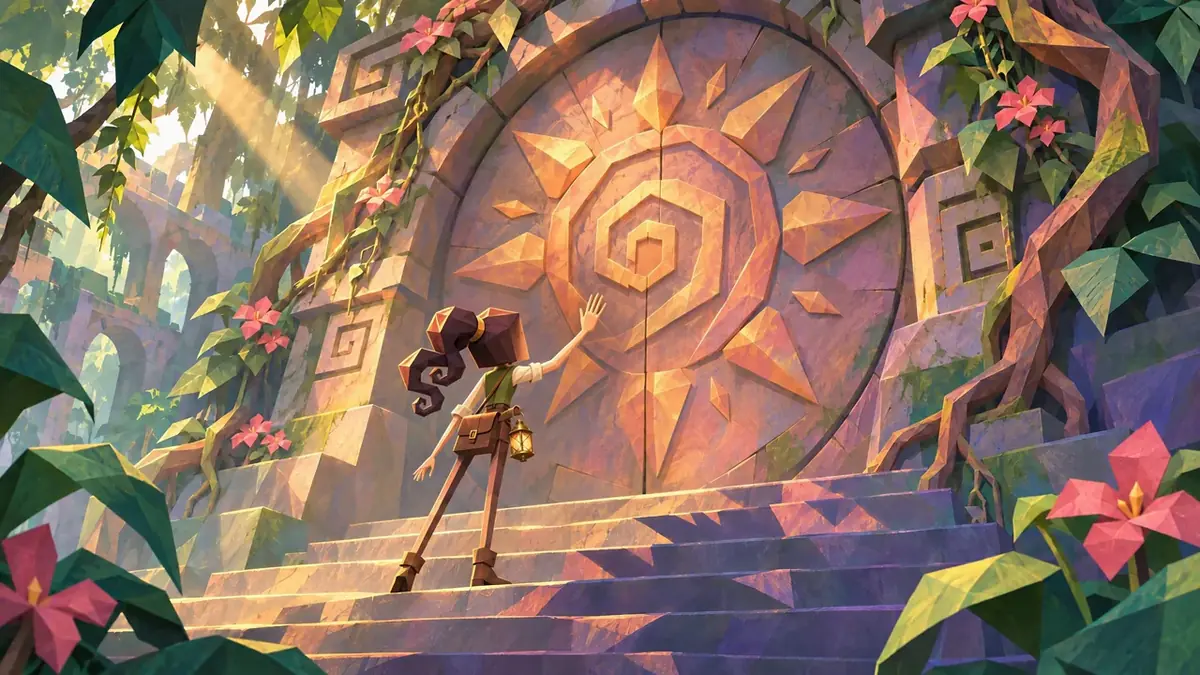
First Frame is where the clip starts. Last Frame is where it has to end: here, the door open and her on the top stair. Drag each image onto its box, or choose it from your library. The buttons on each box let you remove the image, edit it, or open more options.
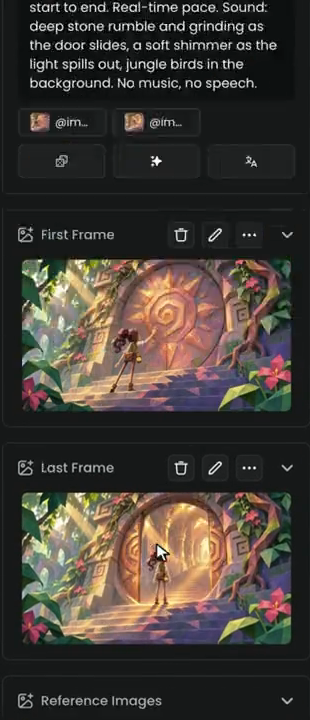
A few rules from the Knowledge Center for Minimax H3:
- The last frame is optional. With only a first frame, the model decides where the clip ends.
- Aspect Ratio follows the first frame.
- Don't mix frames with Reference Images, Reference Videos or Reference Audio in the same run. Choose one way in.
Step 5: Know the reference inputs
Reference Images, Reference Videos and Reference Audio are another way to start. Each has Drag & drop, Select from Library and Upload; audio also has Record. This lesson doesn't use them, since it uses frames.
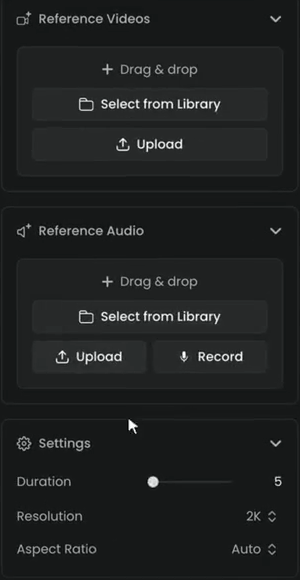
For Minimax H3, the Knowledge Center gives these limits:
| Input | What it guides | Limit |
|---|---|---|
| Reference Images | Subjects and style | Up to 9 images |
| Reference Videos | Motion | Up to 3 clips, 2 to 15 seconds in total |
| Reference Audio | Sound and voice | Only with at least one reference image or video |
Other models take different inputs and limits. The model's panel in the library lists them under Input.
Step 6: Set duration, resolution and aspect ratio
Open Settings:
- Duration sets how long the clip is, in seconds. The film sets 6. Minimax H3 makes 5 to 15 seconds.
- Resolution sets the size. Minimax H3 goes up to 2K. For test runs, set a lower one, here 768P: it's faster and costs less. Make the final take at the resolution you need.
- Aspect Ratio stays on Auto: the clip takes the shape of the first frame. Change it only for a text-only clip, where there's no frame to follow.
The Generate button shows the price, and it changes as you change the duration and the resolution. Click Generate.
Step 7: Check the clip
The take appears in the session on the right. Click it to open it in the viewer. The details on the right list the model, the prompt and the frames it used, so you can see exactly what made it.
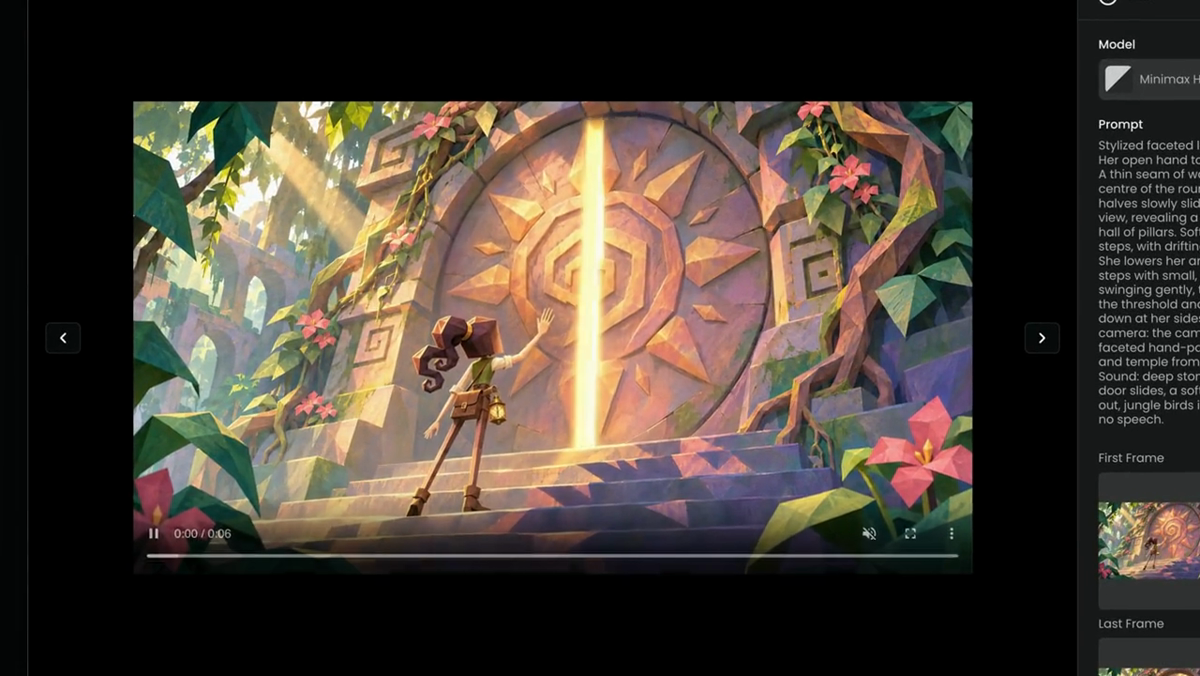
The clip starts on the first frame and ends on the last:
Watch the video: https://ufgc0c9mhl4ueq76.public.blob.vercel-storage.com/academy/29248a83ddb1903bf1900e6597d523da5596b4d239121a2b62e8302d19d9cee4.mp4
Watch it at full size, with the sound on, more than once: once for the motion, once for the faces and hands, once for the sound.
the first and last moments match the two frames, the character and the place stay the same from start to end, the motion follows the order in the prompt, the camera does what you asked, and the sound fits the action.
the clip jumps or cross-fades to reach the last frame, the character changes face or clothes, hands or feet bend in odd ways, the camera moves when you asked for a static shot, or there's music or speech you said you didn't want.
Choose a model for first and last frame
Every model in the "last frame" search can make this kind of clip. They differ in length, resolution, sound and speed, and the panel on the right of the library sums each one up. The Minimax family, from the Knowledge Center:
| Model | Inputs | Length and size | Good for |
|---|---|---|---|
| Minimax H3 | Text, first and last frame, or up to 9 references | 5 to 15 s, up to 2K, 24 fps, native audio | Story beats with sound or dialogue, brand films, game trailers |
| Minimax H3 Max I2V | A starting image, optional end image | 5 to 15 s, 480P or 768P, with audio | Faster tests of a still, with control over how the shot ends |
| Minimax H3 Max Turbo I2V | A starting image, optional end image | 480P or 768P | The fastest way to animate a still when speed matters more than 2K |
To compare models on the same frames, see Video models.
Common problems
| What you see | What to do |
|---|---|
| The model you want isn't in the short list | Click View all models and search for it by name or by what it takes, such as "last frame" |
| There's no Last Frame box | The model doesn't take one. Search "last frame" in the library and pick one that does |
| The clip cross-fades or cuts to reach the last frame | The two frames are too far apart. Make the last frame closer to the first (same angle, same place), or make the clip longer |
| The camera moves although you didn't ask | Write "Static camera: the camera does not move." in the prompt |
| The character or style changes during the clip | Add a continuity line, such as "same character and style from start to end", and check that both frames match |
| The clip is in slow motion | Add "Real-time pace" to the prompt |
| Unwanted music or voices | Say what you don't want: "No music, no speech." |
| The result has the wrong shape | Leave Aspect Ratio on Auto so it follows the first frame, and check the first frame's shape |
| The run fails with frames and references | Use frames or references, not both, in the same run |
What's next
To drive the clip with pictures of a character and a place instead of fixed frames, go to Reference to video. To move the camera on purpose, see Direct the camera and motion, and to choose between models, Video models.