

Use the Scenario Blender Plugin
Install the Scenario Blender Plugin from Scenario's extension repository, connect an API key, and generate textures, materials, 3D and renders in Blender.
- Guide
- Step 5 Scale
Watch the video: https://ufgc0c9mhl4ueq76.public.blob.vercel-storage.com/academy/e76fc0a7c52a89911f5c04c69fc97745265fd4c2bab8b0494b96ff112e0c84fb.mp4
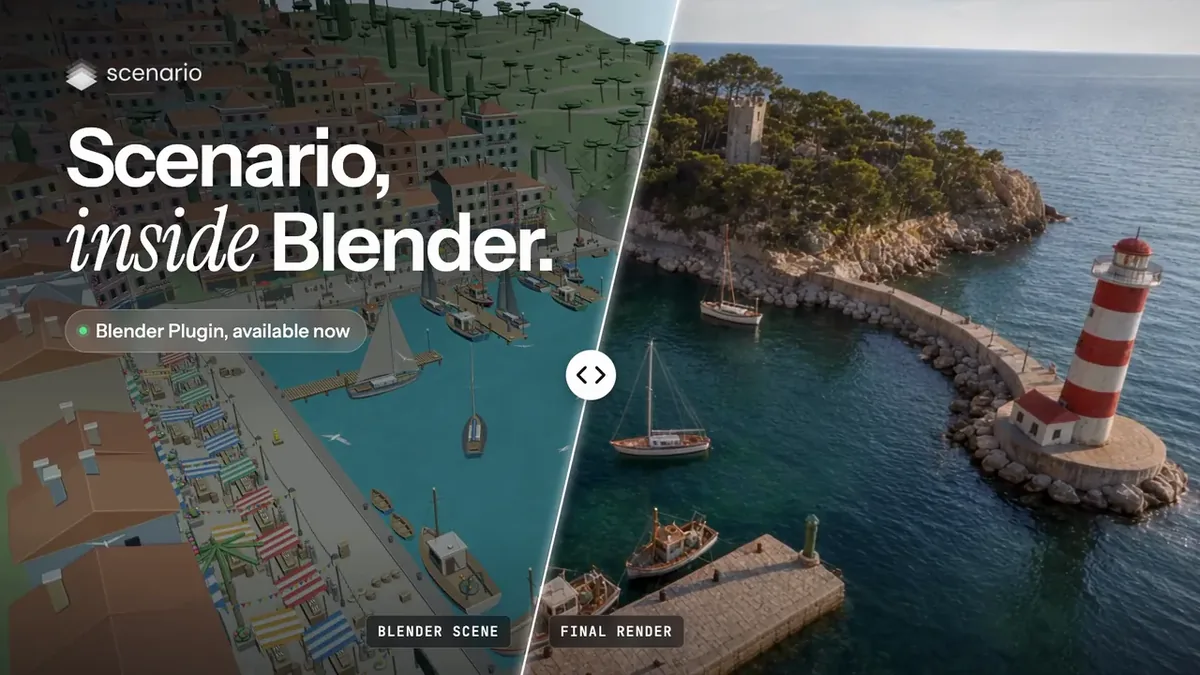
The Scenario Blender Plugin (published as "Scenario for Blender") puts Scenario generation in Blender's sidebar; results land in your scene and an output folder. It is Scenario's official Blender extension, published on GitHub (version 0.13.0 at the time of writing). Two parts are still labeled experimental: the Film pages and trained models.
Outcome: the plugin installed, connected to your Scenario project, and a first generation in your scene.
- 1Go onlineAllow Online Access
- 2InstallScenario's repository, Get Extensions
- 3ConnectProject key, Test connection
- 4Generatea lane, a prompt, the estimate
- 5Use itimport into the scene
When to use this
| Job | Use |
|---|---|
| Textures, materials, props, audio or look development without leaving the scene | The Scenario Blender Plugin |
| Batch work across many files | The API or the Scenario MCP |
| Platform tasks such as training, collections or usage | The web app or the Scenario MCP |
Install
- Open Edit > Preferences > System > Network and enable Allow Online Access. The plugin cannot reach Scenario without it.
- In Get Extensions, open Repositories, choose Add Remote Repository and paste
https://blender.scenario.com/repo/index.json. - Search for Scenario in Get Extensions and install it. It appears as Scenario in the Add-ons list.
- Without the repository: download
scenario-<version>.zipfrom the releases page of thescenario-labs/blender-pluginrepository on GitHub and use Install from Disk. A ZIP copy does not update itself; keep one copy only, either the ZIP or the repository one. - Verify a ZIP (optional): releases ship a
SHA256SUMSfile; runshasum -a 256 -c SHA256SUMS(macOS) orsha256sum -c SHA256SUMS(Linux) in the folder that holds the ZIP andSHA256SUMS. - Why not Blender's extensions site: the plugin needs an external account and keys, so Scenario hosts its own extension repository.
Connect it to Scenario
- In the Scenario web app, open Settings > Organization > API Keys > Add API Key. Create a Project key for the project that should receive your generations, with the Editor role, and, on Enterprise, a usage limit if you want a cap. Copy the key and the secret.
- In Blender, open Edit > Preferences > Add-ons > Scenario.
- Leave Credentials on Saved in Blender, paste the key and the secret, and press Test connection.
- Choose an Output Folder for generated files.
- Two ways to connect: sign in with your Scenario account in the add-on preferences, or paste an API key and secret as above. Saved credentials live in Blender's preferences, not a system keychain.
- Shared machines: choose Credentials > Environment and set the key and secret as environment variables instead.
- Billing: generations are billed to the project that owns the key.
Generate your first texture
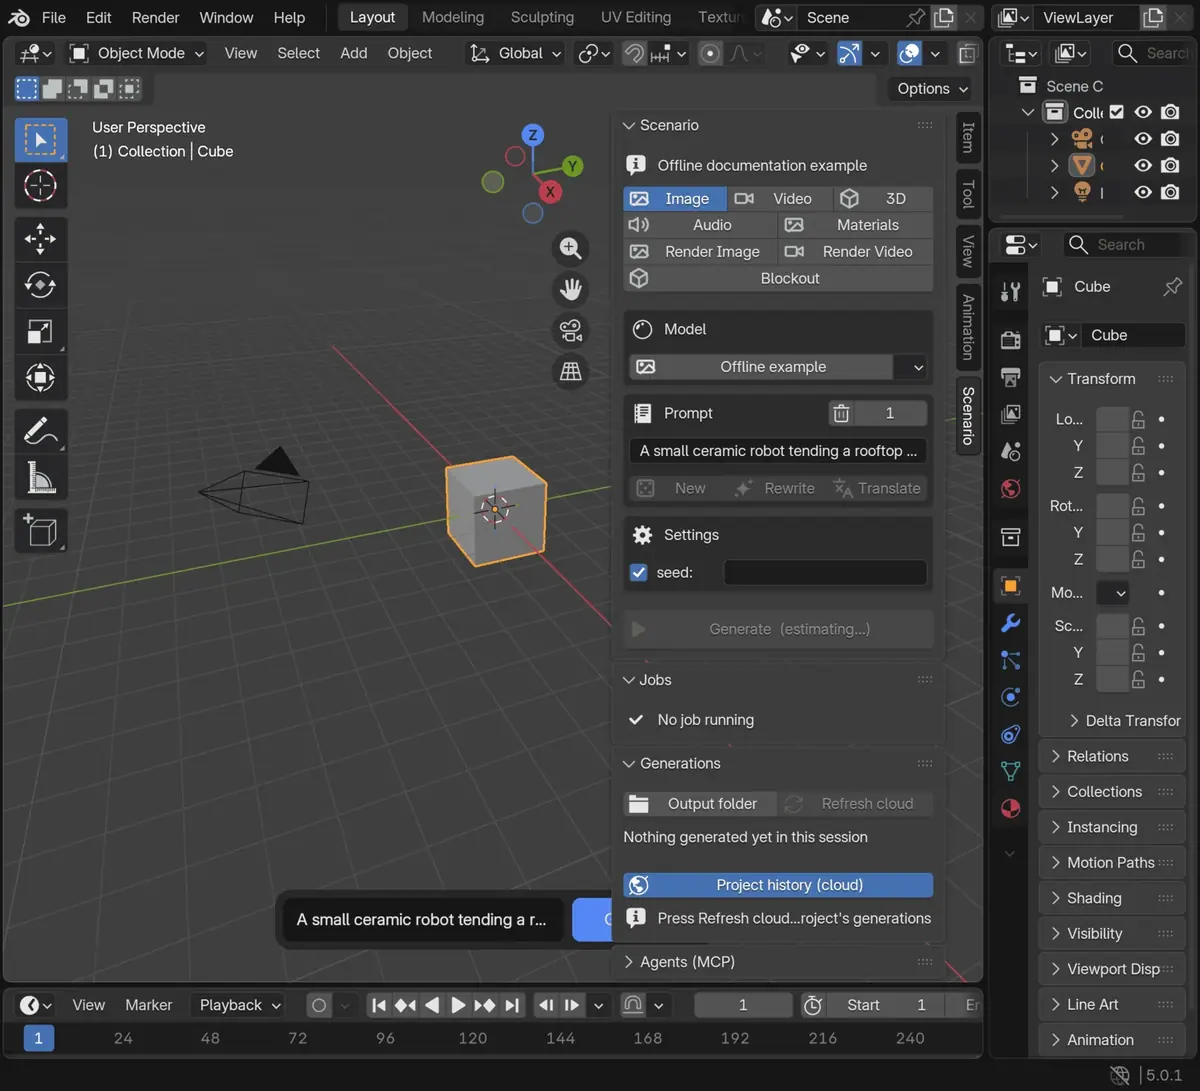
- In the 3D viewport, press N and open the Scenario tab, or click the Scenario button in the viewport header.
- Pick the Image lane.
- Choose a model in Model. The picker lists the models available to your account.
- Type a prompt, for example
weathered teal paint on wooden planks, top-down, even light, tileable. - Read the estimate on the Generate button, then click it. The job appears under Jobs.
- When it finishes, the result shows in Generations and in your output folder, with actions to view it or import it.
The lanes
| Lane | What it makes | Typical use |
|---|---|---|
| Image | Images from text or references | Textures, decals, concept frames, references |
| Video | Video from a prompt, an image or a scene playblast | Animated previs, motion tests |
| 3D | Meshes; also edit tasks on an exported selection | Props and set dressing. In-place editing is still incomplete |
| Materials | Saved PBR texture sets | Apply to a chosen material slot on a mesh |
| Audio | Speech, music or sound effects | Added to the sequencer |
| Environment | 360 panoramas from a prompt or an image, HDRI and upscales | Set as the scene's World |
| Render Image | A finished still from a scene capture plus look references | Grey previs to a styled frame |
| Render Video | Video from timeline captures, with a camera path planner and style references | Previs to a styled shot |
| Blockout | A greybox layout from a written scene description | Fast layouts you then refine or rebuild |
- Prompt helpers: New, Rewrite and Translate. They can spend credits too.
- A floating composer gives quick access to the current lane from the viewport.
Studio and workflows
Studio, in the viewport header, opens larger pages: Create, Film, Workflows, Library, Jobs, Results and Connection.
- Workflows: pick Private or Public, load a workflow, fill its inputs, press Request workflow price, then Generate. A workflow your team built in the web app runs from Blender with the same inputs.
- Film (experimental): load a recipe, generate the shots, build a timeline, then review and export. Each step asks for confirmation before it spends.
Previs to picture
- 1Block outgrey, by hand or Blockout
- 2Cameraset the shot
- 3Render Imageone or two look references
- 4Render Videofollows timeline and camera
The scene keeps the composition; the model supplies the look.
Credits and privacy
- An estimate before every generation, on Generate. Models, settings and references change the price.
- Cost previews send data: your prompt and settings go to the Scenario API while you edit, before you click Generate.
- Generations upload scene captures, selected meshes and reference files to your Scenario project.
- Stored locally: keys, prompts, job state and media stay in Blender's preferences, extension storage and your output folder.
Agents in Blender
The plugin runs a local server named scenario-blender (by default at http://127.0.0.1:9876/mcp, with a bearer token) so an AI agent on your machine can read the open scene and generate into it.
- The Agents (MCP) panel shows its status and token, with setup for Claude Code, Cursor, Claude Desktop and Codex.
- Treat the token as a secret.
- Running arbitrary Python from an agent is a separate permission, off by default.
- Connect both servers if you like: the hosted Scenario MCP still covers platform work (collections, training, workflows, usage) without Blender. See Connect the Scenario MCP.
Updates
- From the repository: Blender lists new versions in Get Extensions and updates the plugin there. Preferences > Add-ons > Scenario > Updates also checks, and Set up official repository adds the repository if you started from a ZIP.
- From a ZIP: install the newer ZIP with Install from Disk and restart Blender.
- Release notes: the repository's releases and changelog on GitHub.
Test connection succeeds, a first image lands in Generations and your output folder, the asset also appears in your Scenario project, and the credits charged match the estimate you saw within normal variance.
the plugin generates in a project you did not intend (check which project owns the key), or results import at the wrong scale or into the wrong material slot.
If it breaks
| Symptom | Cause and fix |
|---|---|
| Test connection fails | Check Allow Online Access, then the key and secret (no spaces), then that the key still exists and is a Project key |
| Generate stays on "estimating" | The estimate needs a connection to Scenario. Check your network and that the form has every required field, such as a reference image for an edit model |
| 403 or a plan message | The key's role cannot run models, the organization is on Free (API keys need a paid plan), or an admin turned the model off. Use an Editor key, check the plan, or pick another model |
| The job failed | Read the message under Jobs. Moderation blocks and input problems are the usual causes; see Blocked prompts and moderation |
| A lane misbehaves | Read the known limitations in the repository (some file types do not import, and Film is experimental), then report a bug through its support page, without pasting keys, tokens or signed asset URLs |
| Two Scenario entries in Add-ons | A ZIP copy and the repository copy are both installed. Remove the ZIP copy and keep the repository one |