

Turn an image into a 3D model
Prepare a front image in an A-pose or a T-pose, add it to an image to 3D model, check the settings, generate, and inspect the back and the wireframe.
- Guide
- Step 1 Learn
Run it in ScenarioTripo P2 Tripo 3.1
On this page4 sections
This lesson turns one image of a character into a 3D model.
Prepare the image
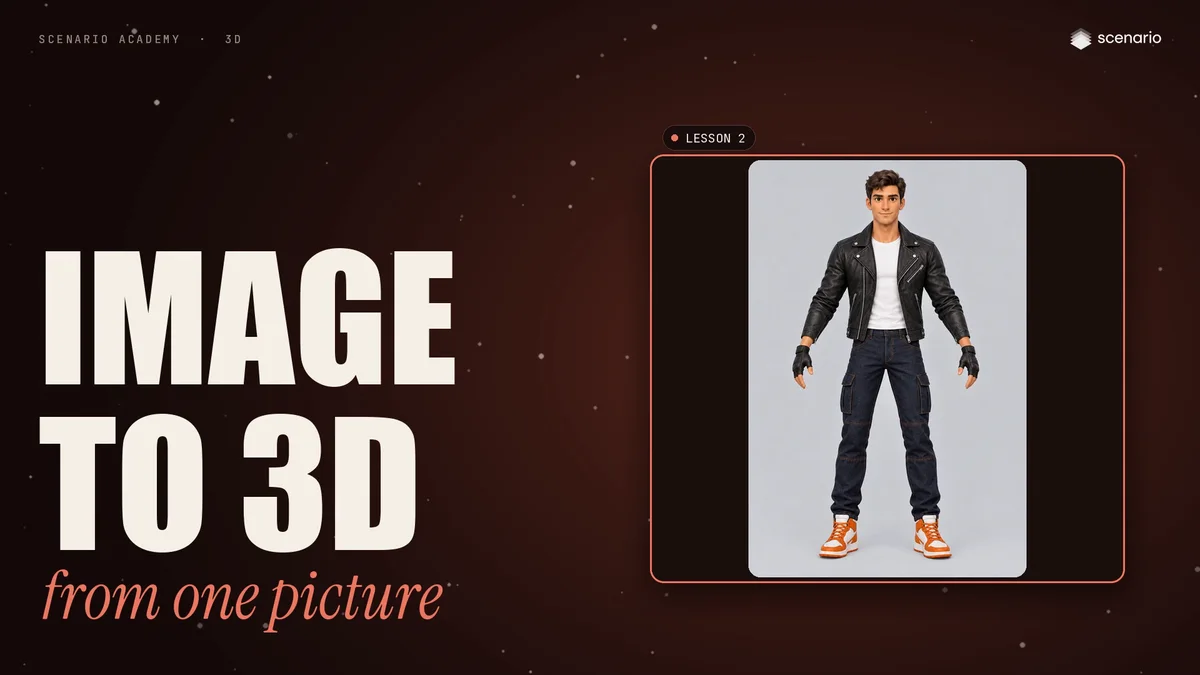
Everything starts with the image. Show your character:
- from the front, standing,
- with the arms away from the body,
- the whole body in frame,
- on a plain background.
This is an A-pose, the most common choice. A T-pose, with the arms straight out to the sides, works too. This lesson continues with the A-pose.
Open 3D and add the image
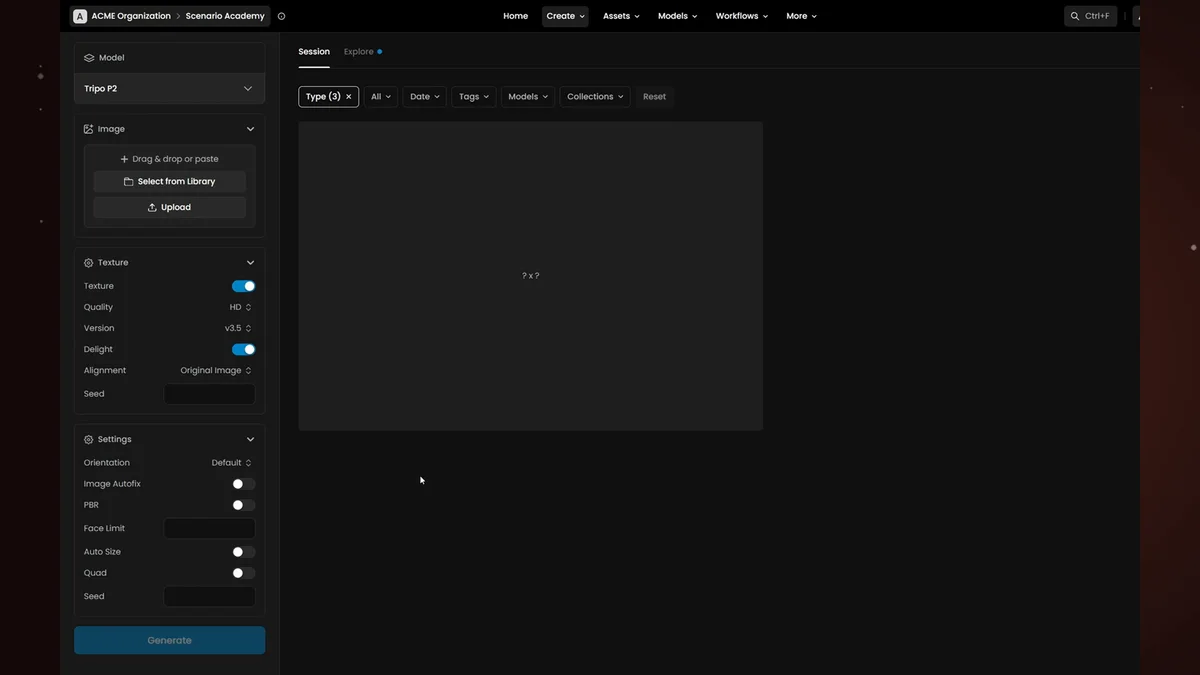
Open Create, then 3D, and pick an image to 3D model from the model bar: here, Tripo P2.
Add your image: upload one, or choose it from your library.
Settings
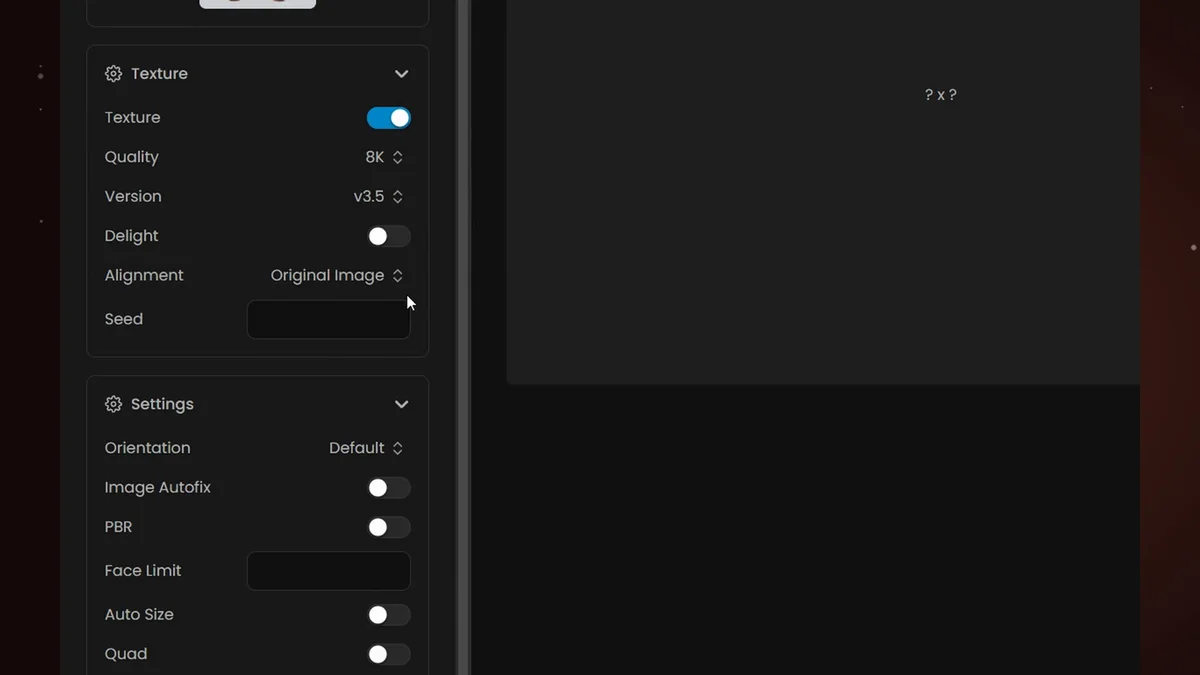
- The settings are the ones from lesson 1: Texture, Quality, Face Limit and Quad topology.
- Some options depend on the model, like Delight and Alignment here. Read what each one offers before you generate.
Generate and inspect
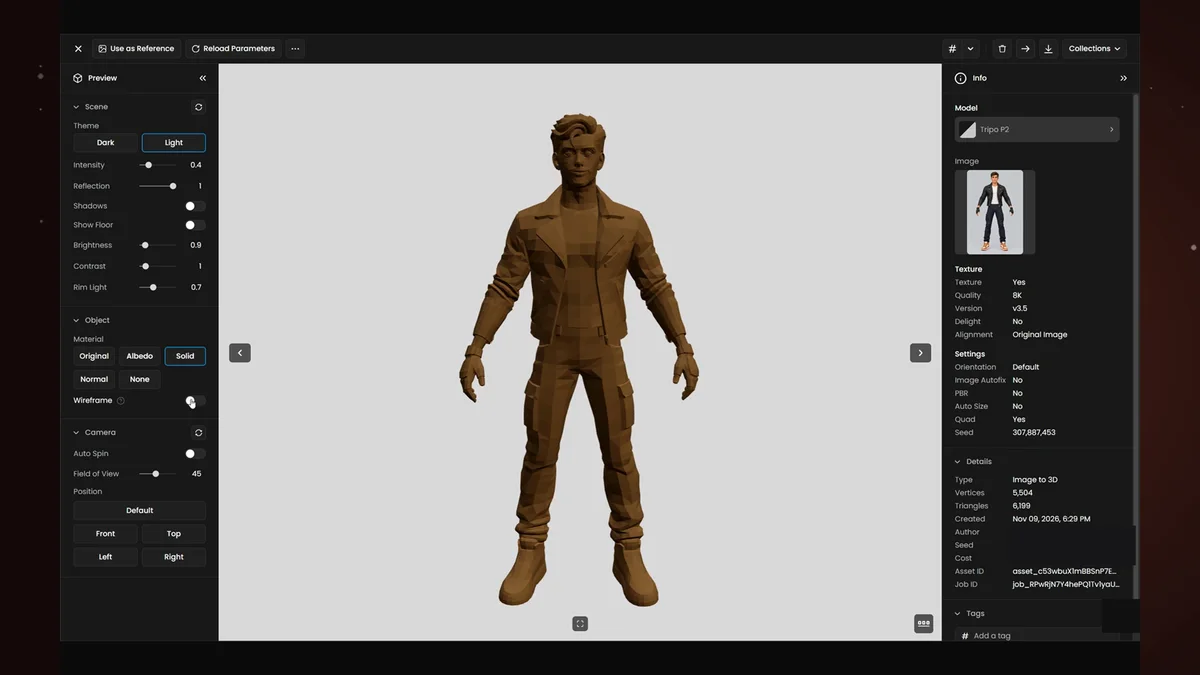
Click Generate. You can keep working while the model builds.
Orbit around the result and check the back: the model had to guess everything the image did not show. Turn on the Wireframe to check the topology, and use the panel on the right for the settings and the triangle count.