

Blender and the Scenario MCP, live
Turn a Blender blockout into a finished short film and a product ad through the Scenario MCP, with two skills and every prompt shown.
- Tutorial
- Step 3 Delegate
On this page24 sections
- Before you start
- Step 1: Get the Block or Build skill
- Step 2: Get the Blender blockout skill
- Step 3: Add both skills
- Example one: a short film
- Step 4: Ask for the blockout script
- Step 5: Run the script in Blender
- Step 6: Check the blockout and render the playblast
- Step 7: Ask for the still and the video
- Step 8: Read why Claude chose its models
- Step 9: Check the film
- Example two: a product ad
- Step 10: Ask for a script with a switch
- Step 11: Run it with the block shoe
- Step 12: Build the sneaker in 3D
- Step 13: Run it with the 3D model
- Step 14: Run the A/B test
- Step 15: The finished ad
- Block or build: the rule
- Brief an agent like a producer
- What happens behind each request
- Scale it up
- Common problems
- What's next
This lesson runs a real project from a chat: Claude, connected to Scenario, writes a Blender script for a grey blockout, then turns its playblast into a finished 15-second film of a traveler reaching a mountain gate. A second example, a sneaker ad, tests when a stand-in should stay a simple block and when it's worth building it as a 3D model.
Quick version
- Download the Block or Build skill from its Exploration and the Blender blockout skill from github.com/scenario-labs/skills, then upload both in Customize › Skills.
- Ask Claude for one self-contained Blender script of your shot: the shots, their length, the set and a capsule stand-in for each character.
- Run the script in Blender's Scripting tab, check the blockout, then render a playblast with View › Viewport Render Animation.
- Attach the playblast and ask for one finished still of the first frame, then the video from that still, and ask which models Claude picks and why.
- For anything that must look exact, such as a product, build it: a concept, then image-to-3D, then the same script with the 3D model in place of the block.
Before you start
- The Scenario MCP connected to your assistant, signed in. If not, follow What the Scenario MCP is, and how to connect it first. The film uses Claude on claude.ai and the project Brand Studio; any assistant that can load skills works.
- Blender 4.5. The scripts use only
bpy,mathandmathutils, so no add-on is needed. - Credits in the team you use. Lookups are free; each still, 3D model and video is billed, and videos at 1080p cost the most. Ask Claude to quote before it runs anything.
Four words come back all through the lesson:
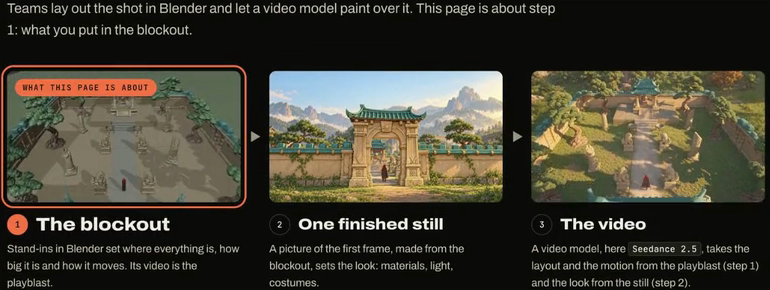
- Blockout: the shot laid out in Blender with simple shapes. It sets where everything is, how big it is and how it moves.
- Stand-in: the shape that takes the place of a character, prop or set piece in the blockout: a capsule, a few boxes, or a generated 3D model.
- Playblast: a quick grey render of the blockout from the shot's cameras. The video model takes the layout and the motion from it.
- One finished still: a picture of the playblast's first frame that sets the look: materials, light, costumes. The video model takes the look from it.
That's the Block or Build method in three steps: the blockout and its playblast, one finished still, then the video.
Step 1: Get the Block or Build skill
Go to scenario.com/explorations and open Block or Build. Every Exploration is a real project, shown step by step, with the skill that does it. Click Skill at the top of the page (the Make yours section has it too) to download it as a ZIP file (scenario-block-or-build-skill.zip). The page also has the Explainer, a Guide and a PDF if you want the method in full.
This skill decides what stands in for each character, prop and set piece before a render-to-real video pass, and runs a fair A/B test of two stand-ins.
Step 2: Get the Blender blockout skill
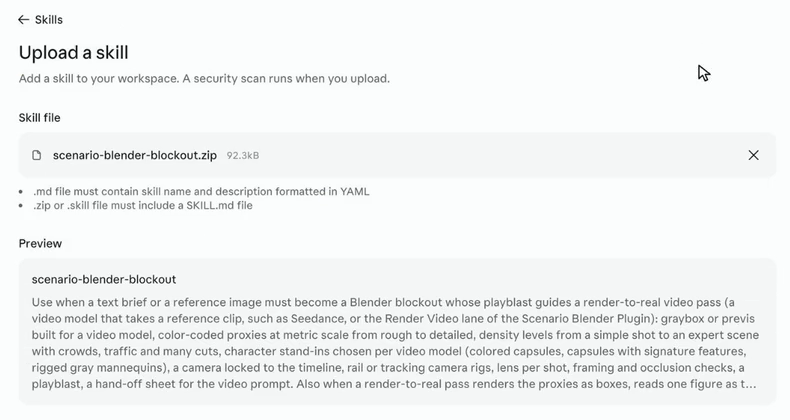
Go to github.com/scenario-labs/skills, Scenario's open-source skills repository. Open skills › dcc › blender and download the blockout skill (scenario-blender-blockout.zip in the film). The dcc folder also holds skills for Maya and ZBrush.

This skill turns a text brief or a reference image into a Blender blockout built for a video model: color-coded stand-ins at real scale, capsules for characters, a camera per shot locked to the timeline, and a playblast.
Step 3: Add both skills
In Claude, open Customize › Skills, then Add skill › Upload skill. Choose the first ZIP. Preview shows the skill's name and description; Security scan runs when you upload. Click Upload.
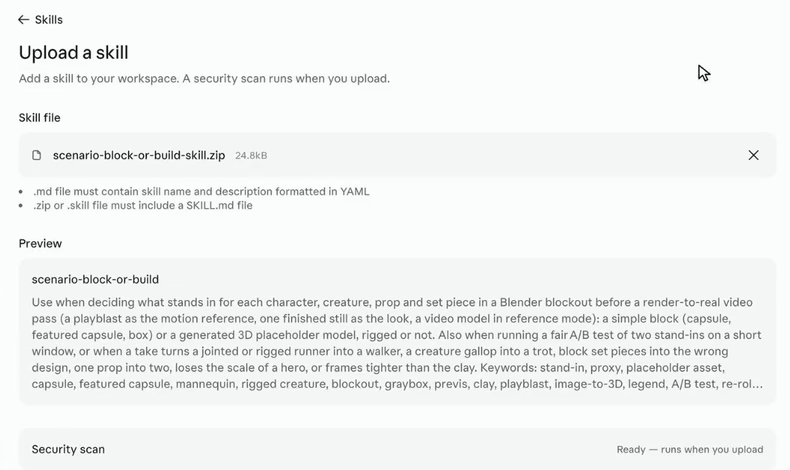
Do the same for the second ZIP. Both skills are now on: scenario-block-or-build and scenario-blender-blockout.
Example one: a short film
Three shots, 15 seconds: a traveler walks up to a mountain gate, climbs the steps behind it, and stops above a valley.
Step 4: Ask for the blockout script
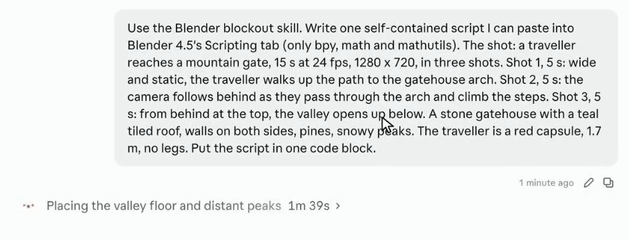
Start a new chat and describe the shot, one line per shot, with the set and the stand-in:
Use the Blender blockout skill. Write one self-contained script I can paste into Blender 4.5's Scripting tab (only bpy, math and mathutils). The shot: a traveller reaches a mountain gate, 15 s at 24 fps, 1280 x 720, in three shots. Shot 1, 5 s: wide and static, the traveller walks up the path to the gatehouse arch. Shot 2, 5 s: the camera follows behind as they pass through the arch and climb the steps. Shot 3, 5 s: from behind at the top, the valley opens up below. A stone gatehouse with a teal tiled roof, walls on both sides, pines, snowy peaks. The traveller is a red capsule, 1.7 m, no legs. Put the script in one code block.
What makes this brief work:
- Format first: length, frame rate, resolution and the number of shots, so the cuts land where you want them.
- One sentence per shot: the camera (wide and static, following behind, from behind at the top) and what happens.
- The stand-in, sized: a red capsule, 1.7 m, no legs. The video model adds the body; the blockout only needs the size and the motion.
Claude follows the skill: the set in blocks, a capsule with no legs, and a camera per shot. It takes a few minutes and shows what it's working on.
Step 5: Run the script in Blender
In Blender, open the Scripting tab, click New, paste the script and click Run Script (the play button). The script builds its own scene, here BLK_mountain_gate, so your other scenes are left alone, and running it again rebuilds that scene from scratch. Its first lines are settings you can change and run again: the frame rate and length, the resolution, the shots and their cameras, the figure height and the colors.
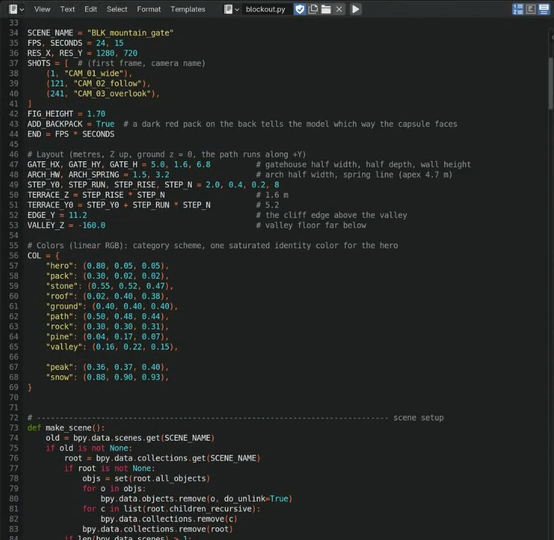
In the film, the script reaches Blender through Claude and runs there. If your assistant has no connection to Blender, copying the code block into the Scripting tab gives the same result.
Step 6: Check the blockout and render the playblast
Switch to the Layout tab. The scene has the gatehouse with its teal roof, the walls, pines, cliffs, the path and the red capsule. It has three cameras, with hard cuts at 5 and 10 seconds. Play the timeline and check that the capsule reaches the arch, climbs the steps and stops at the top, and that each camera sees what its shot needs.
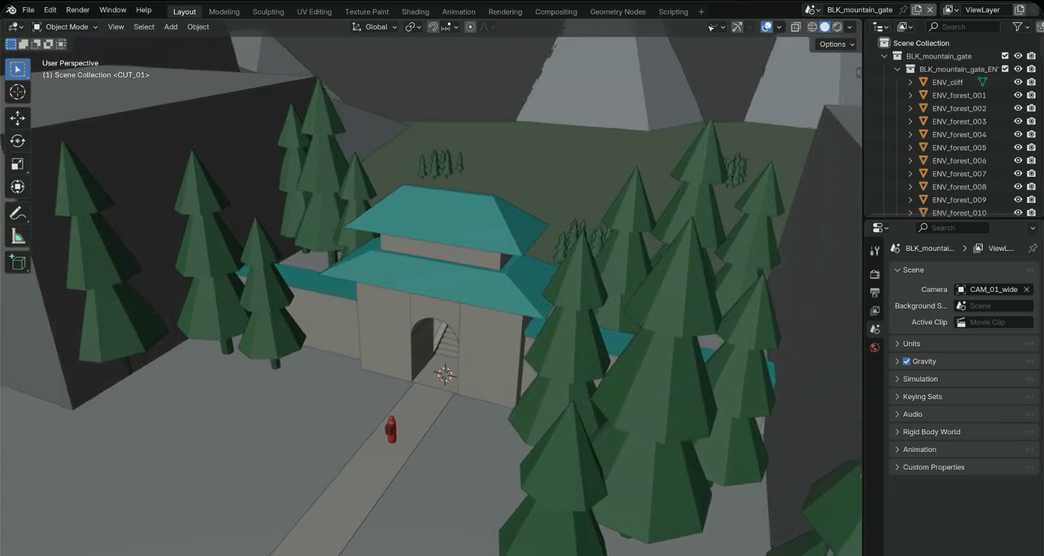
Then render the playblast: View › Viewport Render Animation. The script set the output to an MP4, so you get one grey 15-second clip of all three shots. Grey is all the video model needs.
Step 7: Ask for the still and the video
In a new chat, attach the playblast (gate_playblast_3shots.mp4) and type:
Use Block or Build. This playblast is my three-shot blockout of a traveller reaching a mountain gate. First make one finished still of the first frame: a weathered stone gatehouse with a teal tiled roof, pines, snowy peaks, the traveller in a red hooded cloak, golden morning light, cinematic. Then make the 15-second video from that still with Seedance 2.5 at full quality, 1080p, no draft, keeping the three cuts. Tell me which models you pick and why. Brand Studio.
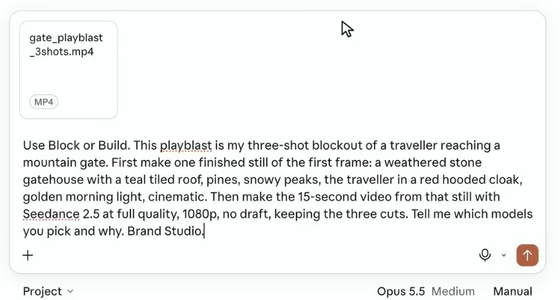
The still describes the look only; the layout comes from the playblast. "Keeping the three cuts" tells the video model to keep the hard cuts of the blockout.
Step 8: Read why Claude chose its models
Because you asked, Claude says which models it used and why, and what each run cost:
- GPT Image 2.5 Sunburst for the still. Scenario's quality ranking put it first among image editors for keeping the layout of a reference image, so the still matches the playblast's first frame.
- Seedance 2.5 for the video, as asked: the playblast and the still go in as references, at 1080p, for 15 seconds.
It also explains the stand-ins: it left the blockout as it was, because characters work best as simple blocks and the video model invents the movement. The still already shows the gate, so the simple blocks were enough there too. Claude ends with what to check in the video: that both cuts land on time, that there's only one traveler, that the walk looks natural, and that the gate in shot 1 matches the still.
Step 9: Check the film
Both results are saved in Brand Studio. Watch the video against the playblast and the still.
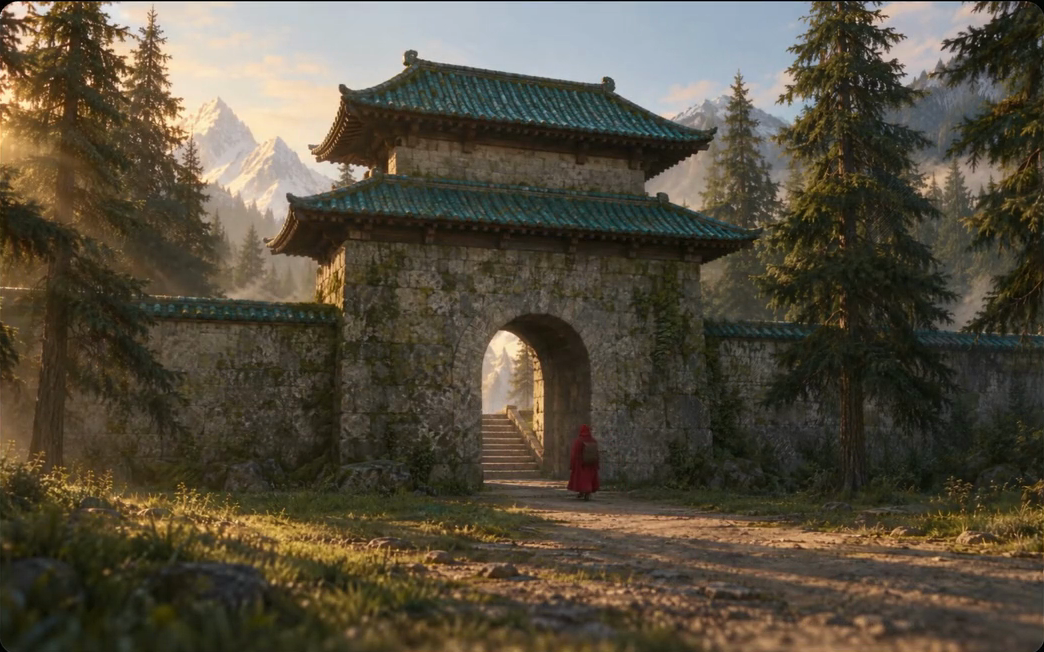
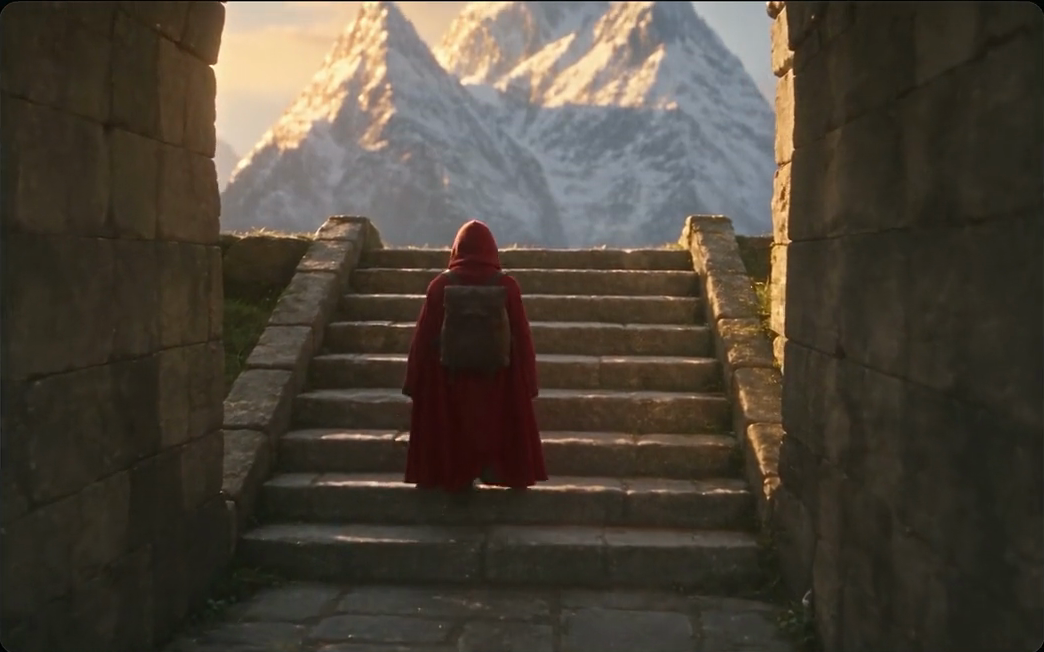
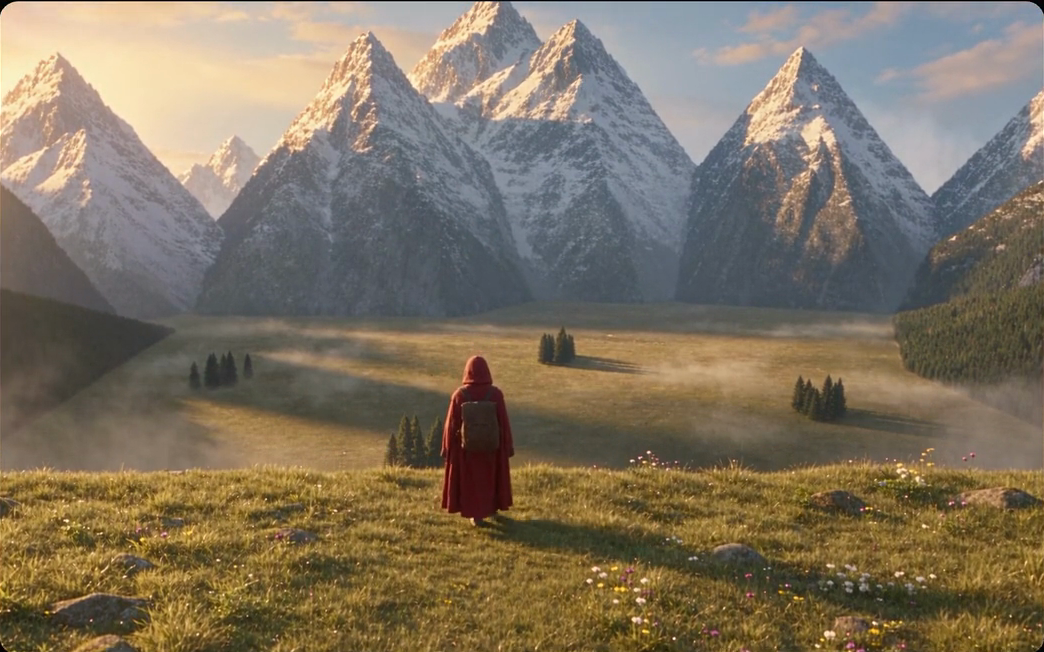
The capsule became a person in a hooded cloak with a backpack, walking, because the still showed that look and the playblast gave the size and the path.
the cuts land at 5 and 10 seconds, there is one traveler, they follow the blockout's path (up to the arch, through it, up the steps, to the edge), the walk looks natural, and the gate in shot 1 matches the still.
a cut moved or disappeared, a second figure appears, the traveler slides or floats, or the gatehouse changes shape between shots. Fix the blockout or the still, then run again; don't fix it with prompt words alone.
Example two: a product ad
A character can stay a capsule, because the video model is free to invent the person. A product can't: the sneaker in the ad must be the same sneaker in every frame. This example tests both stand-ins on the same shot.
Step 10: Ask for a script with a switch
Use the Blender blockout skill. Write one self-contained script for Blender 4.5's Scripting tab (only bpy, math and mathutils): a 15-second sneaker ad, 24 fps, 1280 x 720, in three shots. Shot 1, 5 s: the sneaker drops onto a round stone plinth with a small bounce while the camera circles it. Shot 2, 5 s: a low, slow slide along the sole, close up. Shot 3, 5 s: a slow hero turn on the plinth, with empty space on the left for a title. Put a switch at the top: SHOE = "block" (three boxes and a wedge, 0.30 m long, green upper, orange sole) or the path to a GLB, fitted to the block's size and painted in the same two colours. Put the script in one code block.
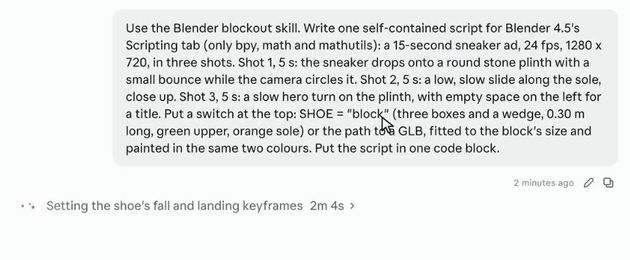
The switch is the A/B test: one script, one line to change, so everything else (the plinth, the cameras, the timing) stays the same.
Step 11: Run it with the block shoe
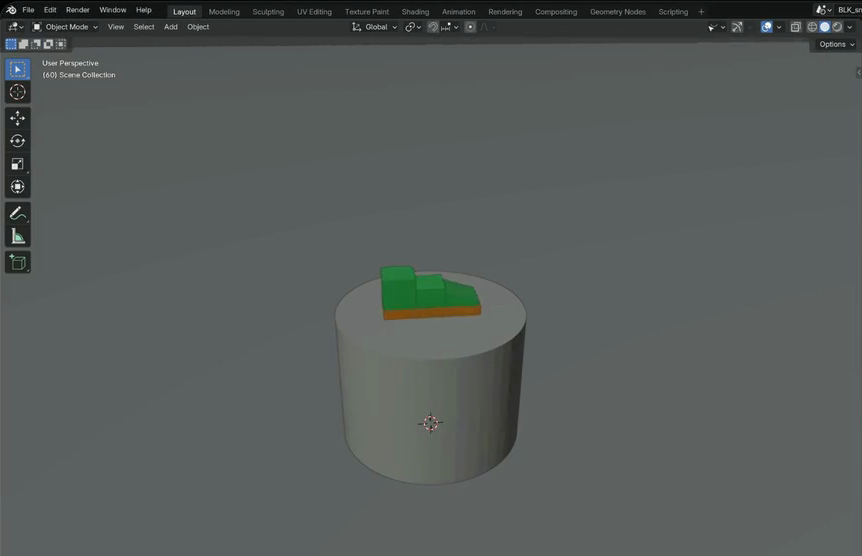
Run the script with SHOE = "block". The block shoe drops onto the plinth: three green boxes and a wedge on an orange sole.
Step 12: Build the sneaker in 3D
In a new chat, ask for the build version:
Use Block or Build. I'm testing stand-ins for a product shot: a sneaker drops onto a plinth and the camera circles it. For the build version, make a concept of the sneaker (green upper, orange sole, three-quarter side view, plain background), then turn it into a 3D model I can import in Blender. Brand Studio.
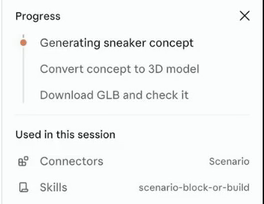
Claude shows its plan in a Progress panel: generate the sneaker concept, convert the concept to a 3D model, then download the GLB and check it. Under Used in this session you can see the Scenario connector and the scenario-block-or-build skill. In the film, the concept comes from GPT Image and the 3D model from Hitem3D 3.0, an image-to-3D model.
Step 13: Run it with the 3D model
Set SHOE to the path of the downloaded GLB and run the script again. The script fits the model to the block's size and paints it in the same two colors, so only the stand-in changes.
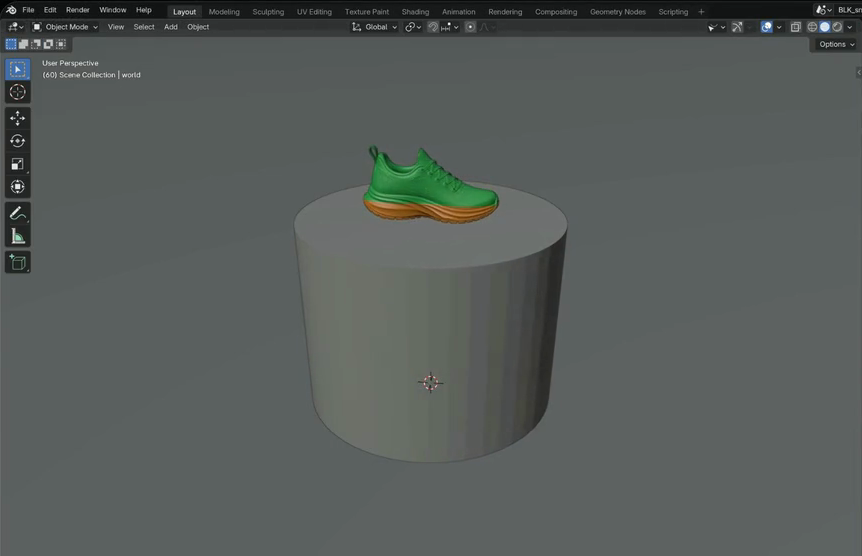
Render a playblast of shot 1 with each shoe, and one of the full ad with the 3D model.
Step 14: Run the A/B test
Attach the three playblasts (sneaker_block_shot1.mp4, sneaker_build_shot1.mp4, sneaker_ad_build.mp4) and type:
Use Block or Build. These are my sneaker ad playblasts: shot 1 with the block shoe, shot 1 with the 3D model, and the full 15-second ad with the model, made from the concept in Brand Studio. Run the A/B on shot 1: one shared still of its first frame in the concept's look, a stone plinth in a soft-lit studio, then the same Seedance 2.5 video for each, 1080p, no draft. Then make the full ad from the full playblast with the same still. Tell me which models you pick and why.
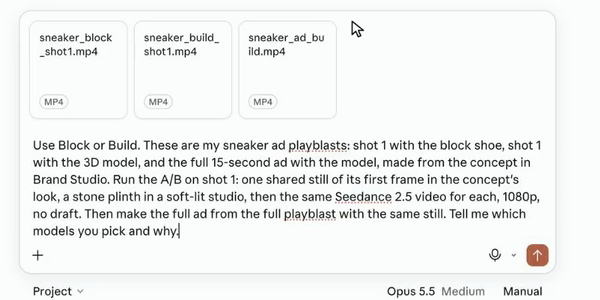
A fair test changes one thing: same still, same prompt, same settings, only the stand-in differs.
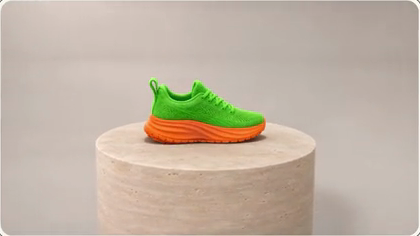
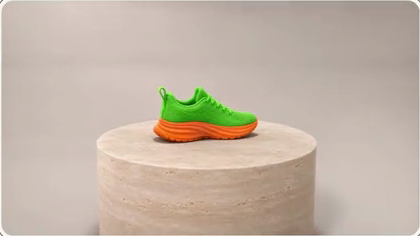
Watch both clips to the end. The block gives the model only a size and a color, so the shoe's shape is free to drift from frame to frame. The built model gives it the exact shape in every frame.
Step 15: The finished ad
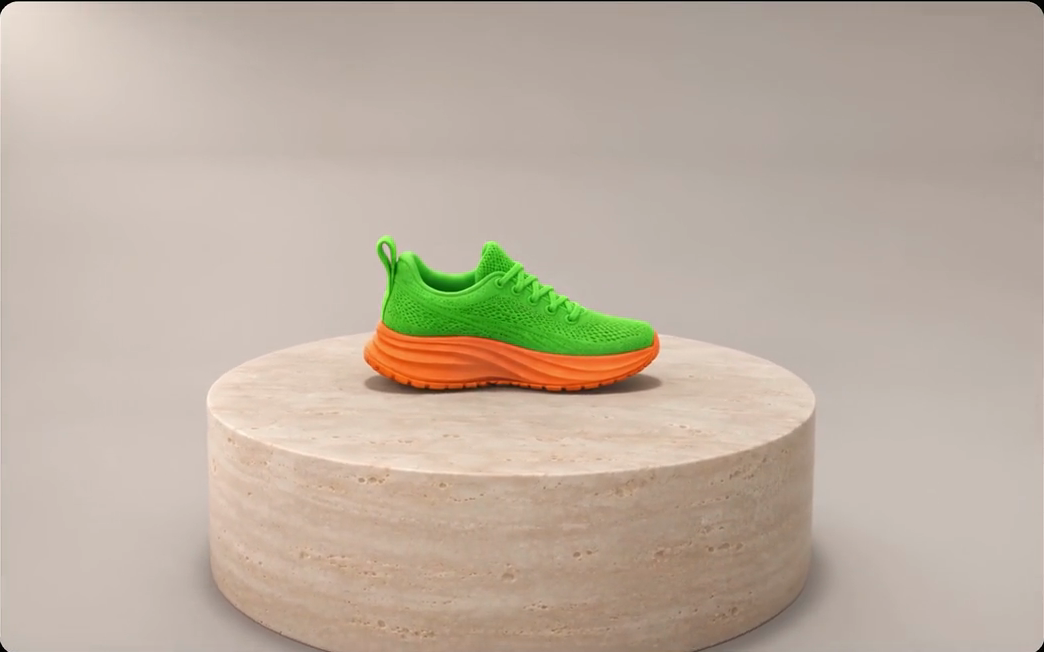
The full ad comes from the playblast with the 3D model and the same still: the drop onto the plinth, the slide along the sole, and the hero turn with space on the left for a title.
Block or build: the rule
| Stand-in | When | Why |
|---|---|---|
| Block (a capsule, boxes) | Characters, creatures and anything whose look the still and the prompt can describe | The video model invents the movement and the detail; a simple block leaves it free to |
| Build (a generated 3D model) | A product, a logo, a hero prop, anything that must look exact | The model's shape is the same in every frame, so the result doesn't drift |
Block what moves. Build what must look exact. And to choose for a new case, run the A/B: one script with a switch, the same still and settings, one change.
Brief an agent like a producer
An agent works with the information you give it. A good request has up to seven parts; scope, job and brief are the minimum, and the budget matters as soon as video, 3D or batches are involved.
| Part | What to say | Example |
|---|---|---|
| 1. Scope | Team and project | "Brand Studio." |
| 2. Job | The output and its use | "A 15-second video, 1080p, keeping the three cuts." |
| 3. Brief | Subject, style, setting, light, format | "A weathered stone gatehouse, golden morning light, cinematic." |
| 4. What stays fixed | Inputs that must not change | "Fitted to the block's size and painted in the same two colors." |
| 5. Budget | A cap and a quote rule | "Quote before running. Stop and ask if a step costs more than you expected." |
| 6. Model choice | A model, or a reasoned pick | "Tell me which models you pick and why." |
| 7. Delivery | Where results go and what to report | "Report the asset IDs and what to check." |
Ask the agent to report the model, asset IDs, cost and any change from your brief. An asset ID handed back in a later session ("use asset_... as the reference") picks up exactly where you left off.
What happens behind each request
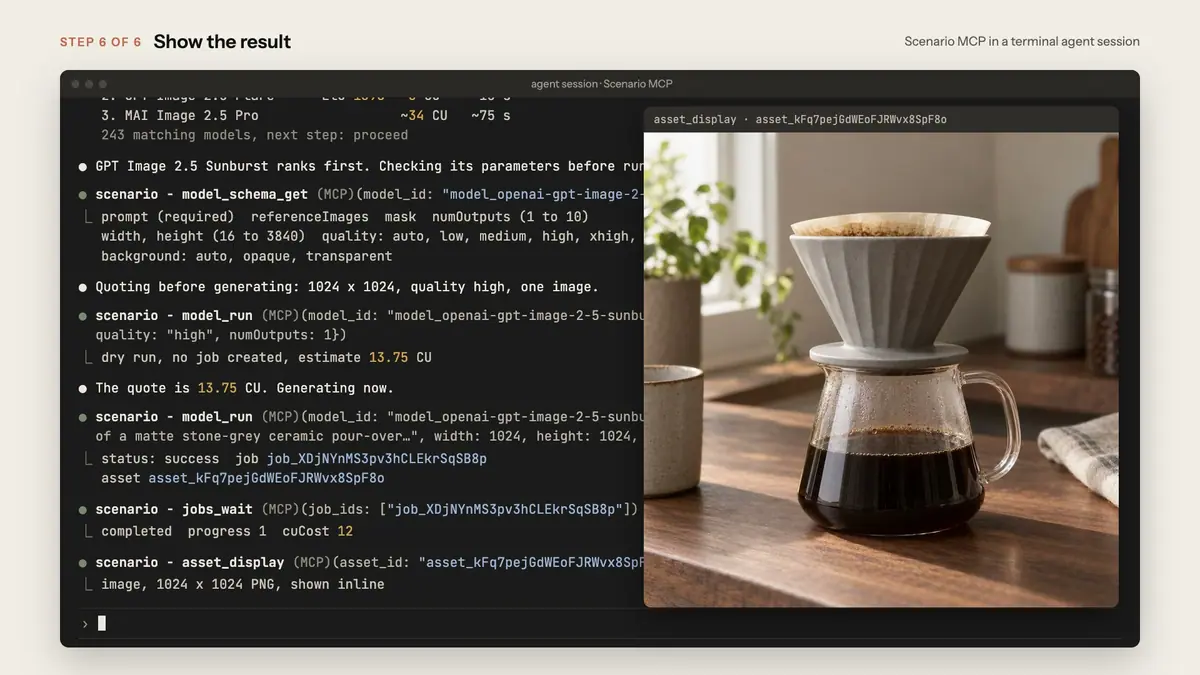
You never call tools yourself. For each generation, the agent runs the same loop:
recommendranks models for the task by measured quality, speed and cost (free).model_schema_getreads the model's parameters. Fields markedcost_impactmove the price.model_runwithdry_run: truereturns a quote and runs nothing; on Enterprise, an IP Detection check requested in the same call is still charged.model_runfor real, thenjobs_waituntil it finishes. The job'scuCostis what you paid.asset_displayshows the result in the chat with a link to it in the web app.
Watch the video: https://ufgc0c9mhl4ueq76.public.blob.vercel-storage.com/academy/60c3db666442e66df106a1180ab9bf01437b8e8cd54dab34db7a81a874fb297e.mp4
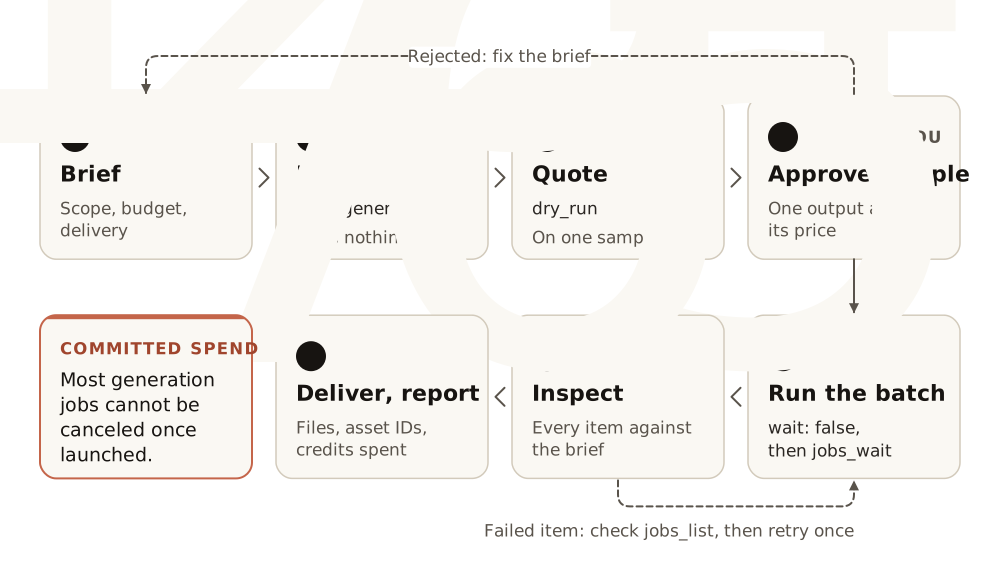
Two details matter for edits: referenceImages is an array even for one image (a bare value is ignored, and you get a new picture instead of an edit), and a launched generation is committed spend, because job_cancel refuses most generation jobs.
Scale it up
The same session scales without code. Keep the order: approve one before making many, and keep the quote step.
- A batch from a list. Paste the list and the rules once, "same light, angle and background as the approved take", and ask for the total quote first.
- A batch from a folder. A local agent uploads each file with
upload_asset, quotes one item, launches the jobs withwait: falsea few at a time, waits withjobs_wait(up to 32 job IDs per call) and downloads each output withasset_download. - Files for your engine or scene. Images convert with
format(png,webp,jpg), meshes withglb,fbxorobj. Store asset IDs, not download URLs, which expire. The Scenario Blender Plugin runs its own local server with scene tools: connect it next to the Scenario MCP and one agent works on the scene and on your Scenario projects at once (Plugins and integrations). - Saved workflows. The agent finds a saved workflow or App with
workflows_listand runs it withworkflow_run. For a request with several steps,plan_generationreturns an ordered plan with a tool and a model per step and runs nothing, so you can review it and its cost first (Run workflows from code and agents).
Common problems
| What you see | What to do |
|---|---|
| Claude doesn't follow the skill | Check both skills are on in Customize › Skills, and name the skill at the start of the request ("Use Block or Build.") |
| The script fails in Blender | Check you're on Blender 4.5 and pasted the whole code block. Copy the error from the console into the chat and ask for a fixed script |
| Cuts land in the wrong place | Check the cameras and markers in the blockout, then render the playblast again; say "keeping the three cuts" in the video request |
| A second figure appears, or the traveler floats | Make the capsule's path and size clear in the blockout (one capsule, on the ground), then run again |
| The product changes shape between frames | Build it: a concept, then image-to-3D, then the same script with the GLB |
| The 3D model is the wrong size or faces the wrong way | Keep the switch's rule "fitted to the block's size", and check the settings at the top of the script before you run it |
| The agent asks which team or project to use | Expected when you have several. Name the project in every request |
A transport error on model_run | The job may still have started. Ask the agent to check jobs_list before running again, or you may pay twice |
429 parallel-custom-jobs | Too many jobs at once. Wait on the jobs already running first |
| 429 naming a quota or balance | The run costs more than the credits left. Ask for a quote, choose a cheaper setting or fewer outputs, or top up |
What's next
Save your opening lines and review rules ("quote first, one change at a time, tell me which models and why") as project instructions: see Instructions, memory and team habits. To run the same steps without a chat, build them as a workflow and call it from code: Run workflows from code and agents. More projects with their skills are on scenario.com/explorations.