

Sketch and render in real time with Live
Draw on a canvas and watch a model render the sketch as you go, then take the best frame to a full-quality model.
- Guide
- Step 1 Learn
On this page13 sections
- Before you start
- Step 1: Open Live
- Step 2: Name the canvas and check that Live is on
- Step 3: Pick the model and write the prompt
- Step 4: Sketch on the left pane
- Step 5: Set how closely the render follows the sketch
- Step 6: Try variations and settings
- Step 7: Change one part with a mask
- Step 8: Finish the render on a full-quality model
- Live at a glance
- Make it repeatable
- Common problems
- What's next
Live turns a rough color sketch into a rendered image while you draw. You find a layout by moving shapes instead of rewriting a prompt, which makes it good for thumbnails, compositions, poses and color blocking. This lesson walks through the Live canvas, from a blank page to a render you can finish on a full-quality model.
Quick version
- Open Create › Live. A New Canvas opens with two panes.
- Pick a model on the IMAGE MODEL card and write a short prompt for the finished image.
- Block in big, flat color shapes on the left pane and watch the render on the right.
- Set the slider: higher keeps your sketch, lower gives the model more freedom.
- Save the canvas, then finish the render you like on a full-quality model.
Before you start
- What you need: a mouse or a pen tablet. You can also import a rough sketch or a photo and draw over it.
- Where it lives: Create › Live, under GENERATE. Saved canvases are under Assets › Canvas.
- Which models run in Live: custom models only. That means Scenario's own trained models and the ones your team trained or uploaded. Third-party image models such as GPT Image or Nano Banana are not offered in Live. A new canvas opens with FLUX.1 Schnell.
- Three things drive the render: the model, the prompt and your sketch. Change any one and the render changes. Most of the work is keeping the three in agreement.
- Live is fast, not final. It renders in about a second, so it trades detail for speed. Treat a Live render as a layout or a reference, then finish it with another tool (Step 8).
Step 1: Open Live
Go to Create › Live. A New Canvas opens.
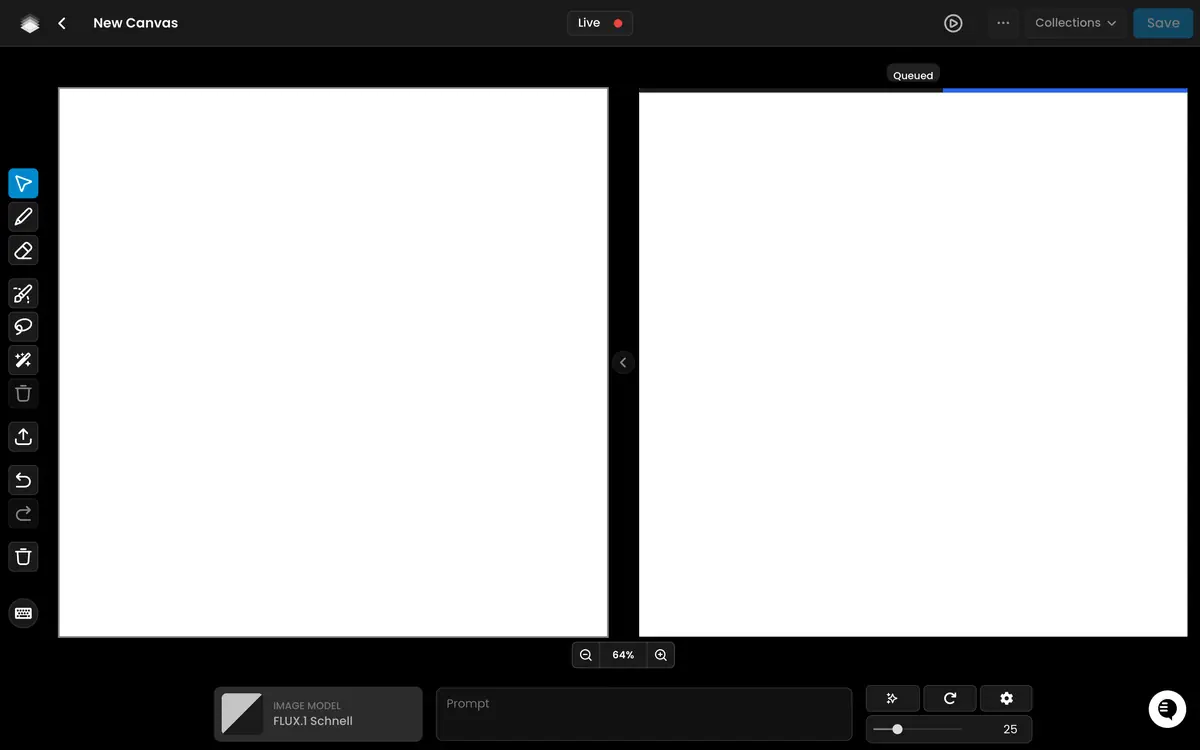
The screen has four parts:
- Left pane: your drawing canvas. The zoom controls under it set how big it shows on screen (64% here).
- Right pane: the live render. A progress bar and a Queued tag show while a render waits its turn.
- Left toolbar: the drawing, eraser and masking tools, import, undo, redo, clear, and the shortcut sheet (Step 3).
- Bottom bar: the model, the prompt, three buttons and the slider (Steps 2, 4 and 5).
The small arrow between the panes sends the render on the right back to the left pane, so you can keep drawing on top of it (Step 6).
Step 2: Name the canvas and check that Live is on
The top bar holds the canvas name, the Live switch, Collections and Save.

- Canvas name: click New Canvas and give it a name the team will recognize, such as the shot or the scene. Saved canvases are listed by this name under Assets › Canvas.
- Live: the switch that keeps the render updating as you draw. If the right pane stops changing, check it first.
- Collections: adds the canvas to one of your collections.
- Save: saves the canvas and its renders. Renders change with every stroke, so save each time you get one you like.
Step 3: Pick the model and write the prompt
The bottom bar holds everything that controls the render.

- Click the IMAGE MODEL card to choose a model. Filter the list with Category › My models for your team's models, or Scenario Models for Scenario's. Pick a style model to get a house style, or a character model to keep one character consistent across sketches.
- Write a short prompt in the Prompt box: the subject, the setting, the style and the light of the finished image. Start short and add detail as the sketch grows.
- For ideas, click the first button over the slider, Prompt Spark. It suggests prompts based on your model and what you typed. Click one to use it, then edit it.
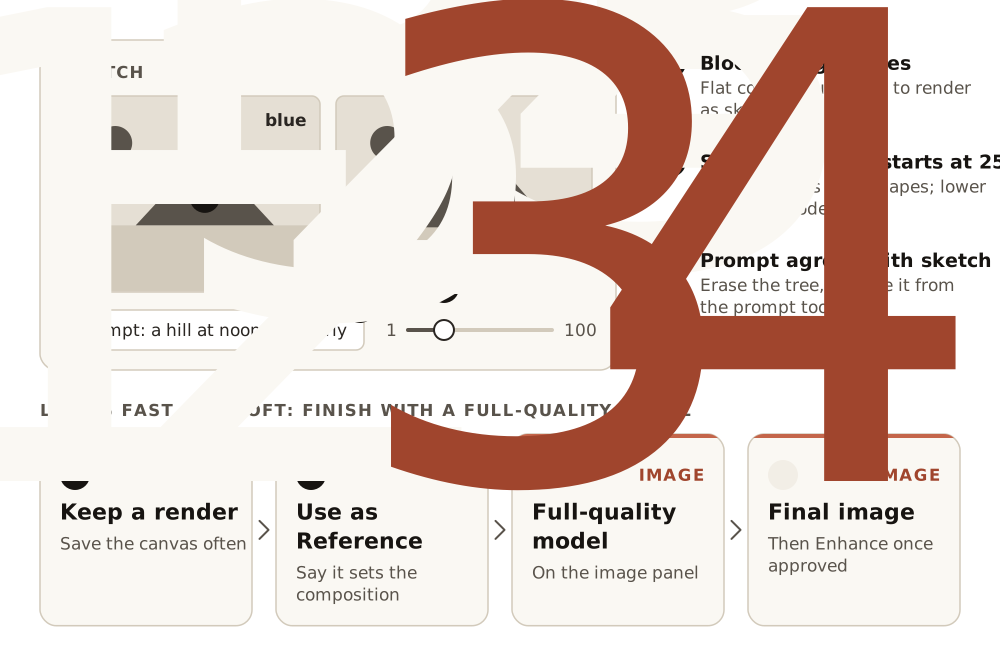
The prompt and the sketch must say the same thing. If you draw a tree, the prompt can mention it. If you erase the tree, take it out of the prompt too. A dark blue sky in the sketch needs a night prompt, not "at noon".
Step 4: Sketch on the left pane
Pick the brush in the toolbar (shortcut S), choose a color, and start drawing. The render on the right updates as you go.
- Block in big shapes with flat colors first: the sky, the ground, the main subject's silhouette. A blue area at the top tends to render as sky, a blue area at the bottom as water.
- Change the brush size and color from the toolbar. Use the color picker (shortcut C) to sample a color that is already on the canvas.
- Erase with the eraser (shortcut E), and use undo and redo freely: every change gives a new render.
- Move and recolor shapes until the render works. It is faster to drag a shape than to describe its new place in the prompt.
- Import an image with the upload button to start from a scan, a photo or an earlier render instead of a blank page.
Press H, or click the keyboard button at the bottom of the toolbar, to see every shortcut.
Contrast matters more than neatness. Bold shapes with clear edges between colors give the model a layout to follow. Pale, thin strokes mostly get ignored.
Step 5: Set how closely the render follows the sketch
The slider under the three buttons has no label. It runs from 1 to 100 and starts at 25. It sets how closely the render follows your sketch's shapes and colors.
- Higher values, around 40 to 70, keep your drawing's structure and colors. Use them when the layout is settled and you want it kept.
- Lower values, around 10 to 30, give the model more freedom, so the prompt counts for more. Use them when your sketch is very rough and you want the model to fill in the detail.
There is no single best value. It depends on how the model was trained, how detailed your sketch is and how specific your prompt is. Move the slider in steps of 5 or 10 and watch the render.
Step 6: Try variations and settings
The other two buttons over the slider:
- Variation (the circular arrow): renders the same sketch and prompt with a new seed. Click it a few times to see different readings of one layout.
- Settings (the gear): with FLUX.1 Schnell it holds only Seed. Set a fixed seed to keep the render stable while you change the sketch, so you see the effect of your strokes and not of a new seed. Other models can show more settings here, such as a negative prompt or sampling steps.
Step 7: Change one part with a mask
Live normally re-renders the whole canvas. To change one area and keep the rest:
- Click the arrow between the panes to send the render to the left pane.
- Pick a masking tool in the toolbar: draw mask, lasso or smart mask.
- Mask the area to change. You can also sketch inside the mask to guide it.
- Change the prompt to describe only that area, for example a new jacket on a character.
Only the masked area changes. The first masked render can take a little longer while the model loads; after that it is fast again. The slider and the prompt work as before.
Step 8: Finish the render on a full-quality model
Live renders are soft and loose in detail. When the layout is right, Save, then take the render you like further:
- Use it as a reference. Open the render, click Use as Reference, and choose a full-quality model on the image panel. GPT Image 2.5 Sunburst is a strong default. In the prompt, describe the finished look and say that the reference sets the composition. To keep the style of your Live model, keep the same model and prompt instead and set the reference's influence fairly high.
- Edit, then upscale. Run Edit with Prompts on the areas that need fixing, then Enhance once the image is approved. With Scenario's own upscalers, add a few style images from the model you used and compare the Precise and Balanced presets.
the render keeps the layout you drew (horizon, subject position and size, main color areas), and the finished image made from it keeps that layout at full quality.
the render ignores the sketch (raise the slider), the prompt and the sketch fight (a subject appears that you didn't draw), or the final model loses the composition (say what the reference is for in the prompt).
Live at a glance
| Control | Where | What it does |
|---|---|---|
| IMAGE MODEL | Bottom bar, left | The custom model that renders the sketch. Opens with FLUX.1 Schnell |
| Prompt | Bottom bar, middle | Describes the finished image. Keep it in agreement with the sketch |
| Prompt Spark | First button over the slider | Suggests prompts from your model and your text |
| Variation | Second button | Same sketch and prompt, new seed |
| Settings | Gear button | Seed with FLUX.1 Schnell; more with some other models |
| Slider | Under the buttons | 1 to 100, starts at 25. Higher follows the sketch, lower frees the model |
| Arrow between panes | Center | Sends the render to the left pane to keep drawing or mask an area |
| Live | Top bar | Keeps the render updating as you draw |
| Save | Top bar | Saves the canvas to Assets › Canvas |
Make it repeatable
- Name canvases clearly so the team can reopen a layout.
- Write down the model, the prompt, the slider value and the seed for a series in one style, and use the same model for every render.
- Save often. A good render is replaced by the next stroke.
Common problems
| What you see | What to do |
|---|---|
| The render doesn't update | Check that Live is on at the top, and wait for a queued render to finish |
| The render ignores your drawing | Raise the slider; use bigger, bolder shapes with more contrast |
| The render copies your rough strokes too literally | Lower the slider and describe the finished look in the prompt |
| Something appears that you didn't draw | Take it out of the prompt, or draw it in the sketch |
| The render jumps around while you draw | Set a fixed Seed in the settings |
| The model you want isn't in the list | Live offers custom models only; finish with that model from the image panel instead (Step 8) |
| The result looks soft | Expected from a real-time render: finish it with a full-quality model |
| You lost a good render | Renders change with each stroke. Save each one you like |
What's next
Take your best render into Generate images as a reference, fix details with Edit images, and upscale the approved result with Upscale and enhance images.