

Remove and replace backgrounds
Cut a subject out to a transparent PNG, swap its background with one prompt, or place it into a scene you already have.
- Guide
- Step 1 Learn
On this page11 sections
- Before you start
- Step 1: Open Remove Background
- Step 2: Remove the background
- Step 3: Check the cutout and download it
- Step 4: Change only the background with a prompt
- Step 5: Check the new background
- Step 6: Put the subject into a scene you already have
- Step 7: Check the composite
- Background-removal models
- Common problems
- What's next
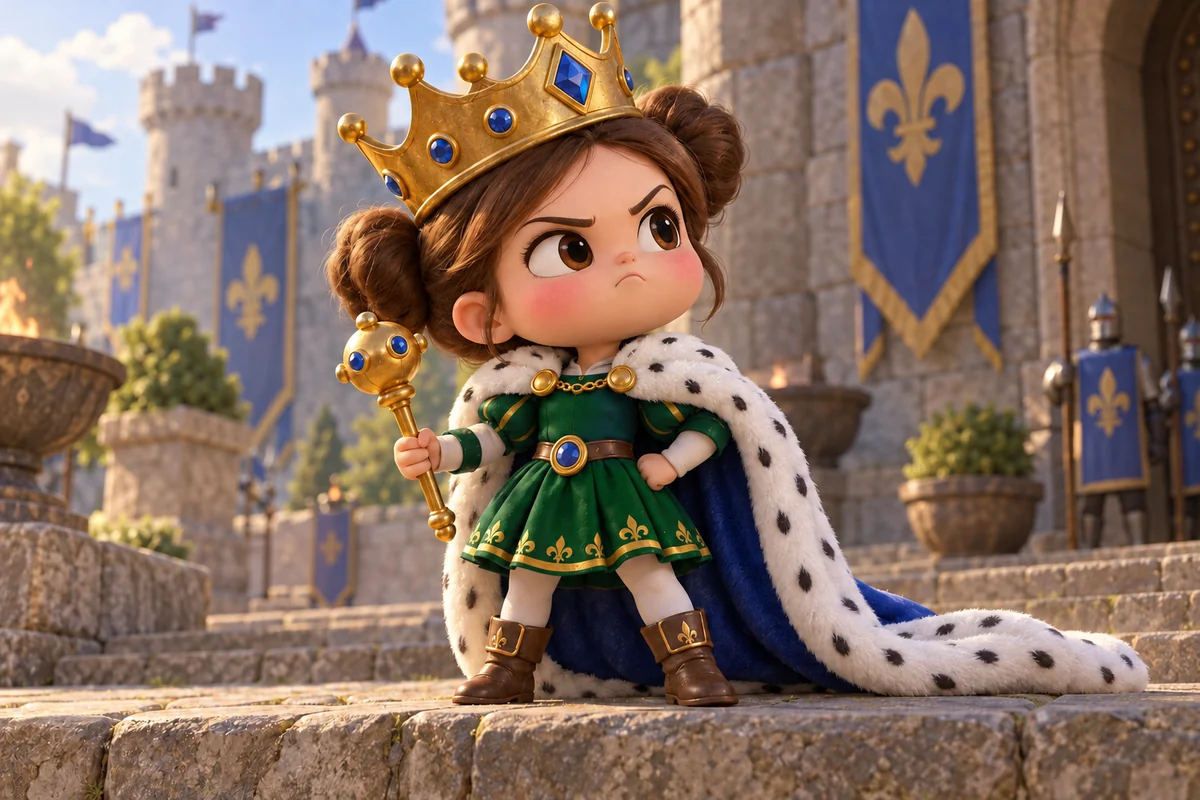
This lesson does three things with one character, a small queen on castle steps: it cuts her out of her background to a transparent PNG with Remove Background, puts her on a sunny beach with Edit with Prompts and GPT Image 2.6 Sunburst, and places her in a market square you already have by giving the model both images. Each step makes a new image, so the original stays safe.
Quick version
- Open the image, click the three dots and choose Remove Background. Keep Transparent and click Remove Background.
- Download the cutout as a PNG to keep the transparent background.
- To change only the background, open the original, choose Edit with Prompts, pick GPT Image 2.6 Sunburst and say what stays and where the subject goes.
- To use your own background, give the model two references, the cutout first and then the scene, ask it to place the subject and match the light, and click Generate.
Before you start
- You need an image with a clear subject. A character or a product that stands out from what is behind it gives the cleanest cutout. High-resolution images (1K or 2K) work best.
- Know which of the three you need:
| You want | Use | You get |
|---|---|---|
| The subject alone, to use anywhere | Remove Background | A transparent PNG |
| The same subject in a new place you describe | Edit with Prompts with one reference | A new image, same subject |
| The same subject in a scene you already have | Edit with Prompts with two references | The two images combined, with matching light |
- Every result is a new asset. The original stays in your library.
Step 1: Open Remove Background
Open your image. To cut out the character, click the three dots in the bar above it and choose Remove Background.
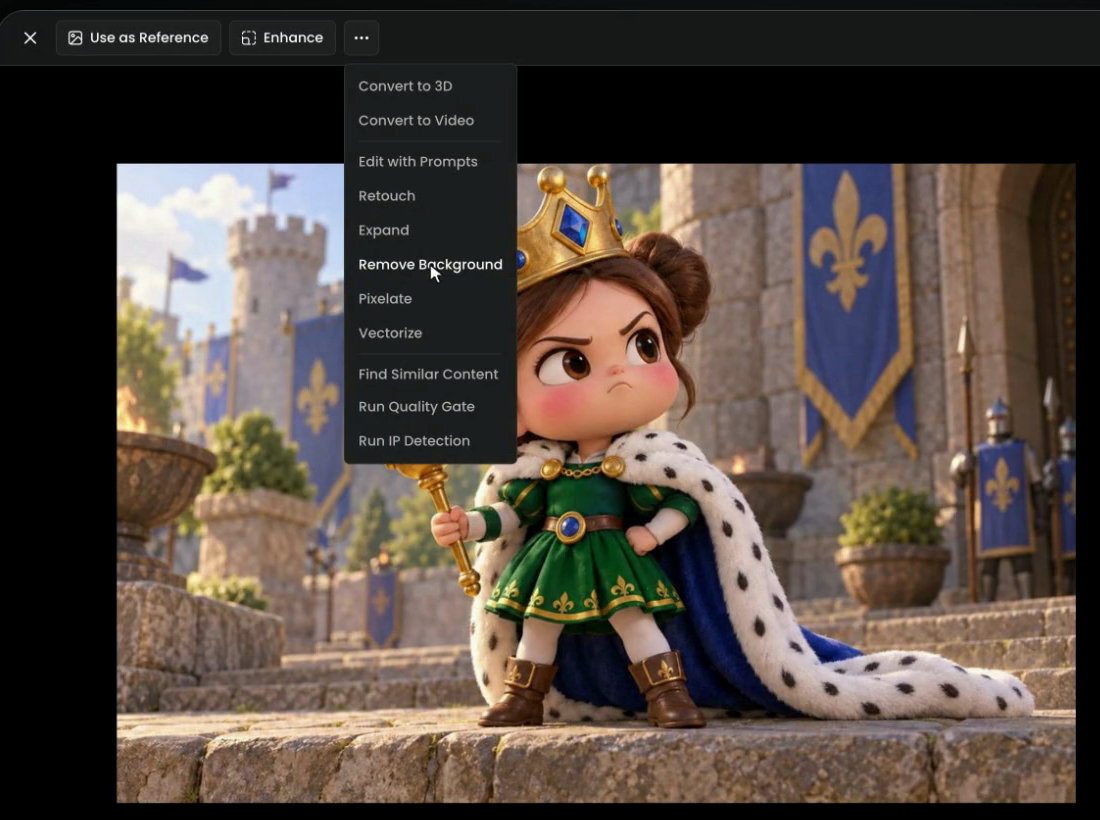
You can also find Remove Background under Edit in the panel on the right of the viewer, in the three-dot menu of any thumbnail, and under Images in the main menu, where you upload an image or pick one from your library.
Step 2: Remove the background
The Remove Background panel opens on the right. Keep it on Transparent and click Remove Background. The price of the run shows on the button.
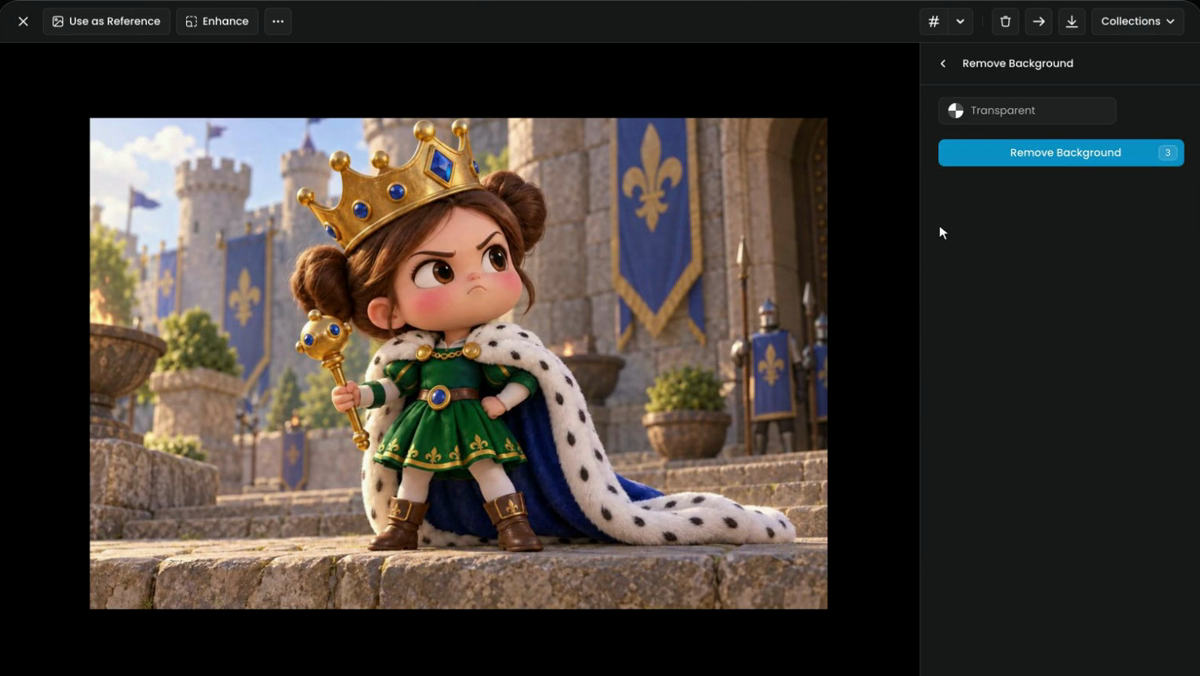
Transparent removes the background completely and leaves an alpha channel. The other option fills the background with a solid color instead, for a plain backdrop that matches a design.
Step 3: Check the cutout and download it
The castle is gone. Her crown, the fur on her cloak and the scepter all stay sharp. The viewer shows the transparent area as black; the Info panel shows the model that made it, Photoroom Background Removal.
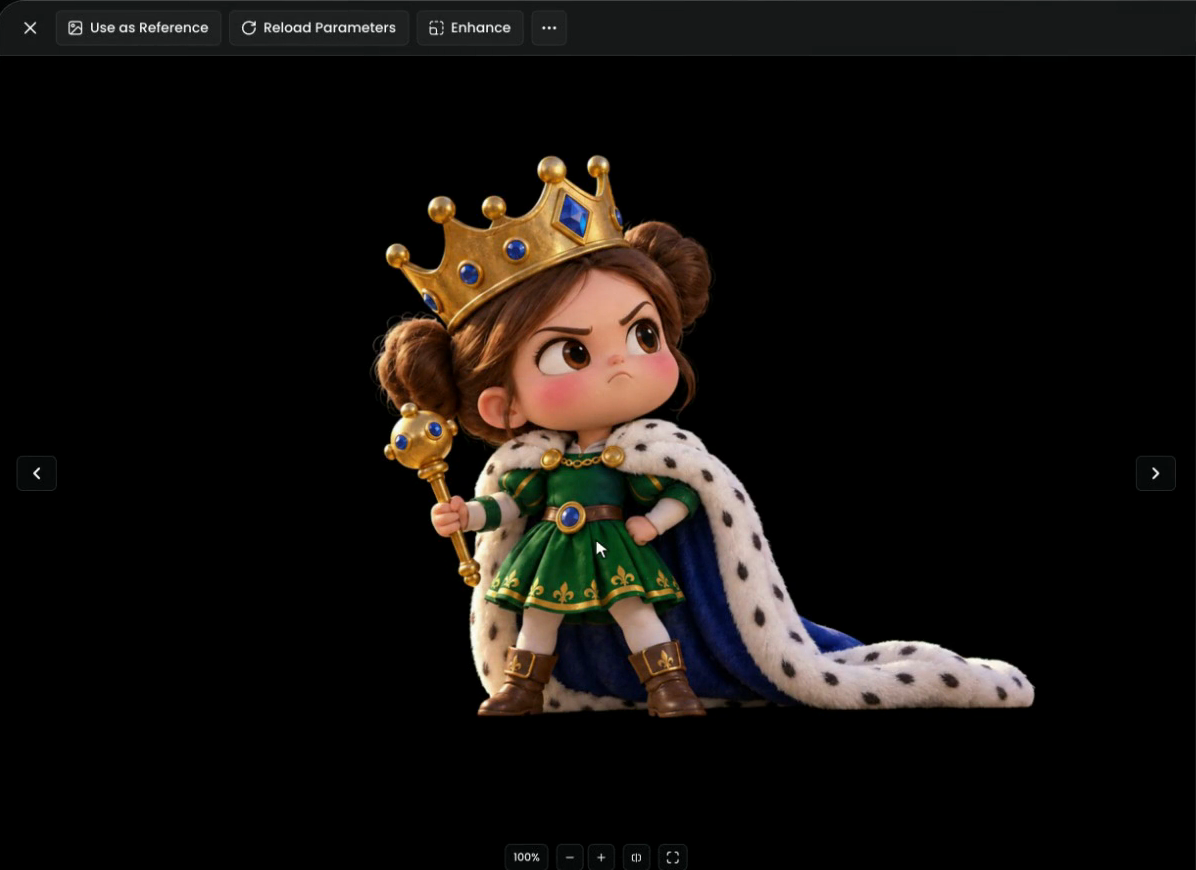
It's a new image, so your original is safe. To keep the transparent background, download it as a PNG with the download icon in the bar above the image. A JPEG has no transparency and would fill it.
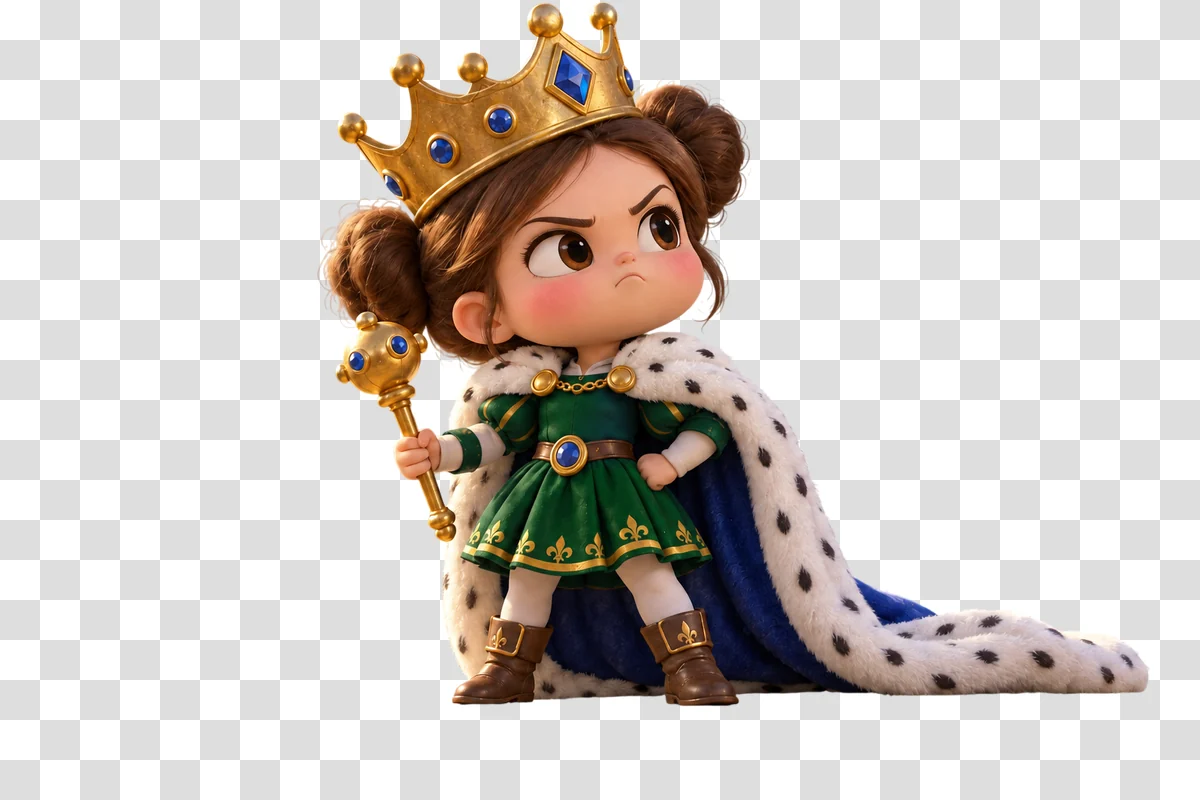
the edges are clean all round, fine details (hair, fur, thin props like the scepter) are kept, and nothing of the old background is left in gaps, such as between an arm and the body.
part of the subject is cut away, a halo of the old background lines the edges, or holes appear. Try a background-removal model from the table below, or clean the edge by hand in Retouch.
Step 4: Change only the background with a prompt
To change only her background, open the original, not the cutout, and choose Edit with Prompts from the three-dot menu. The image loads under Reference Images.
Pick GPT Image 2.6 Sunburst: it keeps the character and redraws everything around her. To find it fast, click the model name and type in the search box; here "2.6" lists GPT Image 2.6 Sunburst and GPT Image 2.6 Flare.
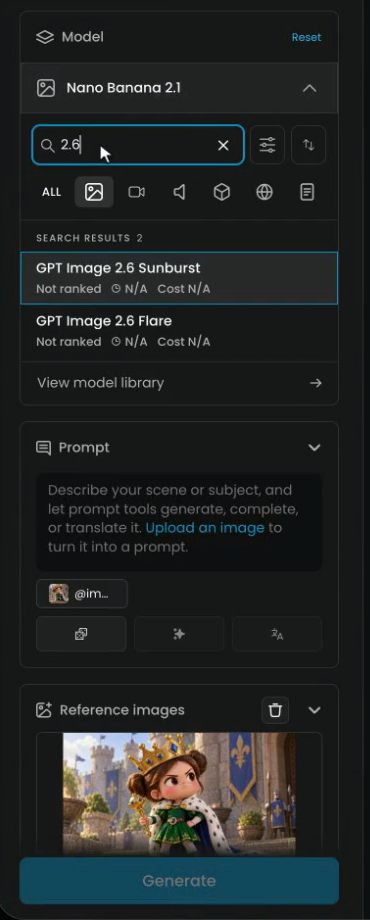
Say what stays and where she goes, in two sentences: first what to keep, then the new place, with a few details and the light.
Keep the queen exactly as she is. Replace the background with a sunny tropical beach: white sand, turquoise water, a few palm trees, bright midday light.
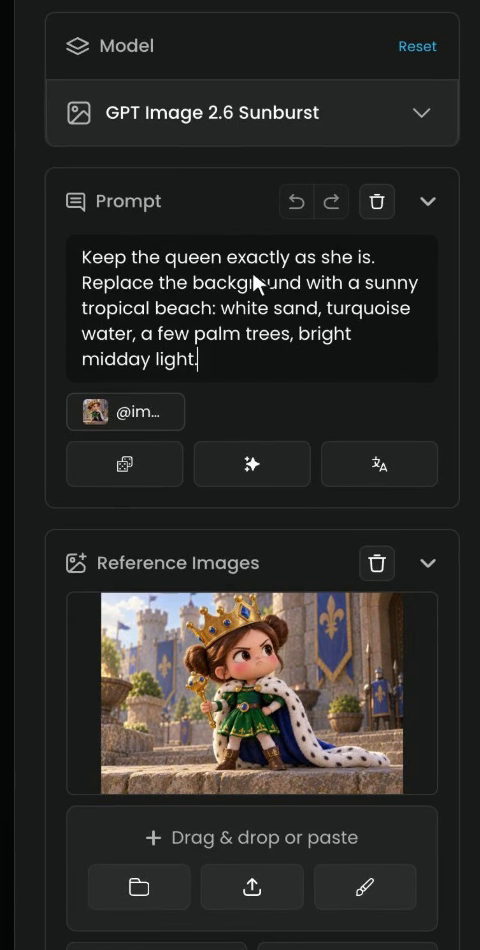
Click Generate.
Step 5: Check the new background
Same queen, new place, and the light and the shadow match the beach. Her crown, cloak and scepter are the ones from the original.
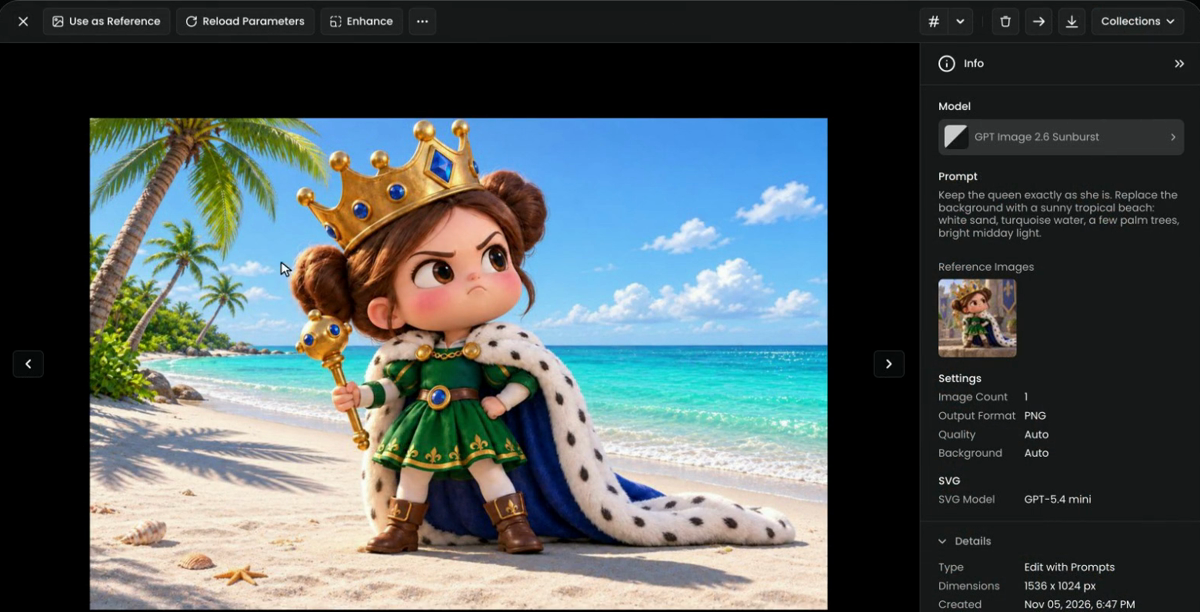
To try other places, change only the second sentence of the prompt and generate again. The first sentence, the keep line, stays the same every time, so the character stays the same too.
Step 6: Put the subject into a scene you already have
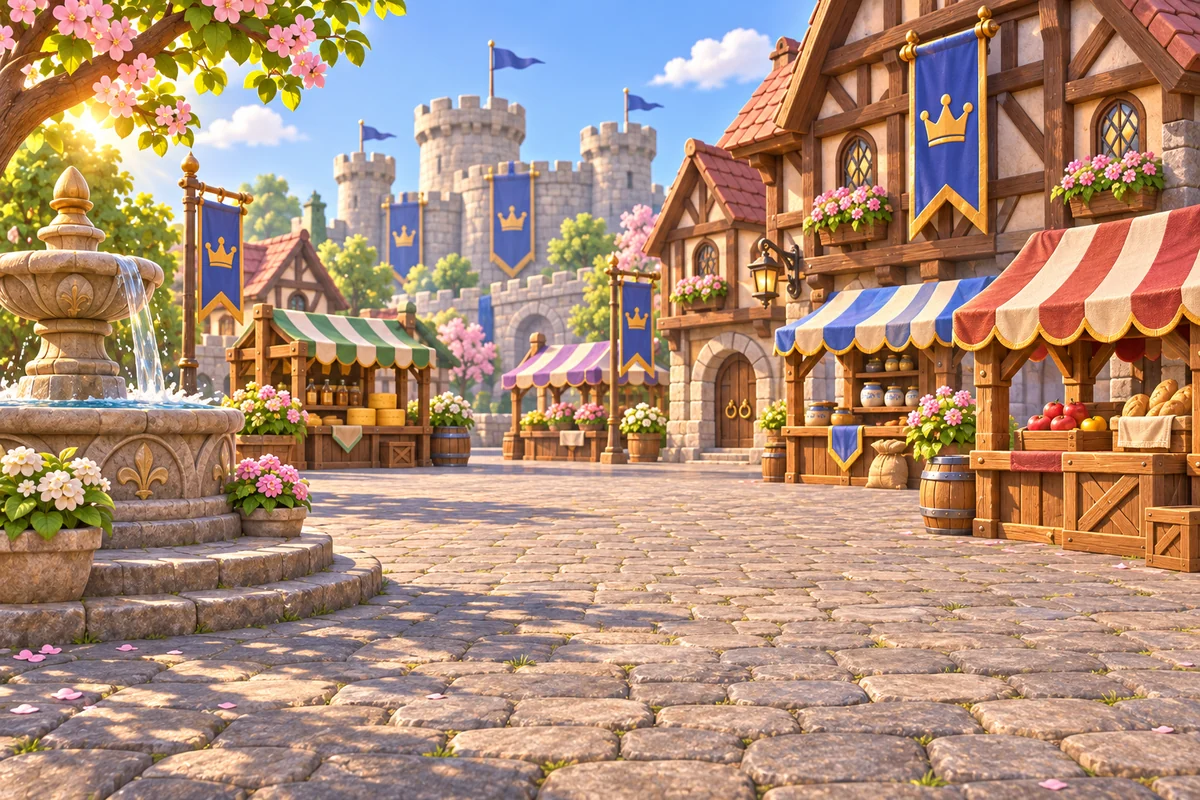
Already have the background? Give the model both images: the cutout first, then your scene.
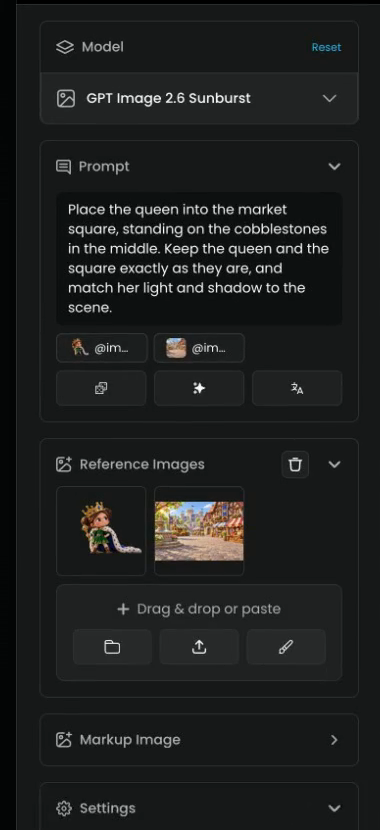
- In Edit with Prompts, clear the current reference with the trash icon next to Reference Images.
- Under Drag & drop or paste, click the folder icon to pick images from your library, choose the cutout and your scene, and click Confirm. You can also drag them in from the gallery or upload them. Put the cutout first, then the scene.
- Ask the model to place her in the scene and match the light. Say where she stands and what must not change:
Place the queen into the market square, standing on the cobblestones in the middle. Keep the queen and the square exactly as they are, and match her light and shadow to the scene.
- Click Generate.
Each reference also shows as a chip under the prompt. Using the cutout rather than the original gives the model only the subject to place, so nothing of the castle comes along with her.
Step 7: Check the composite
She's in your square, lit by the same sun, with a shadow under her feet. The square, the fountain and the stalls are the ones in your image.
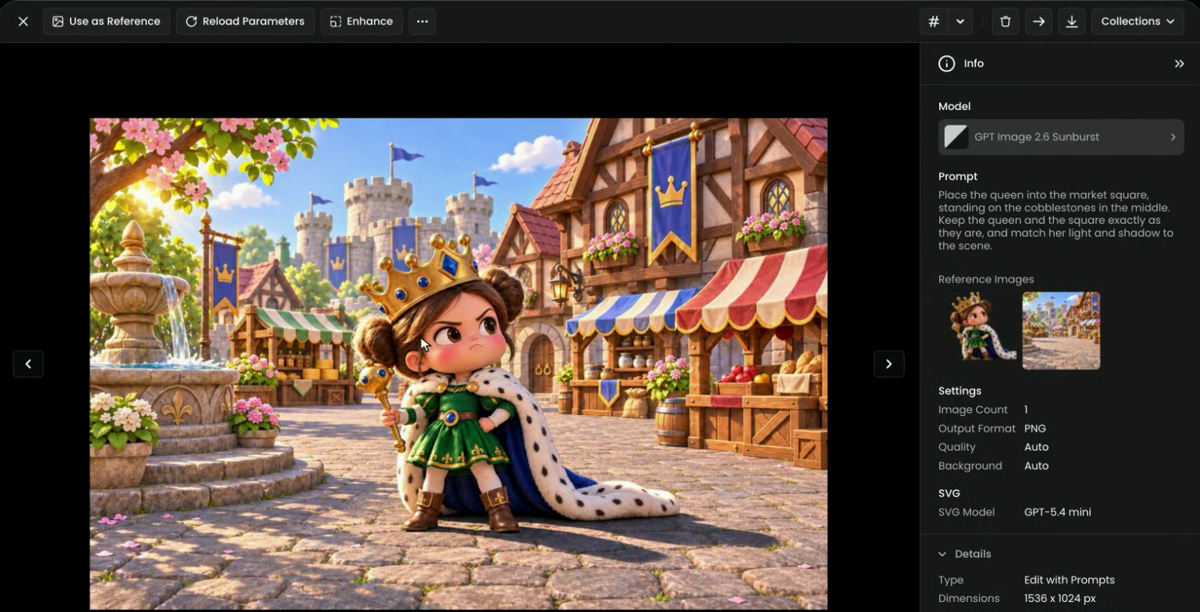
the subject is the same character, the light comes from the same side on her as on the scene, she has a shadow on the ground, her size fits the scene, and the scene itself didn't change.
she looks pasted on (no shadow, a different light direction, a hard outline), she is too big or too small for the scene, or the model redrew the scene. Say where the light comes from and how big she should be, and generate again.
Background-removal models
Remove Background is the quick way. The model library also has background-removal models you can run on their own or in a workflow. Under Capabilities, tick Remove Background to see them.
| Model | Best for | Settings |
|---|---|---|
| Photoroom Background Removal | Products and packshots | Background Color, Shadow Mode (Soft, Hard, Floating), HD Background Removal for images at 2K or larger, Keep Existing Transparency |
| 851 Labs Background Remover | Control over the edges and what goes behind | Threshold (soft to hard edges), Reverse (keep the background instead), Background Type (transparent, white, green screen, blur, overlay, mask) |
| FeyNobg | A clean transparent cutout with nothing to set | Seed only |
| Birefnet Background Removal | Fur and thin details, nothing to set | None |
| Pixelcut Background Removal | Fast cutouts, or the mask on its own | Output Format: RGBA or Alpha |
| Bria Remove Background | Portraits and fine hair | Preserve Alpha (transparent or opaque) |
| Ideogram Remove Background | Hair, fur and glass, nothing to set | None; images up to 10 MB |
Background removal is automatic: you can't pick areas to keep or remove. To fix an edge by hand, open the cutout in Retouch and use the erase brush. To remove backgrounds from many images at once, select them in your library and choose Remove Background from the three-dot menu.
Common problems
| What you see | What to do |
|---|---|
| The download has a white or black background | Download as PNG; JPEG has no transparency |
| Part of the subject is missing, or the old background shows in gaps | Try another background-removal model from the table, or erase what's left in Retouch |
| The edges look rough on hair or fur | Use a model made for fine detail, such as Birefnet or Ideogram Remove Background, on a higher-resolution source |
| Edit with Prompts changed the character | Start the prompt with the keep line ("Keep the queen exactly as she is"), and use a model that keeps the subject, such as GPT Image 2.6 Sunburst |
| The subject looks pasted into your scene | Use the cutout as the first reference, and ask for her light and shadow to match the scene |
| The model redrew your background scene | Say "keep the square exactly as it is" in the prompt |
What's next
When the image is approved, upscale it as the last step. To change other parts of an image without starting over, see Edit images.