

First results
Your first image, your first edit and your first video, one after the other, on the same character.
- Tutorial
On this page17 sections
- Before you start
- Step 1: Open the image playground
- Step 2: Choose a model
- Step 3: Write the prompt
- Step 4: Know your reference options
- Step 5: Check the settings and generate
- Step 6: Open the image page
- Step 7: Use the actions along the top
- Step 8: Tag it and file it
- Step 9: Remove the background
- Step 10: Turn the image into a video
- Step 11: Describe the movement and generate
- Step 12: Check the clip
- Seedance 2.5 drafts
- Background removal options
- Common problems
- What's next
This lesson takes one character, Queen Pip, through the three things most people do first in Scenario. You make an image with GPT Image 2.5 Sunburst, explore everything on its page, cut out its background, then turn it into a five-second video with Seedance 2.5.
Quick version
- Open Create › Images, pick a model, write a short prompt and click Generate.
- Click the result to open its page: the Info panel shows how it was made.
- Choose Remove Background, keep Transparent, and run it. The original stays as it was.
- Under Convert, choose Video, set Duration to 5s, turn on Draft, describe the movement and click Generate.
Before you start
- What you need: a Scenario account and a few credits. The cost of every run shows on its Generate button before you click.
- Where it lives: everything starts from Create in the top bar. If you haven't seen the app yet, take Your first tour first.
- Key words:
- A model is the AI that makes your image. Each one has its own strengths and its own settings.
- The prompt is the text that describes what you want.
- A reference image is a picture the model follows while it creates.
- The first frame is the picture a video starts on.
Each part of this lesson has its own detailed article: Your first image, Your first edit and Your first video.
Step 1: Open the image playground
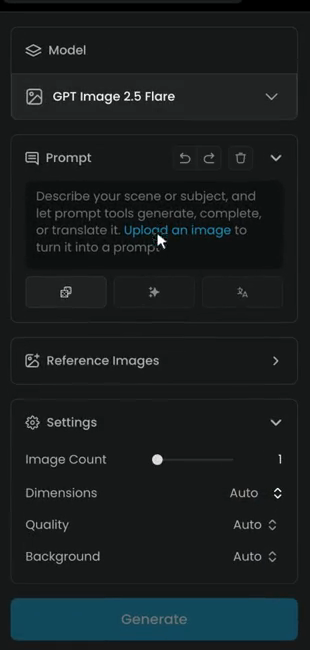
Open Create, then Images. This page is the playground, where you'll do most of your creating.
The panel on the left is where you set things up. Work through it from top to bottom: Model, Prompt, Reference Images, then Settings, with Generate at the bottom. On the right is your Session: every image you make here appears in that grid, newest first.
Step 2: Choose a model
Click the model's name to open the list. You can scroll it, search by name, filter it by type with the icons under the search box, or click View model library to compare every model with examples. Each row shows the model's rank, how many seconds a result takes and a cost guide in dollar signs. Hover a model to read what it does.
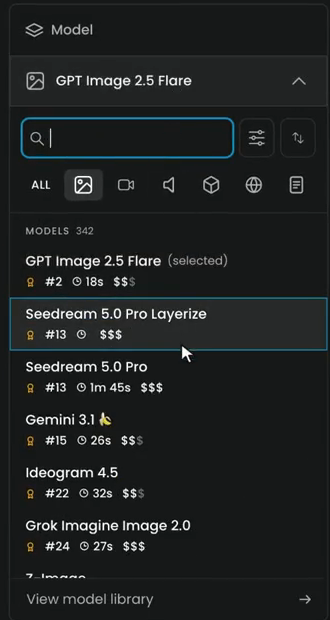
Watch the Settings change when you pick a model. The film picks Ideogram 4.5 first, which brings its own settings:
| Setting | What it does |
|---|---|
| Aspect Ratio | The shape of the image |
| Resolution | 1K or 2K. 1K keeps the cost down while you test. |
| Quality | How much detail the model renders |
| Magic Prompt | Rewrites your prompt behind the scenes to add detail |
| Image Count | How many images one click makes |
| Seed | Lets you repeat a result exactly |
| Copyright Detection | Screens the result for copyrighted content |
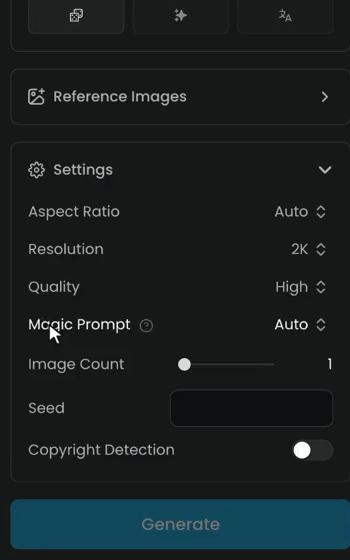
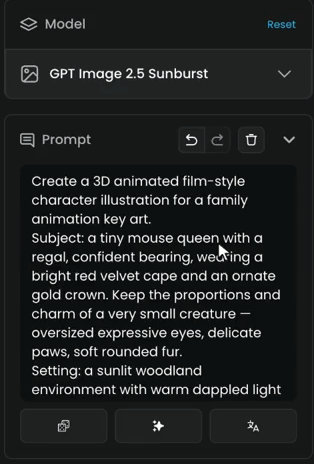
The panel always matches the model you pick. For Queen Pip, search for "Sunburst" and pick GPT Image 2.5 Sunburst, a model built for precise, detailed images.
Step 3: Write the prompt
Click into the Prompt box and describe what you want in plain words: who or what, what it looks like, where it is, and the style. The film keeps it short:
a tiny mouse queen with a red cape and a gold crown, in a sunny forest, 3D animated film style
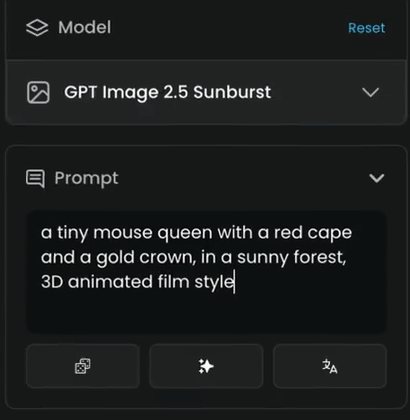
Under the box are three prompt tools:
- Generate a new prompt: writes a brand new prompt for you, based on what this model does best.
- Improve (the wand): completes and improves what you wrote.
- Translate: translates your text, so you can write in any language.
Click Improve. Your short idea becomes a full, detailed description, with the subject, setting, style and composition spelled out. You can still edit any word of it. If you don't like a change, use the undo and redo arrows in the Prompt header, or the bin to clear the box. And if you already have a picture you like, Upload an image in the empty box turns it into a prompt.
Step 4: Know your reference options
Under the prompt is Reference Images. A reference image is a picture the model follows while it creates: a character to keep consistent, a style to match, or a rough layout. Open it to see the four ways to add one: Drag & drop or paste, Select from Library, Upload and Sketch.
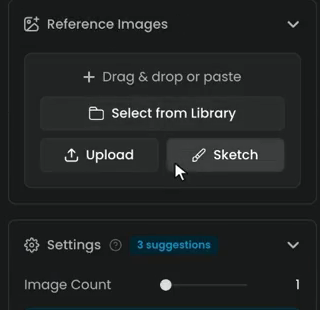
Queen Pip starts from text only, so leave it empty.
Step 5: Check the settings and generate
GPT Image 2.5 Sunburst has four settings:
| Setting | Options |
|---|---|
| Image Count | How many versions you get from one click |
| Dimensions | Auto lets the model decide, or pick a preset with its size, like 3:2 (1536 x 1024) |
| Quality | From Low to Max. Higher is sharper, but slower. |
| Background | Auto, Opaque, or Transparent if you want a cutout straight away |
The film sets Dimensions to 1536 x 1024 and leaves Quality and Background on Auto.
Scenario may also suggest settings that suit your prompt. The Settings header then shows 3 suggestions, each with Apply, and a card at the bottom lists them with Apply All. Use them or ignore them.
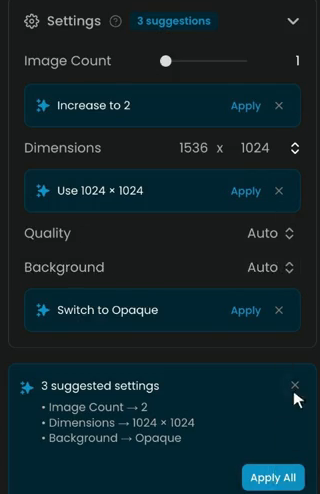
Check the cost on the Generate button, then click it. A few seconds later, the image appears at the top of your session. Everything you make is saved to your project automatically.
Above the grid, the session filters (Type, All, Date, Tags, Models, Collections and Reset) help you find earlier results. Next to Session, Explore shows examples with their prompts, so you can borrow ideas.
Step 6: Open the image page
Click Queen Pip to open her full size. This is the image page, and everything you can do with an image starts here.
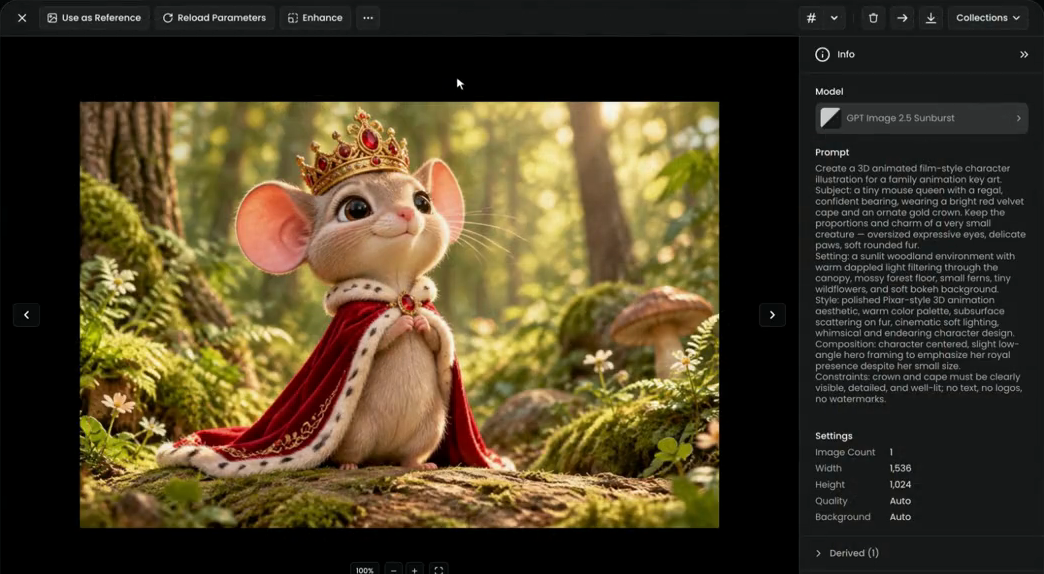
- Move between images: use the arrows, or the strip along the bottom. The double arrow in the corner hides the strip.
- Zoom: under the image, + and - zoom in to check details, and the percentage fits it back. The last button shows it full screen.
- The Info panel, on the right, shows exactly how she was made:
- the Model card, which opens the model's page
- the full Prompt and every Setting
- Derived, every image made from this one, with View All
- Details: type, size, when and by whom, what it cost, and its Asset ID, the unique name of this file
- Convert, Edit and Tags further down
Step 7: Use the actions along the top
Along the top left are the actions:
- Use as Reference sends the image into a playground as a guide.
- Reload Parameters loads the same model, prompt and settings, so you can recreate it or make variations.
- Enhance upscales it into a bigger, sharper version.

The three dots next to them hold every tool for this image: Convert to 3D, Convert to Video, Edit with Prompts, Retouch, Expand, Remove Background, Pixelate, Vectorize, Find Similar Content, Run Quality Gate and Run IP Detection, which screens the image before you use it. The same conversions and edits are in the Convert and Edit sections of the Info panel.
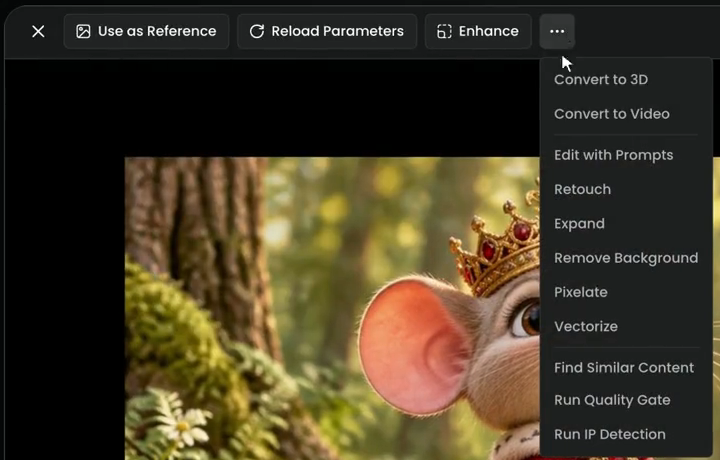
On the top right:
- # copies the Asset ID, which you use with the API, the Scenario MCP and workflows. The arrow next to it opens Copy Asset ID and Copy Link.
- The bin deletes the image.
- The arrow transfers it: the image is copied into another project and the original stays where it is.
- The download button saves it to your computer.
Step 8: Tag it and file it
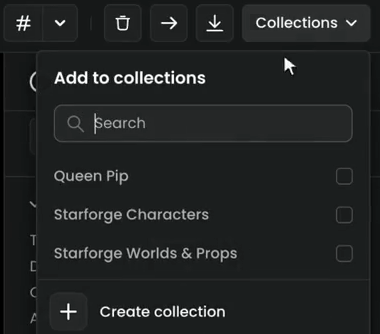
At the bottom of the Info panel, type a tag in Add a tag, like Queen Pip, and press Enter. Tags are short labels you can filter by later.
Collections, at the top right, files the image in a folder. Tick a collection in Add to collections, or click Create collection, and the image is added straight away.
Step 9: Remove the background
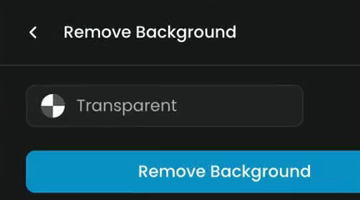
Choose Remove Background, from the Edit section of the Info panel or from the three dots. A small panel opens. Keep it on Transparent, so only the character remains, and click Remove Background. Its cost shows on the button.
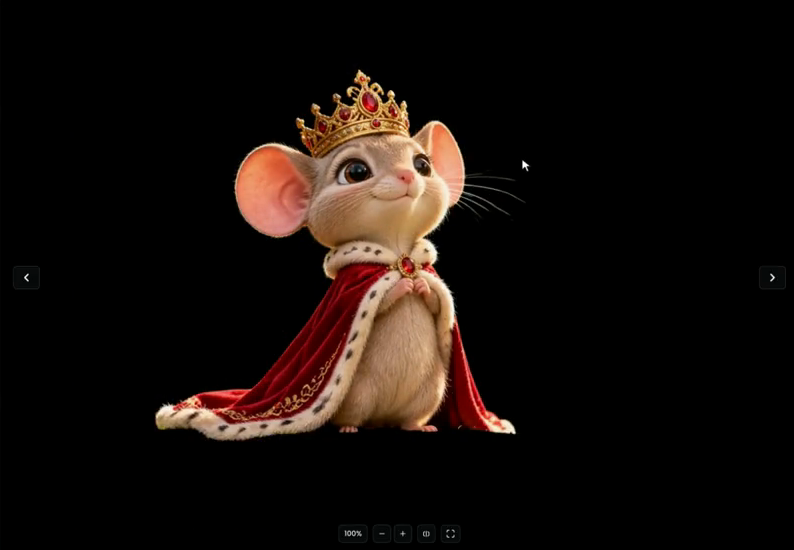
A few seconds later the background is gone. The cutout is saved as a new image, made with Photoroom Background Removal, and the original stays exactly as it was. That is true of every edit: you never lose your original.
Step 10: Turn the image into a video
Go back to the original Queen Pip. In the Info panel, under Convert, choose Video (or Convert to Video in the three dots). Scenario opens the video playground with the image in First Frame, so the video starts exactly on this picture. To end on a set picture too, add one under Last Frame.
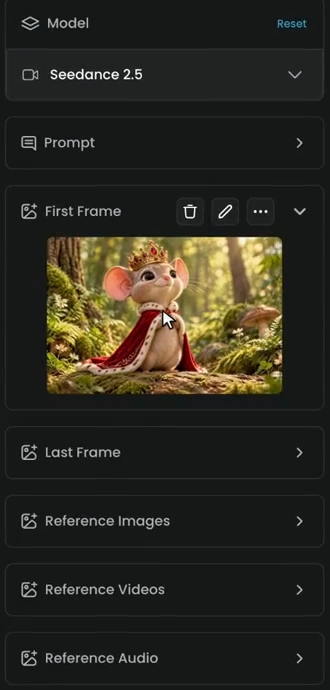
It is the same layout as the image playground, with video settings. With Seedance 2.5 as the model, open Settings:
| Setting | What the film sets |
|---|---|
| Duration | 5s |
| Resolution | 720p (ignored while Draft is on) |
| Aspect Ratio | Auto |
| Generate Audio | Off, for now |
| Output Format | MP4 |
| Draft | On |
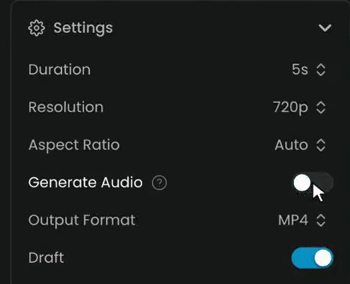
Draft makes a 480p preview, quicker and cheaper while you test. If you like it, you can finish it in 1080p later without generating it again.
Step 11: Describe the movement and generate
Open Prompt. For a video, describe what happens, not what things look like: the first frame already shows that. One clear action is often enough:
she raises her scepter, and her cape lifts in the wind
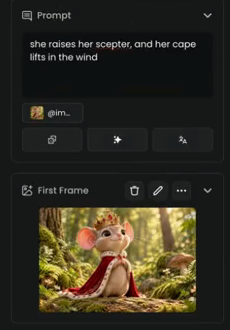
Click Generate. Videos take a minute or two. You can keep working while it runs, and it lands in your session when it's ready.
Step 12: Check the clip
Open the clip. Five seconds of Queen Pip, from one image and one sentence. A banner above it reads 480p draft, 6 days left to finalize in 1080p, with a Finalize in 1080p button.
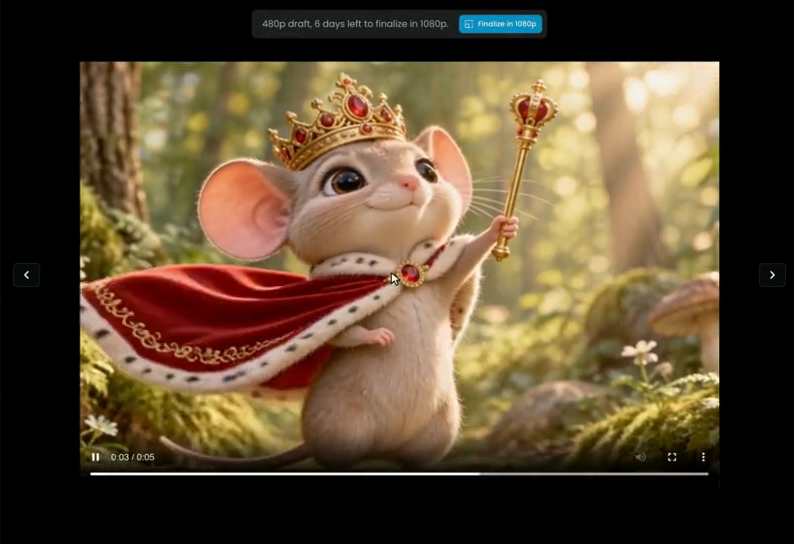
the clip starts on your image, the character stays the same from the first frame to the last, and the movement is the one you described.
the face or costume changes, limbs or props warp, or the motion ignores the prompt. Simplify the prompt to one action and generate another draft.
Seedance 2.5 drafts
Seedance 2.5 infers what to do from what you give it: a prompt alone, a first frame, a first and a last frame, or reference images, videos and audio.
- With Draft on, the output is always 480p and the Resolution setting is ignored.
- To finish a draft, open it and click Finalize in 1080p. This opens the playground with Seedance 2.5 Draft Complete and your draft loaded. Click Generate to get the 1080p version, delivered as a MOV file.
- A draft can be finalized for 7 days. After that, generate a new draft.
- Resolution offers 480p, 720p and 1080p when Draft is off. There is no 4K: upscale the approved clip if you need more.
Background removal options
- Transparent removes the background completely and keeps an alpha channel. A solid color option replaces it with a color you pick.
- It works best on high-resolution images (1K or 2K) with a clear contrast between the subject and the background.
- It is fully automatic: you can't choose areas to keep. To erase parts by hand, use Canvas.
- To cut out many images at once, select them in your library and choose Remove Background from the three dots in the bottom bar.
Common problems
| What you see | What to do |
|---|---|
| The settings changed after you picked a model | That's expected: every model has its own. Check them again before you generate. |
| The image doesn't match your idea | Add who, what, where and style to the prompt, or click Improve, then generate again. |
| The cutout has rough edges or lost fine detail | Start from a sharper, higher-resolution image with a clear contrast between subject and background. |
| The video changes the character | Keep the prompt to the movement only, one action at a time, and use the image as First Frame. |
| The Finalize in 1080p button is gone | The draft is more than 7 days old. Generate a new draft, then finalize it. |
| You can't find your image again | Use the session filters, or open Assets and filter by type, tag or model. |
What's next
In Your studio in Scenario, you choose a model in the Model Hub, run an App and a workflow on Queen Pip, file and share your work, and let Genie set up a new image for you. For every image setting, see Image settings explained.