

Work as a team
Share your team's work and workflows, give the Agent shared rules, and bring people in.
- Tutorial
On this page14 sections
- Before you start
- Step 1: Group assets in a collection
- Step 2: Tag many assets at once
- Step 3: Share a workflow, and lock it
- Step 4: Move a workflow to another project
- Step 5: Put Apps on the project's Home page
- Step 6: Write organization instructions for the Agent
- Step 7: Add project instructions
- Step 8: Add your own instructions
- Step 9: Review the Agent's memory
- Step 10: Bring your team in
- Step 11: See how it's going
- Common problems
- What's next
The last lesson of Admin and governance is about working as a team. In the Starforge Games organization it groups and labels the team's assets with collections and tags, shares a workflow safely, gives the Agent instructions at three levels, then brings everyone in and watches how it goes.
Quick version
- Group a job's assets in a Collection, and label them with tags, many at once.
- Share a workflow in its project; Lock Workflow so people can run it but not change it; export and import it to move it.
- Turn a workflow into an App, and put Apps on the project's Home page with Customize Home.
- Write Organization Instructions, Project Instructions and Personal Instructions for the Agent, under Agent in Settings.
- Invite your team in one go, set up projects the way you work, and check Analytics and Activity Trail.
Before you start
- Roles. Organization instructions need an organization Admin. Project instructions need a project Owner or an Admin. Anyone can write their own instructions and lock or duplicate a workflow they can edit.
- What's shared where. Collections, tags and workflows belong to a project: everyone in the project sees them. Agent memory is never shared.
- The earlier lessons set up the pieces this one uses: projects and roles in Set up your workspace, invitations in People and access.
Step 1: Group assets in a collection
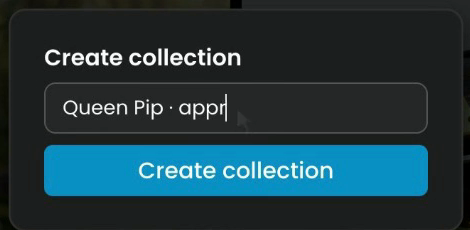
Collections group assets in one place: for example, a job's approved references, or its finals. Open Collections at the top right of the top bar and click New Collection, or create one on the spot from an asset's Collections menu: type a name and click Create collection.
To add many assets at once, select them in the gallery and choose the collection from Collections in the bar at the bottom. A collection only groups: deleting it leaves the assets in your library.
Step 2: Tag many assets at once
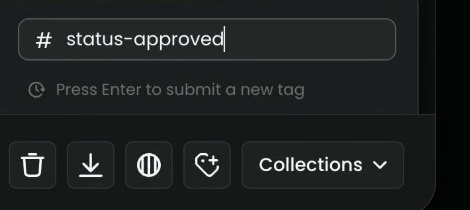
Tags label your assets, so anyone can find them with search (⌘+F) or the Tags filter. Select several assets in the gallery, open the tag field in the bar at the bottom, type the tag and press Enter: it's added to every selected asset. Use dashes instead of spaces, for example status-approved, and agree on a short list of tags as a team.
Step 3: Share a workflow, and lock it
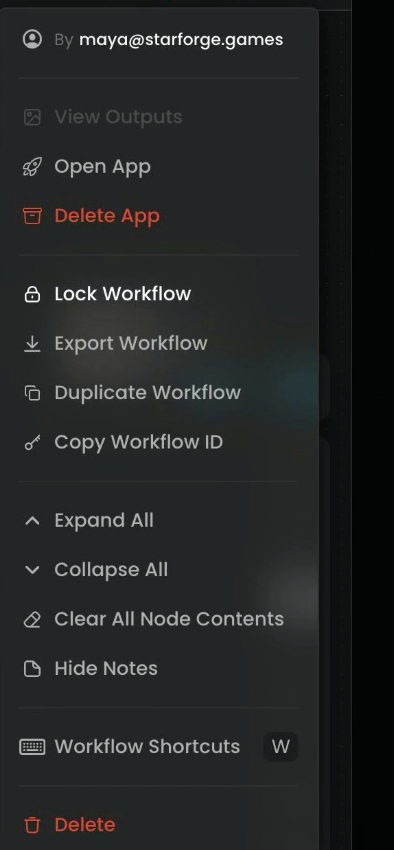
A workflow is shared with everyone in its project. Open it and click the ... menu at the top right of the editor:
| Menu item | What it does |
|---|---|
| Lock Workflow | People can still run it, but not change it |
| Export Workflow | Downloads it as a file, to import in another project |
| Duplicate Workflow | Makes your own copy, to try changes without touching the original |
| Copy Workflow ID | Copies its ID, for the API |
A locked workflow opens in run-only mode ("You're in run-only mode"), with Switch to Edit Mode for those who may change it.
Step 4: Move a workflow to another project
To use it in another project, export it, then import it there: switch to the other project with the pill, open Workflows and click Import at the top right. It comes back exactly as you built it, with all its nodes, connections and settings.

Step 5: Put Apps on the project's Home page
A workflow can also become an App: a simple form with only the inputs and outputs you choose, so anyone can run it without seeing the nodes. Click Edit App at the top of the editor to set it up.
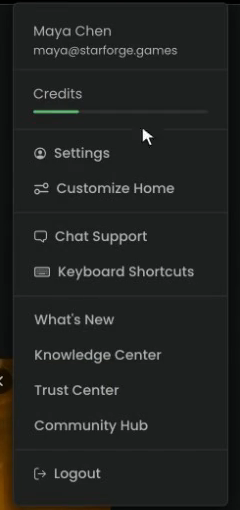
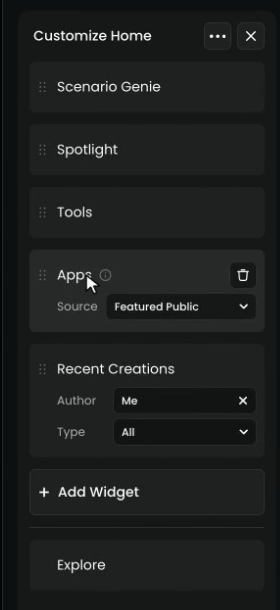
Then Customize Home can put Apps on the project's Home page. Open your account menu at the top right and choose Customize Home. The panel lists the Home page's sections (Scenario Genie, Spotlight, Tools, Apps, Recent Creations, Explore). Set Apps to the project's own apps with Source, drag sections to reorder them, or click Add Widget for another one.
Step 6: Write organization instructions for the Agent
The Agent works from two kinds of context:
- Instructions, which people write: rules it always follows.
- Memory, which it learns as you work.
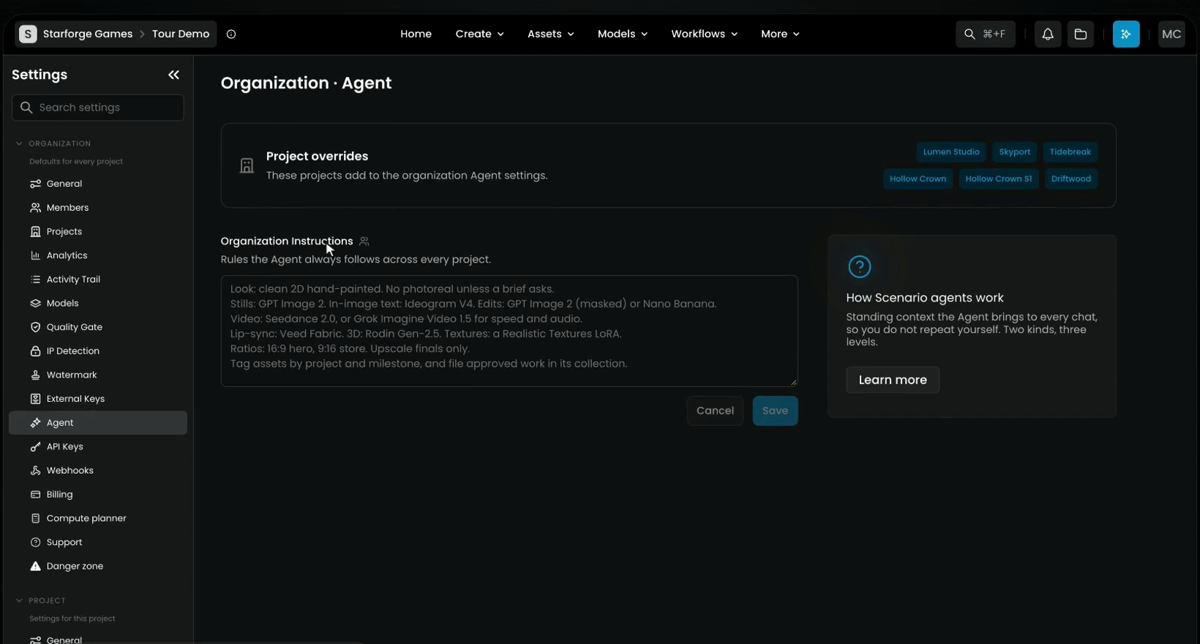
Organization instructions apply in every project, and only admins can edit them: for example, your brand voice. Open Organization › Agent and write them in Organization Instructions ("Rules the Agent always follows across every project"), then click Save. Project overrides, at the top, lists the projects that add their own.
Keep them short and stable, one rule per line. The film's example:
Look: clean 2D hand-painted. No photoreal unless a brief asks.
Stills: GPT Image 2.5 Sunburst. In-image text: Ideogram 4.5. Edits: GPT Image 2.5 (masked) or Nano Banana 2.1.
Video: Seedance 2.5, or Grok Imagine Video 1.5 for speed and audio.
Lip-sync: Veed Fabric. 3D: Rodin Gen-2.5. Textures: a Realistic Textures LoRA.
Ratios: 16:9 hero, 9:16 store. Upscale finals only.
Tag assets by project and milestone, and file approved work in its collection.
Step 7: Add project instructions
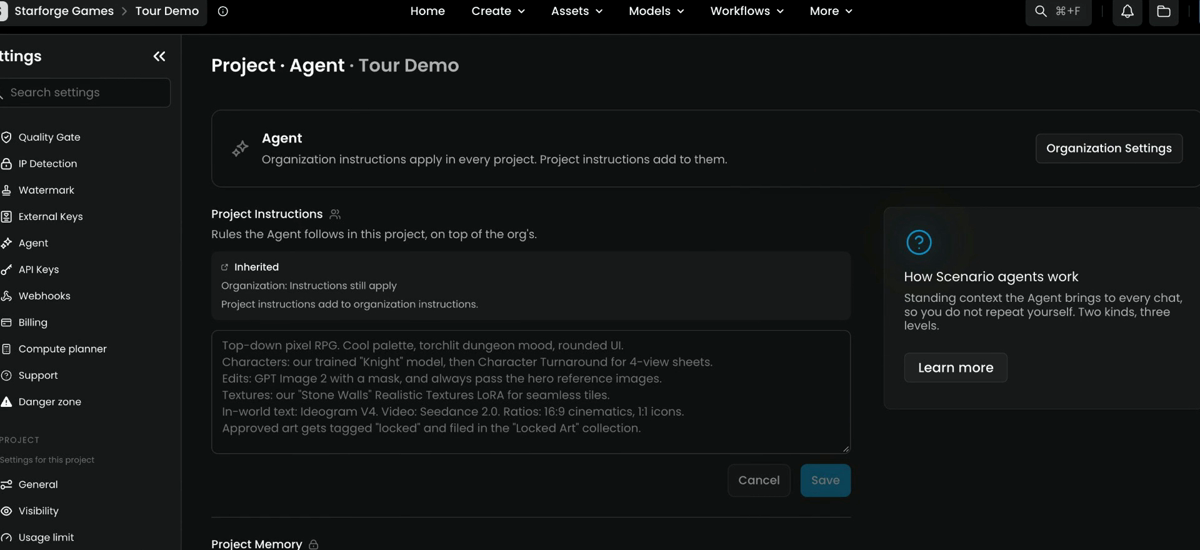
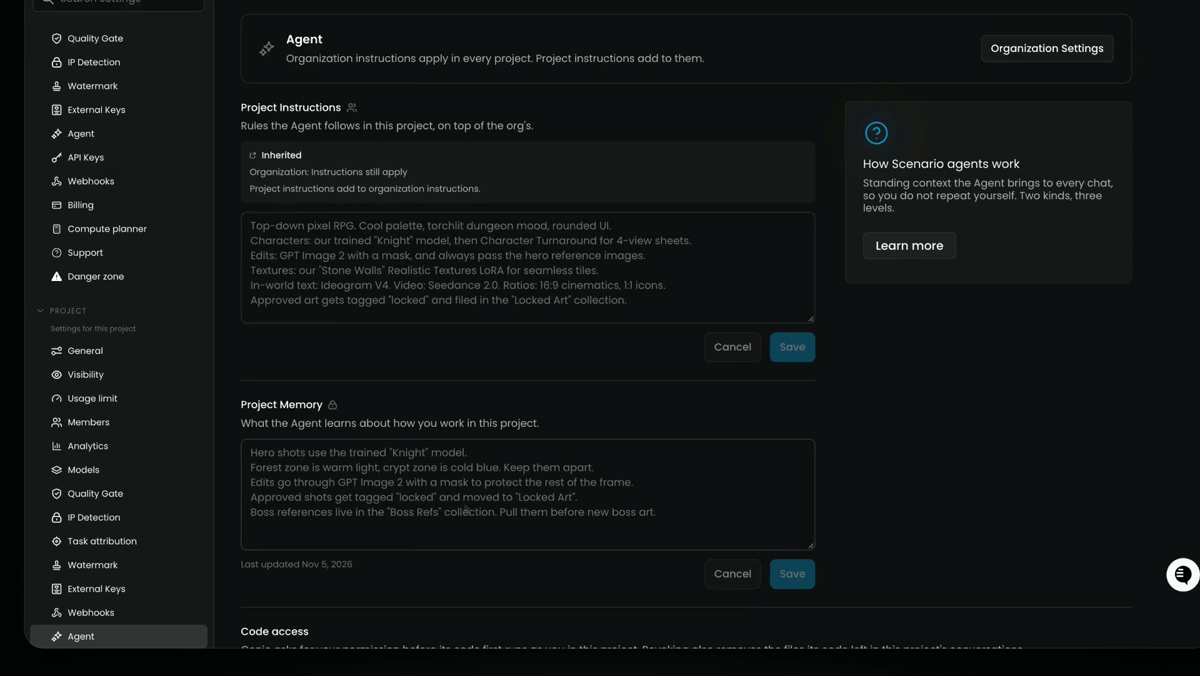
Project instructions add to them for one project: the art direction, the models to use, how to write prompts. Open Project › Agent and write them in Project Instructions ("Rules the Agent follows in this project, on top of the org's"). The Inherited note reminds you that the organization's instructions still apply.
Write them like the brief you'd give a new teammate:
Top-down pixel RPG. Cool palette, torchlit dungeon mood, rounded UI.
Characters: our trained "Knight" model, then Character Turnaround for 4-view sheets.
Edits: GPT Image 2.5 with a mask, and always pass the hero reference images.
Textures: our "Stone Walls" Realistic Textures LoRA for seamless tiles.
In-world text: Ideogram 4.5. Video: Seedance 2.5. Ratios: 16:9 cinematics, 1:1 icons.
Approved art gets tagged "locked" and filed in the "Locked Art" collection.
Step 8: Add your own instructions
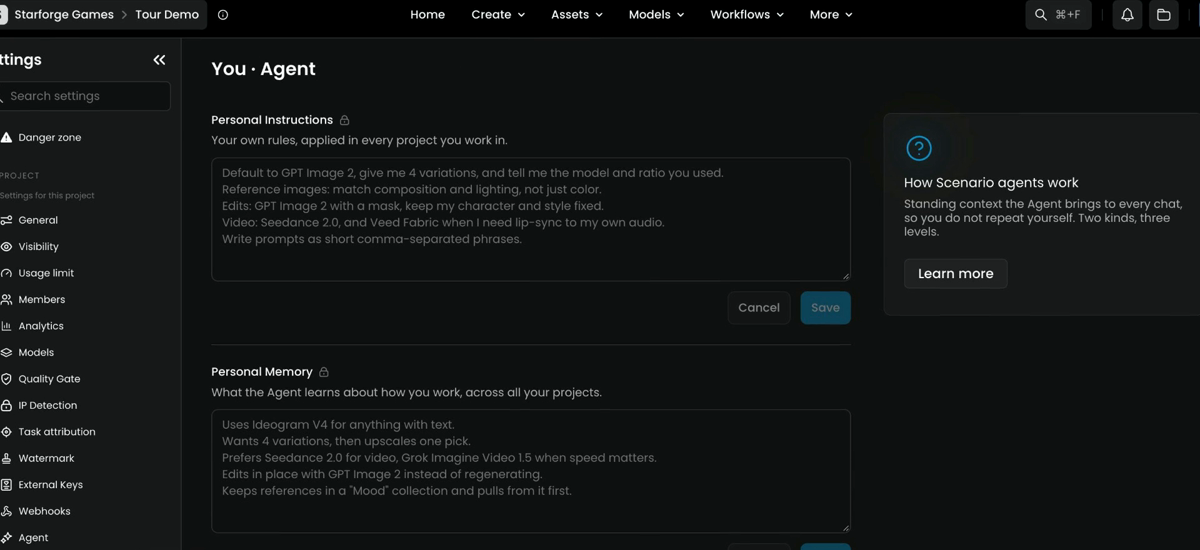
Each person can add their own instructions too, under You › Agent › Personal Instructions ("Your own rules, applied in every project you work in").
When rules overlap, the more specific one wins: your own over the project's, the project's over the organization's. Instructions also win over memory.
Step 9: Review the Agent's memory
Memory is private to each person: there's no shared memory for the organization or a project. It comes in two parts:
- Personal Memory, under You › Agent: what the Agent learns about how you work, across all your projects.
- Project Memory, under Project › Agent: what it learns about how you work in this project.
You can review it, edit it and save it, or ask the Agent to forget something.
| Source | Who writes it | Where | Who it applies to |
|---|---|---|---|
| Organization Instructions | Organization admins | Organization › Agent | Everyone, in every project |
| Project Instructions | Project owners and admins | Project › Agent | Everyone in the project |
| Personal Instructions | You | You › Agent | You, in every project |
| Personal Memory | The Agent, and you | You › Agent | Only you, every project |
| Project Memory | The Agent, and you | Project › Agent | Only you, in this project |
Step 10: Bring your team in
To invite many people at once, paste their emails into Invite Members (under Organization › Members), and give them a role and their projects in one go. For long lists, use Import CSV. People and access shows each screen.
Projects can follow however your team works:
- One shared project for a small team.
- One project per client or game, so each team sees only its own work.
- A sandbox for trying things out, with new models and a spend cap.
Step 11: See how it's going
Analytics and the Activity Trail, under Organization in Settings, show how it's going: who's active, what they use, and what they make. Spend and usage walks through both.
Common problems
| What you see | What to do |
|---|---|
| Someone changed a shared workflow by mistake | Lock it with Lock Workflow; people can still run it |
| A workflow is missing in another project | Workflows don't move on their own; export it and Import it there |
| You want to try changes on a team workflow | Duplicate Workflow and work on your copy |
| The Agent ignores the brand rules | Put them in Organization Instructions; check that a project or personal rule doesn't override them |
| The Agent remembers something wrong | Edit your Personal Memory or Project Memory, or ask it to forget |
| Teammates can't find approved work | Agree on tags and a collection per job, and add both to the instructions |
What's next
That's Admin and governance. You've set up your organization, controlled access and spend, protected your content, and brought your team in. Go back to Set up your workspace any time you need the map, and now go and build something together.