

Keep a character or product consistent with reference to video
Make a character sheet, pass it with a place as reference images, say what each one is, and describe the action and the camera.
- Guide
- Step 1 Learn
On this page11 sections
- Before you start
- Step 1: Make a character sheet
- Step 2: Check the sheet
- Step 3: Add the references to the video panel
- Step 4: Say which image is which, then direct the shot
- Step 5: Set the aspect ratio and generate
- Step 6: Check the result
- Which models take reference images
- How to write a reference prompt
- Common problems
- What's next
A video model redraws your character in every frame, so a face, an outfit or a product can drift as the camera moves. This lesson keeps one character, Kiko, the same from every angle: first you make a character sheet with GPT Image 2.6 Sunburst, then you pass the sheet and a place to Minimax H3 as reference images and get a rooftop chase where she stays on-model running, in the air and close up.
Quick version
- Make a character sheet: one image with the front, the back, the side and a close-up of the head.
- Open Create › Videos, leave First Frame empty, and add the sheet (and a place) to Reference Images.
- In the prompt, say which image is which, then describe the action and the camera.
- Choose the Aspect Ratio yourself, then click Generate.
- Pause on frames and compare the character with the sheet.
Before you start
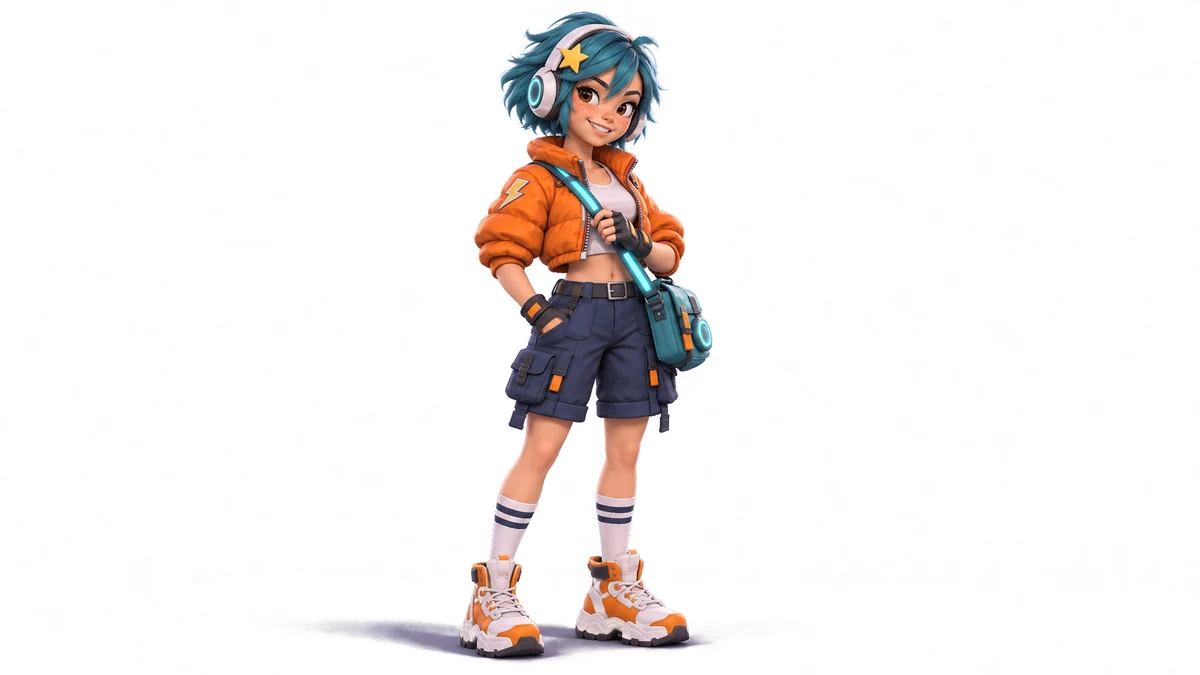
- One approved image of the character. Here it's Kiko, a stylized 3D game character on a white background. Approve the design first: the video can only be as consistent as the image it copies.
- An image of the place, if you have one. Here it's a red-tiled rooftop town with floating islands and a waterfall. Without it, the model invents the setting from the prompt.
- Reference images or a first frame, not both. A first frame fixes the opening shot. Reference images tell the model what the character and the place look like, and leave the composition to the prompt. On the models in this lesson the two can't be combined, so First Frame stays empty.
- What a character sheet is for. One front view leaves the model to guess the back and the side. A sheet that shows every side gives it something to copy when the camera swings around.
Step 1: Make a character sheet
Open the image panel (Create › Images). The film uses GPT Image 2.6 Sunburst.
- Add the approved character to Reference Images: drag and drop or paste it, or choose it from your library.
- Write a prompt that asks for four views in one row: front, back, side, and a close-up of the head. Name the character's details one by one so each panel keeps them, and say where details sit (here the star clip and the lightning patch are on her right side, so the side view facing right hides them).
- Click Generate.
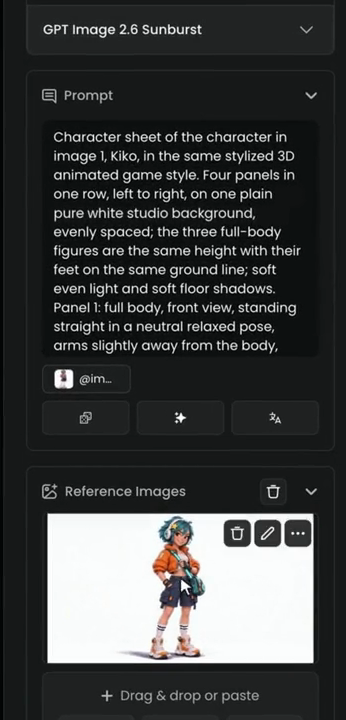
The prompt the film uses:
Character sheet of the character in image 1, Kiko, in the same stylized 3D animated game style. Four panels in one row, left to right, on one plain pure white studio background, evenly spaced; the three full-body figures are the same height with their feet on the same ground line; soft even light and soft floor shadows. Panel 1: full body, front view, standing straight in a neutral relaxed pose, arms slightly away from the body, looking at the camera. Panel 2: full body, back view, the same pose, showing the back of the hair, the headphones band, the back of the orange puffer jacket, the bag strap across the back and the bag at her left hip. Panel 3: full body, side view in profile facing right, the same pose (the star clip and the lightning patch are on her right side, so they are hidden in this view). Panel 4: a close-up of her head and the top of her chest, front view, slight smile. Keep exactly the same character in every panel: face, brown eyes, freckles, short messy teal hair, yellow star clip on her right side, white headphones with glowing teal rings, cropped orange puffer jacket with the lightning patch on the right sleeve, white top, navy cargo shorts, fingerless black gloves, teal crossbody bag with a glowing teal strap, white socks with two navy stripes, chunky orange and white sneakers. No text, no labels, no numbers, no logos, no UI.
Step 2: Check the sheet
Open the result. The sheet now shows Kiko from every side.
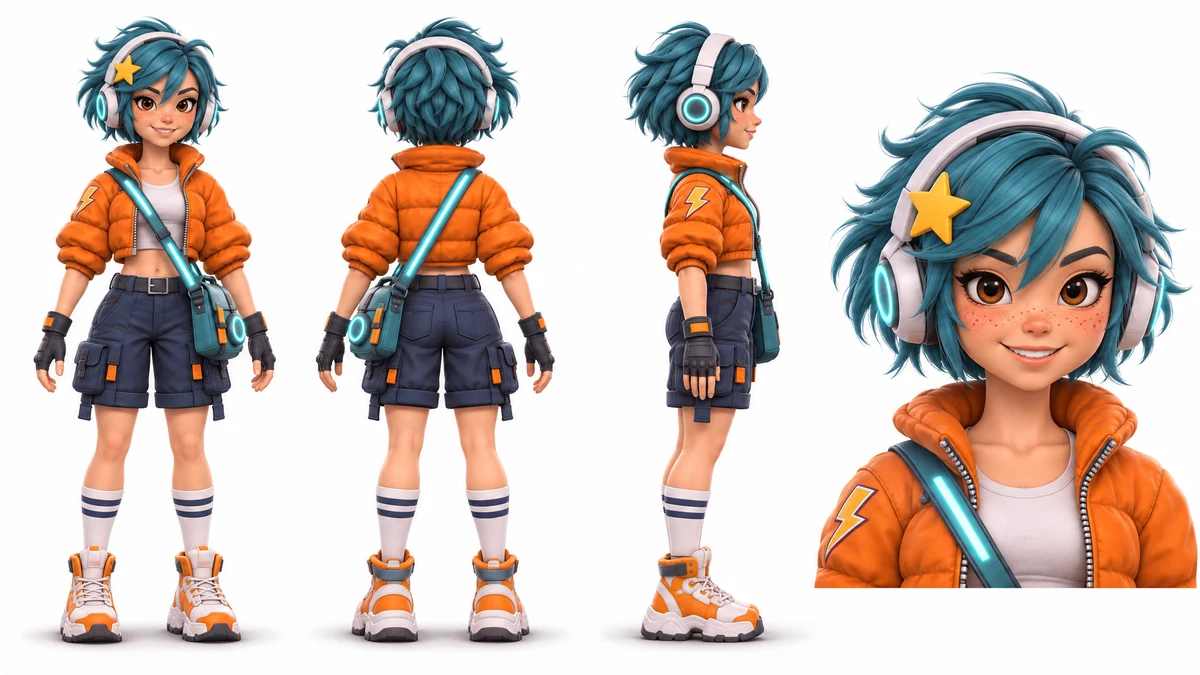
Before you use it, compare each panel with the original image: the same face, hair, jacket, bag and sneakers, the details on the correct side, and the three full-body figures the same height. Fix the sheet now if something is wrong. Whatever is wrong in the sheet will be wrong in every video made from it.
Step 3: Add the references to the video panel
Open Create › Videos and choose Minimax H3 as the model (see Generate video for how to pick a model in the library).
- Leave First Frame empty.
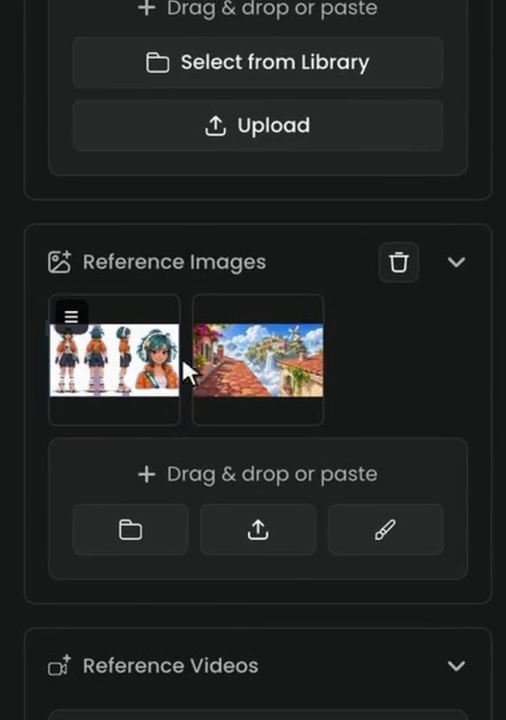
- Under Reference Images, add the character sheet.
- Add more references if you need them. Here the second image is the environment, the rooftop town.
You can remove a card with its trash icon. The order matters: the first one you add is image 1, the second is image 2.

Step 4: Say which image is which, then direct the shot
Start the prompt by naming each reference: image 1 is Kiko, and image 2 is the place. Then describe the action and the camera, beat by beat, and end with the sound. Repeat at the end that there is one character, the same as in image 1, from start to end.
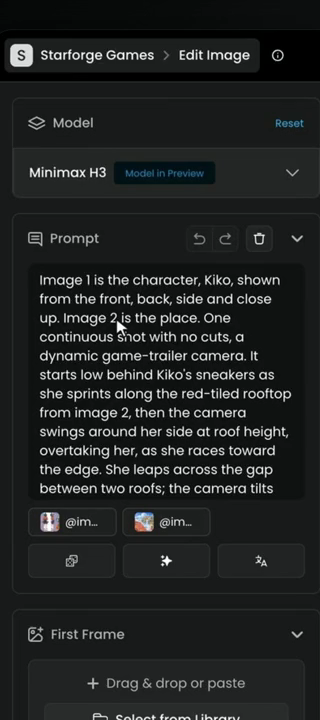
The prompt the film uses:
Image 1 is the character, Kiko, shown from the front, back, side and close up. Image 2 is the place. One continuous shot with no cuts, a dynamic game-trailer camera. It starts low behind Kiko's sneakers as she sprints along the red-tiled rooftop from image 2, then the camera swings around her side at roof height, overtaking her, as she races toward the edge. She leaps across the gap between two roofs; the camera tilts up from below her, so we see her mid-air against the blue sky, the floating islands and the waterfall. She lands in a crouch on the next roof, and the camera pushes in to her face as she looks up and grins. One character only, the same Kiko as in image 1 from start to end. Sound: quick footsteps on clay tiles, rushing wind, a landing thud, distant birds. No music, no speech.
The camera moves around her on purpose: from behind, from the side, from below and close up. That is the test of the sheet.
Step 5: Set the aspect ratio and generate
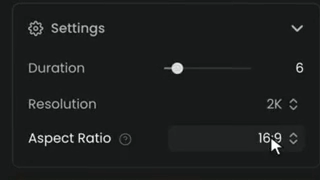
Open Settings:
- Duration: 6 seconds here.
- Resolution: 2K here. Use a lower resolution for test takes.
- Aspect Ratio: choose it yourself. With references, there's no first frame to set the shape of the clip. The film switches it to 16:9.
The price shows on the Generate button. Click Generate.
Step 6: Check the result
Open the clip. The Info panel on the right keeps the model, the prompt, both reference images and the settings, so you can run it again with Reload Parameters.
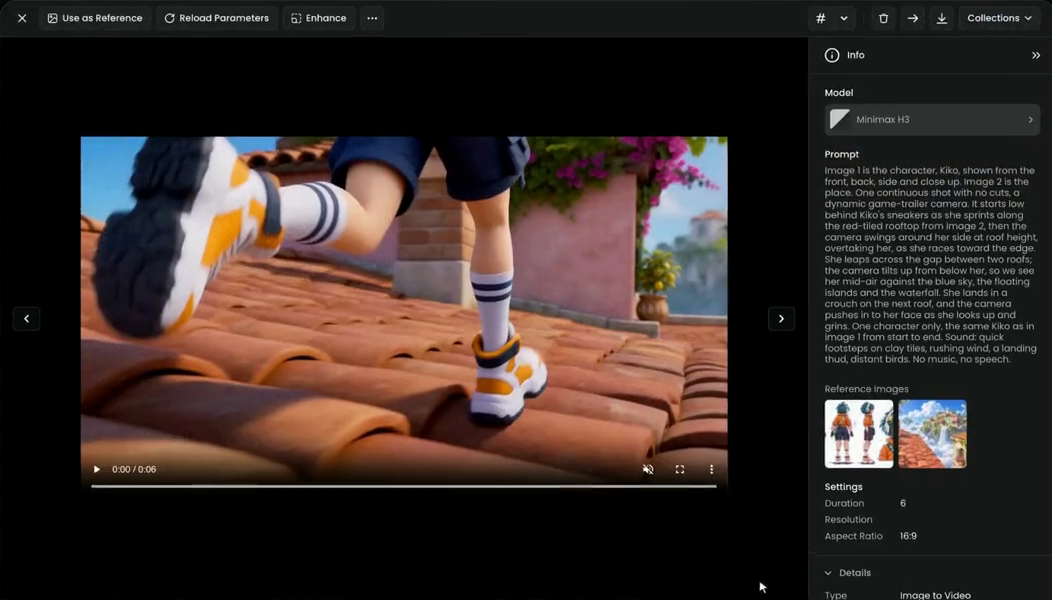
Kiko stays the same from every angle: running, in the air, and close up. Don't judge it from the thumbnail. Pause on the frames where the camera shows a new side of her, and compare each one with the sheet.
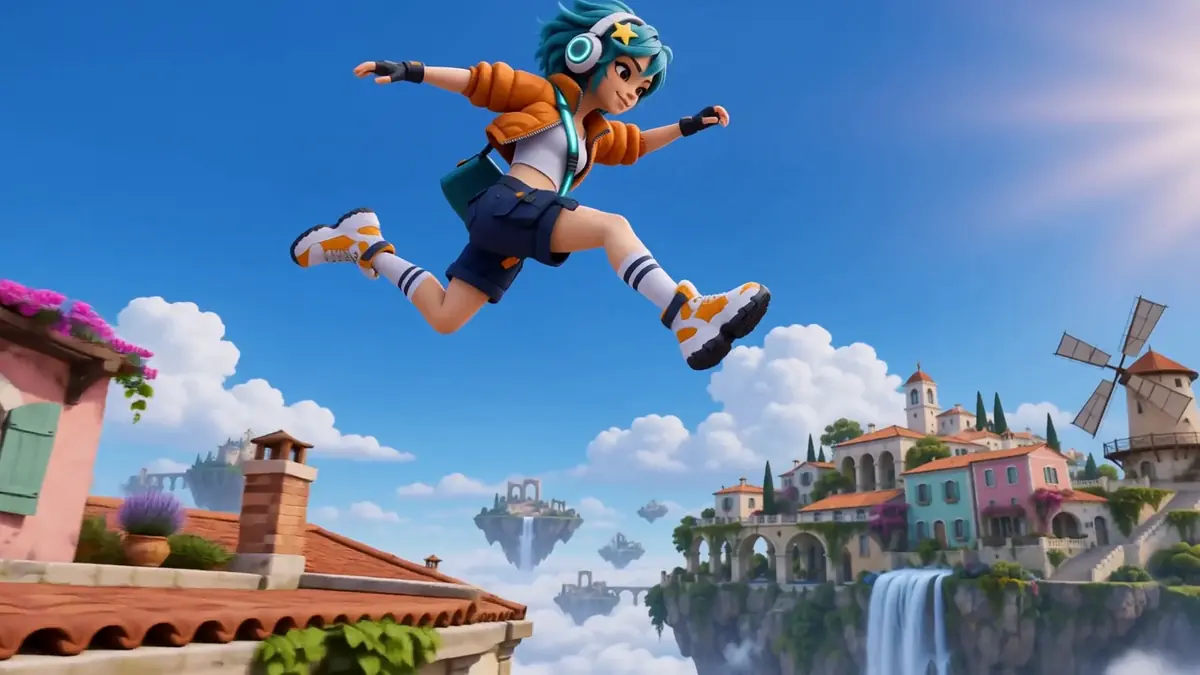
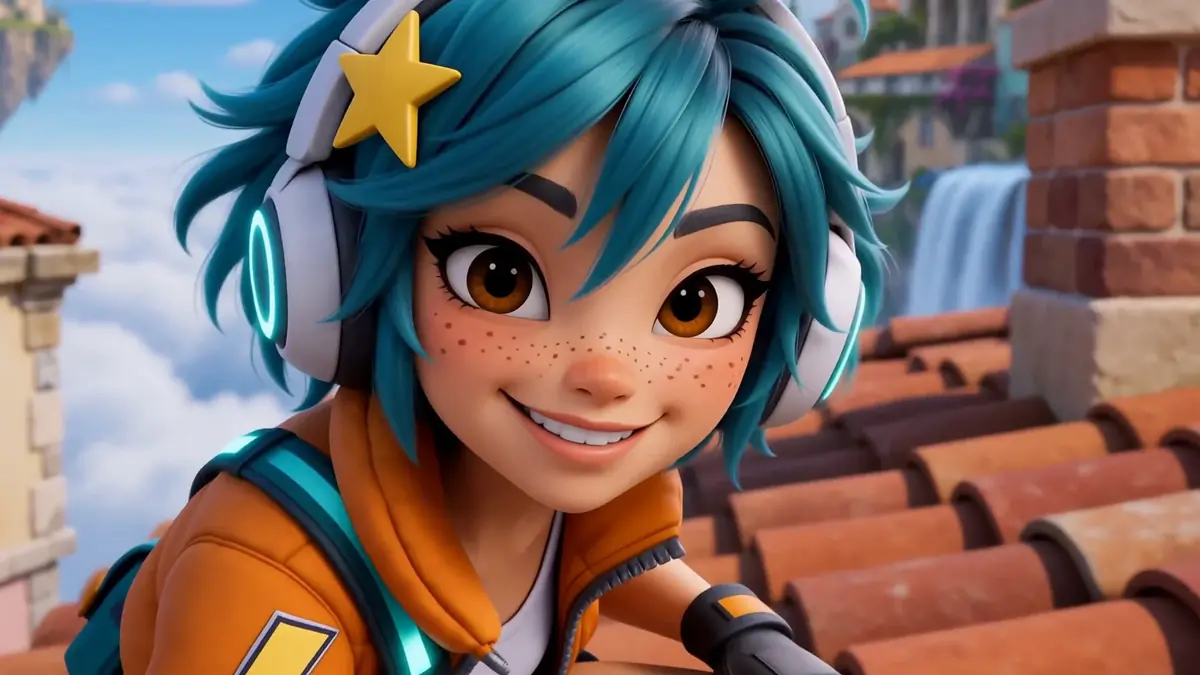
the face, hair color, outfit, bag and sneakers match the sheet in every frame you pause on, details stay on the correct side, there is only one Kiko, and the place looks like image 2.
the face or hair changes between angles, the jacket or bag changes color or shape, a second character appears, details swap sides, or the place drifts away from the reference. Fix the sheet or the prompt, then generate again.
Which models take reference images
The film uses Minimax H3. These video models also build a shot from reference images. Check the panel for the current limits before you start.
| Model | Reference inputs | What to know |
|---|---|---|
| Minimax H3 | Up to 9 images, up to 3 videos, up to 3 audio clips | Can't be combined with First Frame or Last Frame. Reference audio needs at least one reference image or video. Native audio is generated in the same pass. |
| Seedance 2.5 | Up to 30 images, 10 videos, 10 audio tracks | Tag references in the prompt as @image1, @video1, @audio1. A first frame and reference images can't be combined. Has a cheaper 480p Draft mode. |
| Gemini Omni 1.2 Flash Reference to Video | 1 to 10 images, or a reference clip of 3 seconds or less | Places the subject in a new scene; dialogue in quotes comes out lip-synced. Replaces Gemini Omni 1.1 Flash Reference to Video, which stops working on December 3, 2026. |
| Wan 3.0 | Up to 10 images, 5 videos, 5 audio clips | Refer to them as "Image 1", "Video 1", "Audio 1", numbered per type in the order you added them. Use either a first frame or references, never both. |
How to write a reference prompt
- Give every reference one role. "Image 1 is the character", "Image 2 is the place". A reference without a role can donate its whole scene, background included.
- Say what to ignore. If the sheet has a white studio background, the model shouldn't put Kiko in a white studio. Naming image 2 as the place does that here; you can also write it outright ("do not use the plain background from image 1").
- Name the details that must not change. Colors, accessories, which side a detail is on. The sheet prompt above lists them all, and the video prompt points back to the sheet.
- Walk the shot forward in time. Describe what happens beat by beat, with the camera move for each beat, then the sound.
- Ask for one character only when there is one. Otherwise the model may add a second figure that looks like the first.
Common problems
| What you see | What to do |
|---|---|
| The face or outfit changes when the camera moves around | Make the sheet clearer (every side, plain background, same height), and list the details that must not change in the prompt |
| The background of the sheet shows up in the video | Say in the prompt which image is the place, and that the sheet's background is not part of the scene |
| A second copy of the character appears | Add "One character only, the same character as in image 1 from start to end" |
| The clip comes out in the wrong shape | Set Aspect Ratio yourself; with references there's no first frame to set it |
| You can't add reference images | Remove the First Frame and Last Frame: the models here don't combine them with references |
| A detail is on the wrong side | Say in both prompts which side it's on, and check the side panel of the sheet |
What's next
To control where a shot starts and ends instead, use a first and a last frame: see Generate video. To direct the camera more precisely, see Direct the camera and the motion. To compare video models before a long project, see the video models guide.