

Spend and usage
Cap what a member, project or API key can spend, get warned in time, and read where credits go.
- Tutorial
On this page13 sections
- Before you start
- Step 1: Find Usage Alerts
- Step 2: Add alerts
- Step 3: Set a default limit for everyone
- Step 4: Set a limit for one person
- Step 5: Cap a project and an API key
- Step 6: See where the credits went
- Step 7: Check the Activity Trail
- Step 8: Send the numbers to finance
- Step 9: Know who sees what
- When a limit is reached
- Common problems
- What's next
Everyone in your organization draws from one shared pool of credits, counted in compute units (CU). This lesson sets up usage alerts for the Starforge Games organization, caps spending per member, project and API key, reads where the credits went in Analytics and the Activity Trail, and shows who sees which numbers. All of it is also available through the Scenario MCP; here it is done in the web app.
Quick version
- In Settings › Organization › Billing, click Set up next to Usage Alerts and add up to ten low-balance alerts.
- In Organization › Members, click Set limit for a default cap, or set one person's cap from their row.
- Cap a project under Project › Usage limit, and an API key from its Usage column.
- Read Organization › Analytics and Activity Trail to see where the credits went.
- Share the organization's numbers with members by downloading the report.
Before you start
- You need to be an organization Admin to set alerts and limits and to see the organization's numbers.
- Alerts warn, limits block. An alert only sends an email; nothing stops. A limit is a cap: when it's reached, generation stops for that member, project or key.
- Limits are caps, not allowances. They never add credits; they only restrict how much of the shared pool someone can draw. A member, project or key with no limit can use the whole balance.
- The billing period runs on your subscription's monthly cycle, not the calendar month. The reset date shows on the Billing page, and every limit dialog repeats it.
- Plans. Usage alerts need a paid plan. Per-member, per-project and per-key limits are Enterprise features. Analytics is on Pro and above.
- Every generation shows its cost on the Generate button before you run it, in CU.
Step 1: Find Usage Alerts
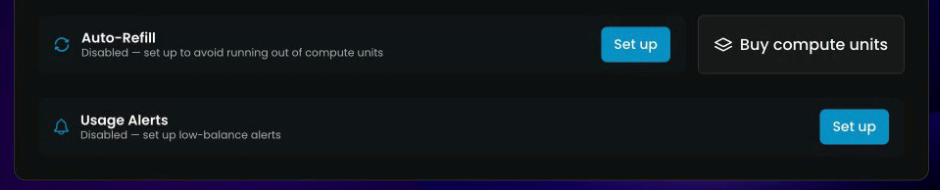
Start with alerts, under Billing: open the pill, click the gear next to the organization, then Billing. In the current-plan card, below the compute units available, are two rows: Auto-Refill and Usage Alerts. Until you set them, both read "Disabled". Click Set up on the Usage Alerts row.
Step 2: Add alerts
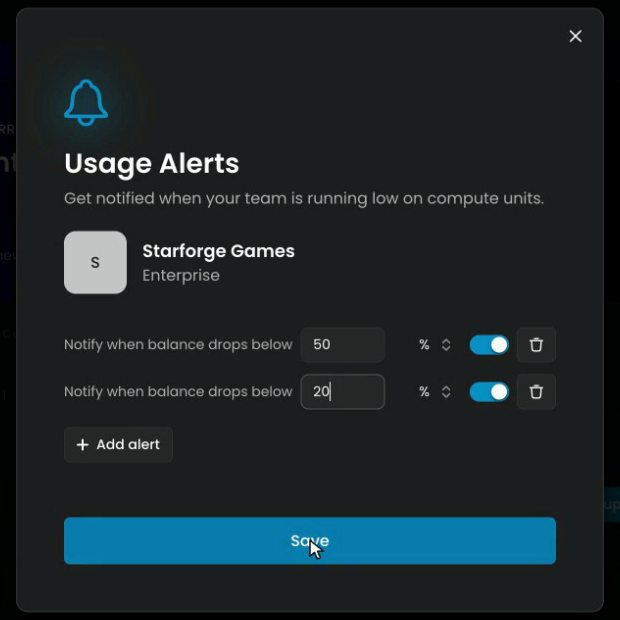
Usage Alerts opens: "Get notified when your team is running low on compute units." Click Add alert, and choose when it fires. Each row reads Notify when balance drops below, then:
- A value, a whole number.
- A unit: % for a percentage of your plan's credits for the period (1 to 100), or CU for a fixed amount.
- A switch to turn that alert on or off without deleting it, and a bin to remove it.
Add up to ten, then click Save. When the balance drops below one, every admin gets an email. Each alert fires once per billing period, and again only if the balance climbs back above it (after a top-up, for example). If one big batch crosses several alerts at once, admins get one email, for the lowest.
A common setup: one early warning as a percentage, and one or two fixed CU amounts for "nearly empty".
Auto-Refill, on the same card, buys compute units automatically when the balance drops below a level you choose. Many teams set an alert a little above the Auto-Refill level as a check.
Step 3: Set a default limit for everyone
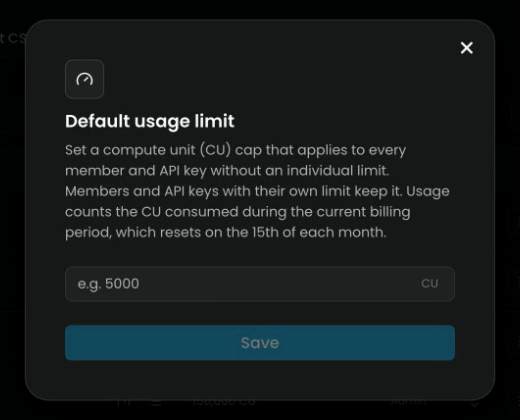
Limits block spending at a cap. In Organization › Members, the Default usage limit card ("No default" until you set one) applies to every member and API key without a limit of its own. Click Set limit, type a CU amount and click Save.
Members and API keys with their own limit keep it. Usage counts the CU used during the current billing period.
Step 4: Set a limit for one person
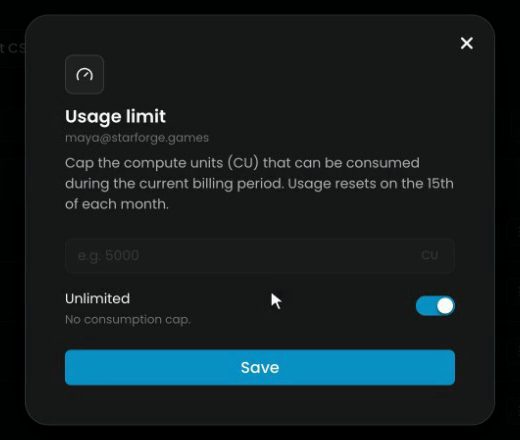
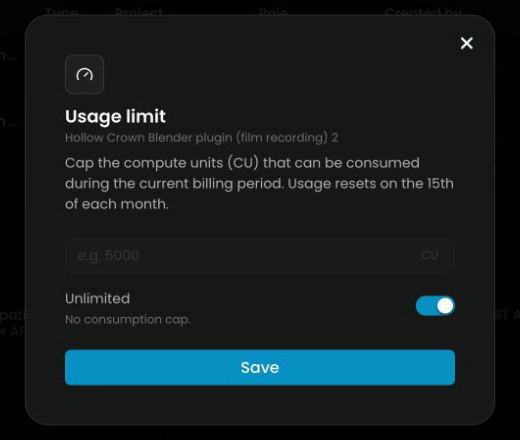
You can also set a limit for one person, from their row: click the usage icon in the Actions column. Usage limit opens with their email under the title. Turn off Unlimited ("No consumption cap"), type the CU cap and click Save.
In the members list, each person's usage shows against their cap, so you can see who is close.
Step 5: Cap a project and an API key
- A project. Each project can have its own cap, under Project › Usage limit: type the CU amount and click Save limit. It counts everything spent in the project, across all its members and API keys. Only organization admins can change it; project owners can see it. Set up your workspace shows this page.
- An API key. Open Organization › API Keys and click the key's Usage value. The same Usage limit dialog opens with the key's name. You can also set the cap when you create the key.
Remember: a member or key with no limit can use the whole balance. Keys used by scripts or outside tools are the first to cap.
| Level | Where | What it caps |
|---|---|---|
| Plan | Organization › Billing | The organization's whole pool for the period |
| Default | Organization › Members › Set limit | Every member and key without its own cap |
| Member | Their row in Organization › Members | One person |
| Project | Project › Usage limit | Everyone and every key in one project |
| API key | Usage in Organization › API Keys | One key |
Step 6: See where the credits went
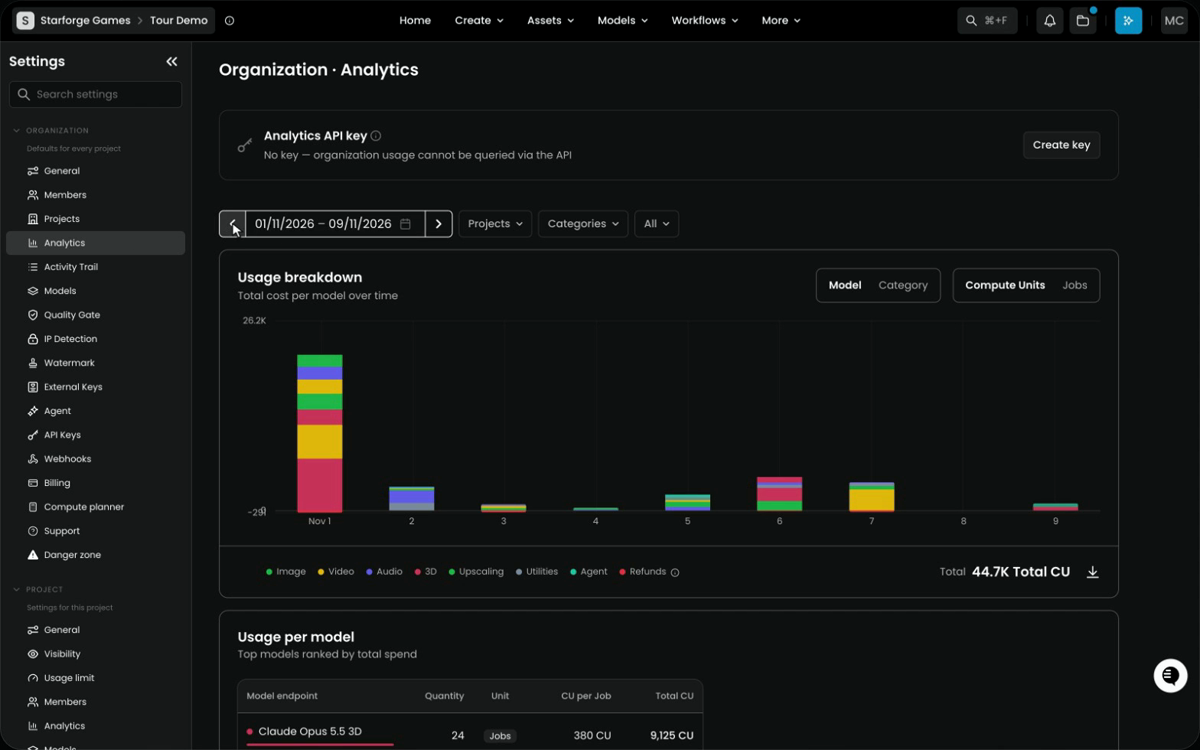
Organization › Analytics shows where your credits go.
- Dates. Pick the date range, or step back a month with the arrows.
- Filters. Filter by Projects or Categories.
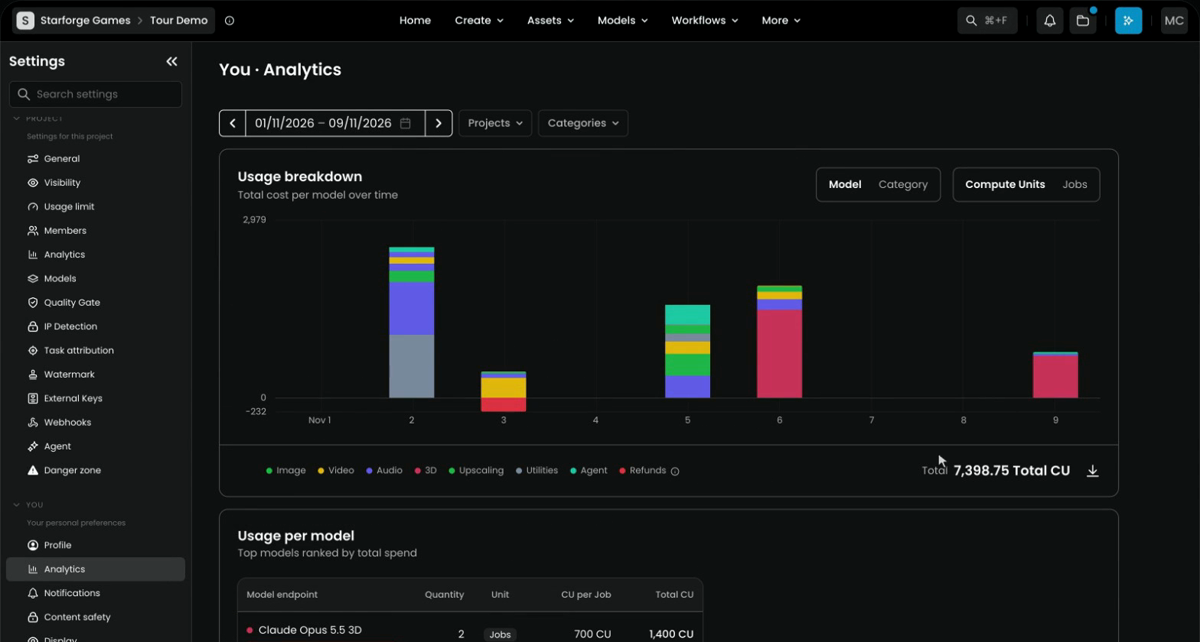
- The chart. Usage breakdown switches between Model and Category, and between Compute Units and Jobs. The total for the period sits under the chart, with a download icon.
- Usage per model. The top models ranked by total spend, with the quantity, the CU per job and the total for each.
Further down:
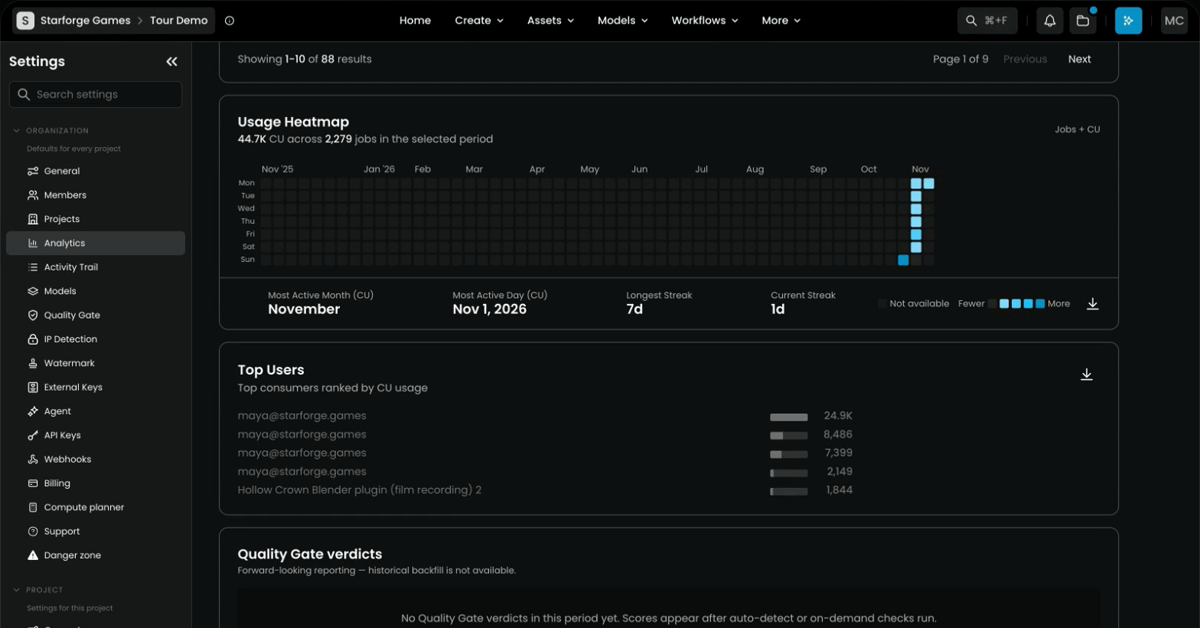
- Usage Heatmap: your busiest days, with the most active month and day and your streaks.
- Top Users: the top consumers ranked by CU, people and API keys alike, with a download icon.
Step 7: Check the Activity Trail
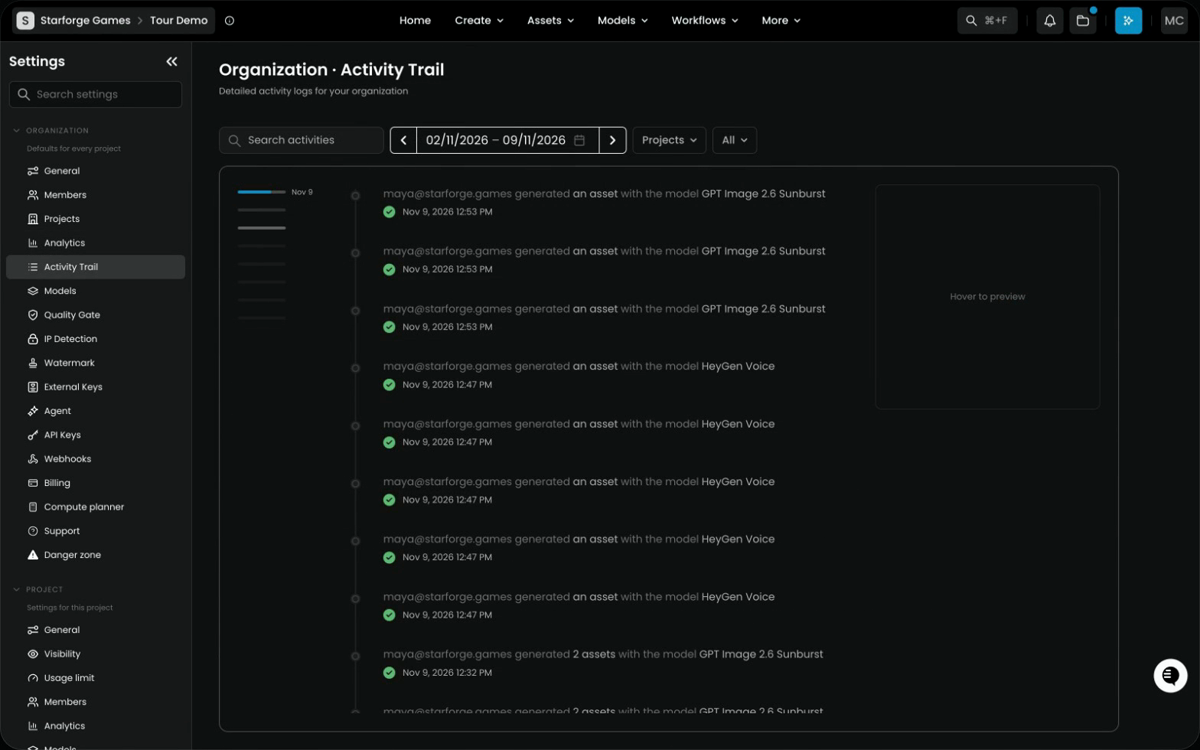
Organization › Activity Trail logs every action: who made what, with which model, and when. Search it, pick the dates, and filter by Projects and by type. Hover a row to preview what was made.
Step 8: Send the numbers to finance
For finance, click Create key on the Analytics API key card at the top of Analytics, and pull the same numbers into your own tools. Until you create one, the card reads that organization usage can't be queried through the API.
Step 9: Know who sees what
- Admins see everything: the organization's Analytics, the Activity Trail, and every member's usage, right in Members.
- Members see their own usage, under You › Analytics.
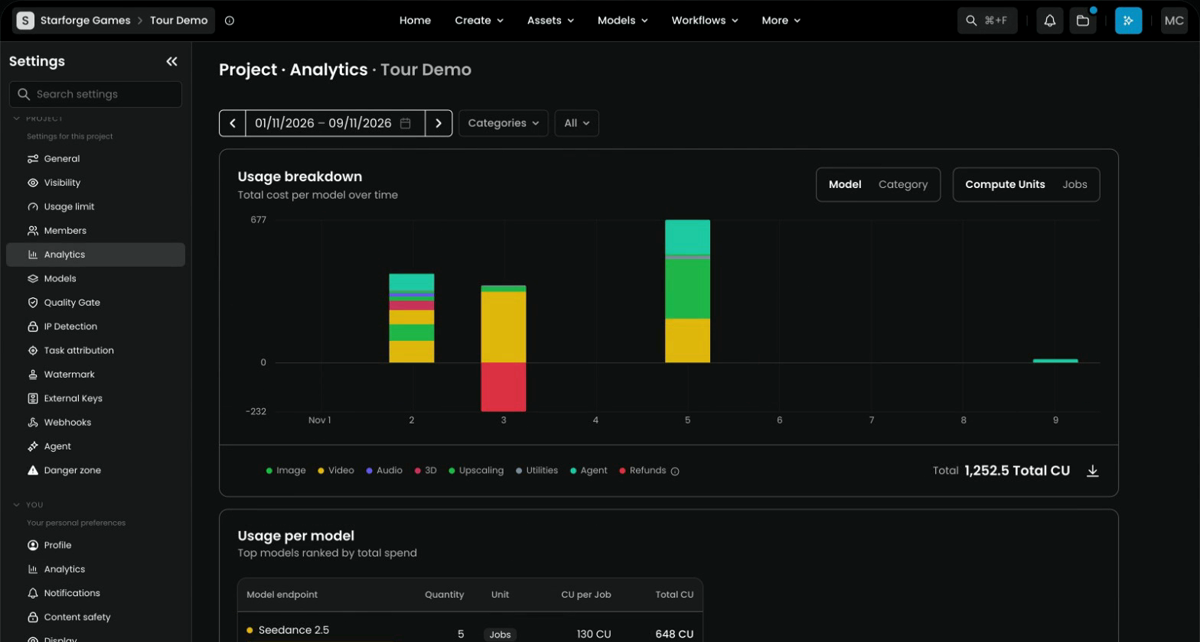
- Each project has its own Analytics, under Project › Analytics, for the people who run it.
Members don't see the organization's numbers. If someone needs them, download the report and share it.
When a limit is reached
- A member or project cap: generation is blocked with a message saying the cap was reached and that an admin can raise or remove it.
- An API key cap: requests with that key stop.
- The plan's credits run out with no top-up left: on Pro, Max and Enterprise the organization moves to Relax mode, where you can keep generating in the web app with a wait between jobs. Requests made with an API key stop.
A separate limit caps how many jobs run at the same time. Concurrent Jobs Limit means too many jobs are running at once, not that your credits are used up: wait for one to finish.
Common problems
| What you see | What to do |
|---|---|
| No alert email arrived | Alerts go to admins only; check the alert's switch is on and the threshold hasn't already fired this period |
| One person used most of the balance | Set a default limit, or a limit on their row |
| A script drained the credits | Cap its API key from the Usage column |
| A member is blocked by a cap | Raise or remove their limit, or the project's |
| A member asks for the organization's numbers | Download the report from Analytics and share it |
| Usage Alerts is missing on Billing | It needs a paid plan |
What's next
You can now see and cap what your team spends. Next, Content and security protects what your team makes, with Quality Gate, IP Detection and Watermark.