

People and access
Invite people with the right roles, sign them in with SSO, give partners one project, and remove access cleanly.
- Tutorial
On this page13 sections
- Before you start
- Step 1: Open Members and click Invite Members
- Step 2: Choose their organization role
- Step 3: Pick their projects and send
- Step 4: Change a role in one project
- Step 5: Make someone an admin
- Step 6: Remove someone who leaves
- Step 7: Turn on single sign-on
- Step 8: Give a partner a project of their own
- Step 9: Close the job
- Roles at a glance
- Common problems
- What's next
Now bring people in. This lesson invites your team into the Starforge Games organization with the right role and projects, changes roles and removes people, sets up single sign-on, and gives partners access to their own work and nothing else. Almost all of it can also be done through the Scenario MCP; here it is done by hand in the web app.
Quick version
- Open Settings › Organization › Members and click Invite Members.
- Add their emails, choose Admin or Member and pick their projects, then send the invitations.
- Change project roles under Project › Members; remove leavers in Organization › Members and delete their API keys.
- For single sign-on, ask Scenario to turn it on, set it up in your identity provider and test it.
- Give each partner a project of their own, with a spend cap, agreed models and, if it fits, Solo visibility.
Before you start
- You need to be an organization Admin to invite people, change organization roles and manage API keys. A project Owner can manage the members of that project.
- Every person has two roles: one in the organization (Admin or Member) and one in each project they join (Owner, Contributor or Viewer). Set up your workspace explains them.
- Seats. Organization › Members shows how many seats are used and available. If you need more, an Admin adds them under Organization › Billing.
- Single sign-on is an Enterprise feature, and so is the Solo project visibility used for partners.
Step 1: Open Members and click Invite Members
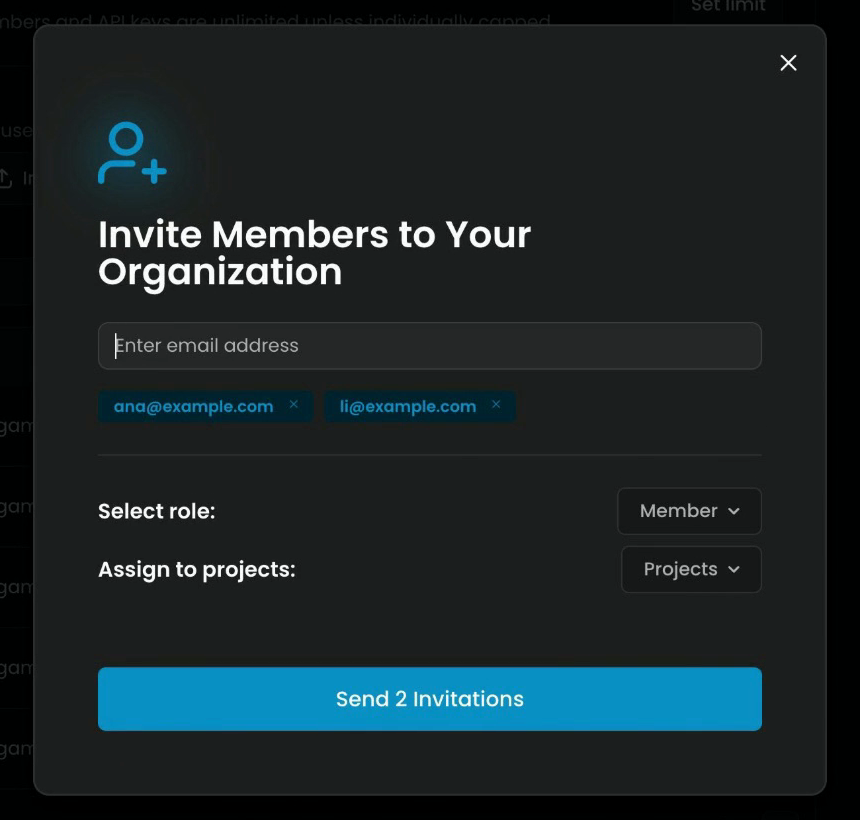
Everything about your people starts in Members, under Organization: open the pill at the top left, click the gear next to the organization, then Members. This is where you add users. Click Invite Members.
Invite Members to Your Organization opens. Type their email addresses in Enter email address, separated by commas; each one becomes a chip you can remove with its x. For a long list, use Import CSV on the Members page instead, with the addresses in one line separated by semicolons (email1;email2;...).
Step 2: Choose their organization role
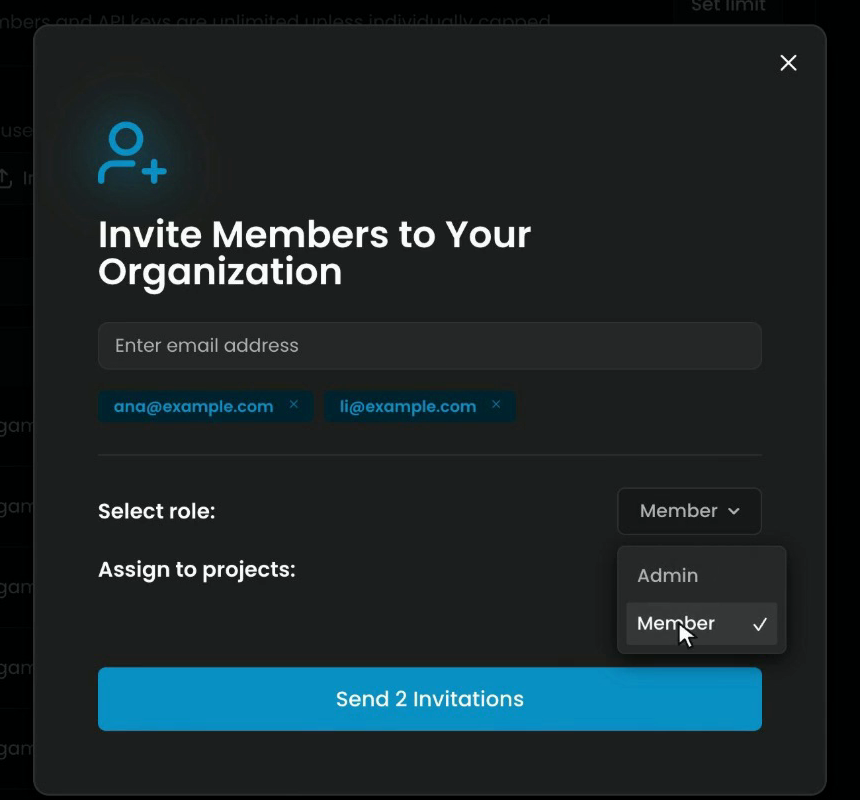
Open Select role and choose Admin or Member. Most people are Members: they work in the projects they're added to and see nothing else. Keep Admin for the few people who run billing, members, settings and models.
Step 3: Pick their projects and send
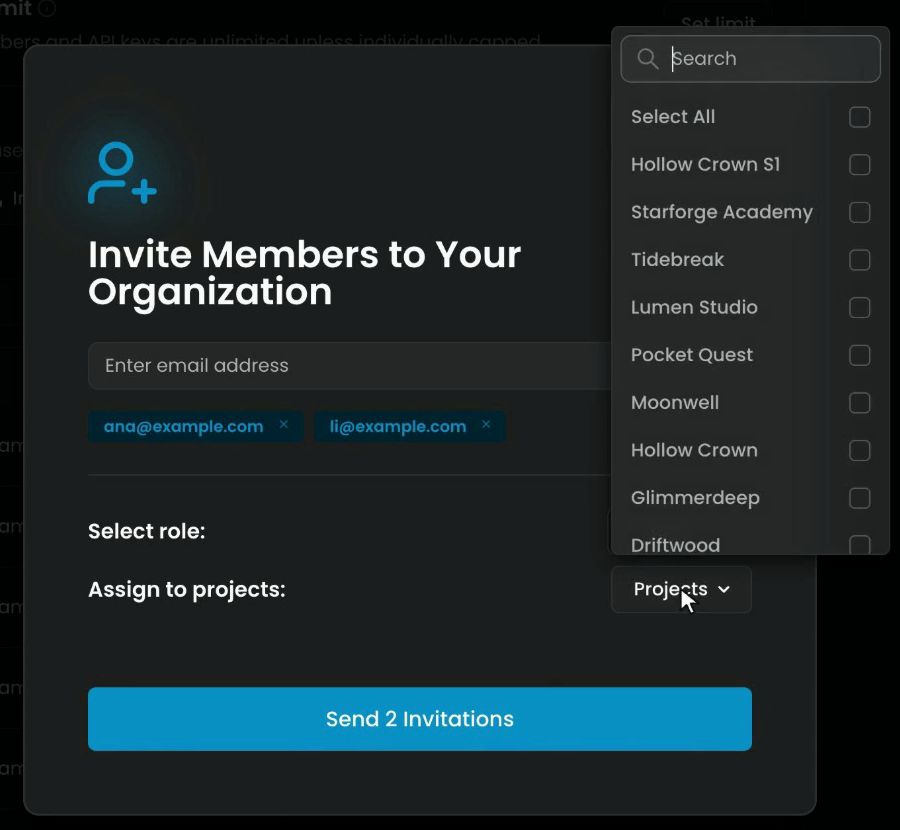
Open Assign to projects and tick the projects they'll join, so they land in the right place on day one. Type in Search to find a project, or use Select All. The button then shows how many you picked, for example Projects (1).
Click Send 2 Invitations (the number follows how many addresses you added). Each person gets an email to accept.
Step 4: Change a role in one project
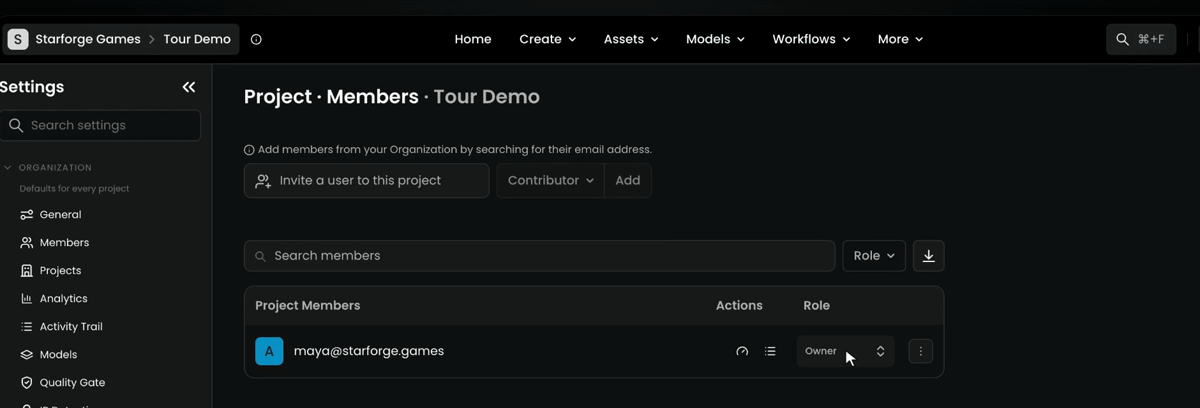
Each project has its own members, under Project › Members. Here you can:
- Add someone who is already in the organization: type their email in Invite a user to this project, pick a role (it starts on Contributor) and click Add.
- Change anyone's role for this project only, right on their row, in the Role column.
The Role filter above the list shows only the Owner, Contributor or Viewer rows when the project is large.
Step 5: Make someone an admin
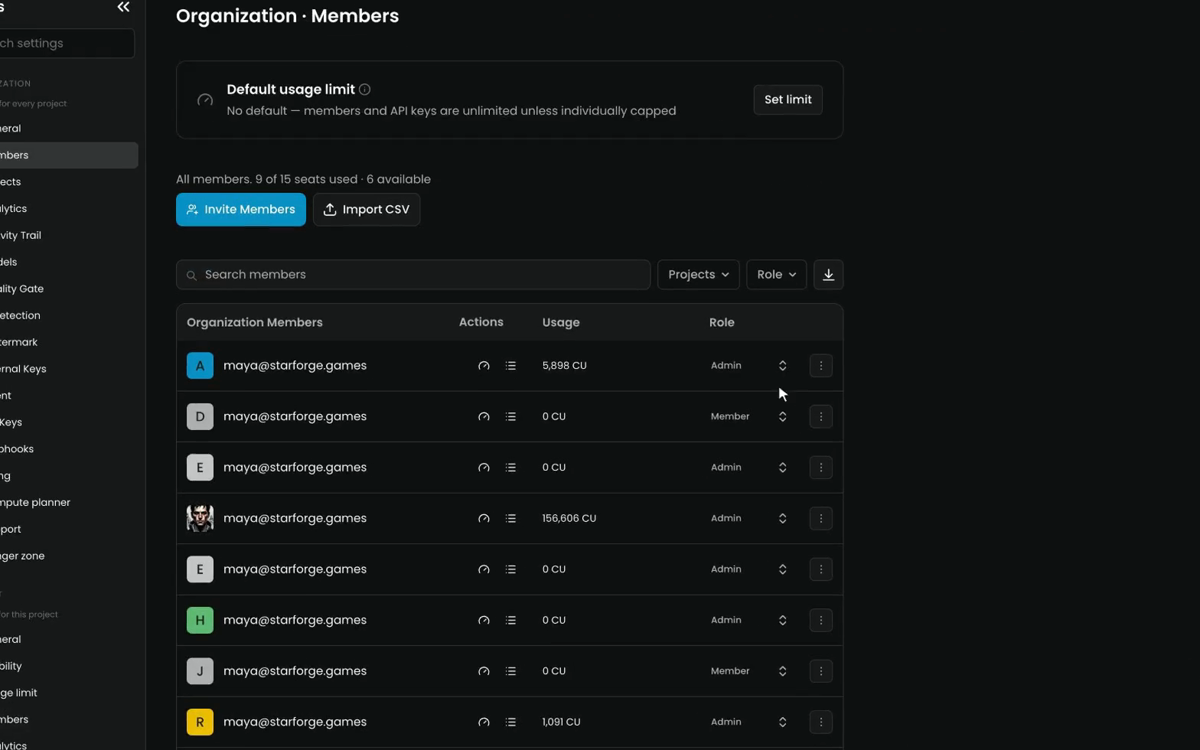
To make someone an admin, change their role in the organization's Members, in the Role column of their row. There's always at least one admin, so to hand over, promote the new admin first, then change your own role.
Step 6: Remove someone who leaves
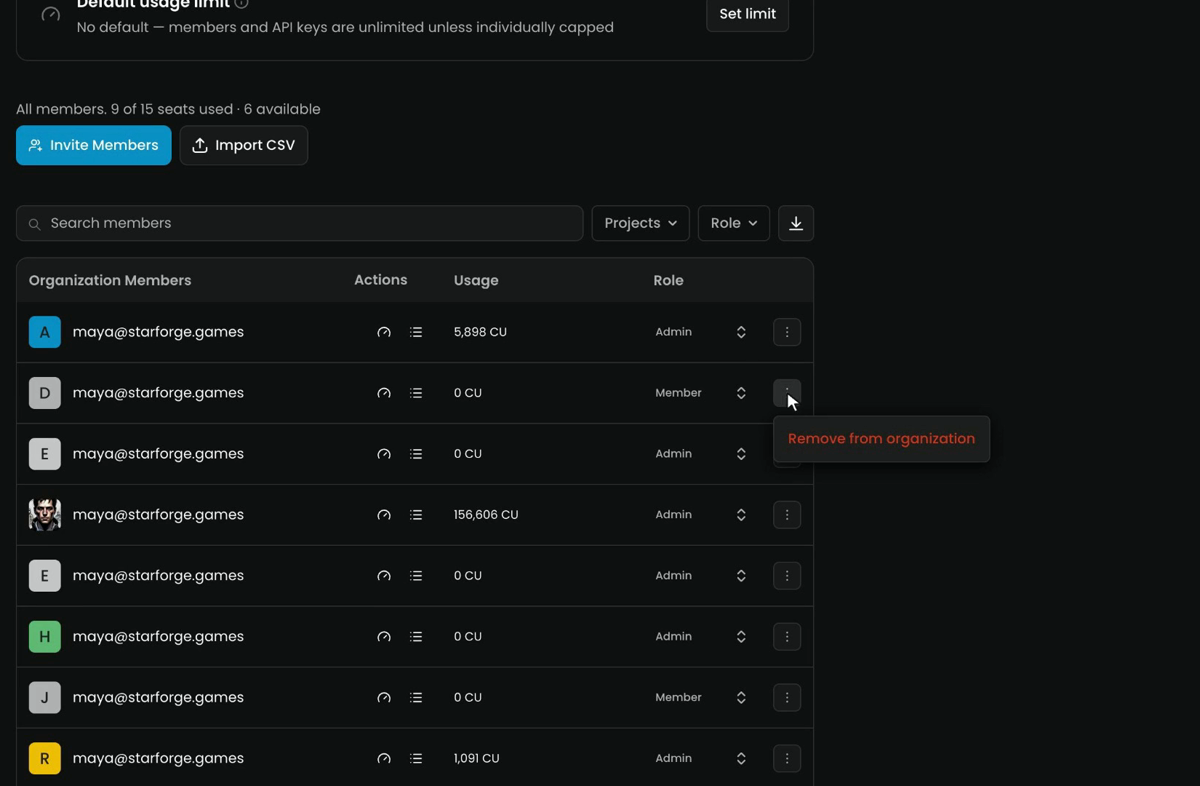
When someone leaves, open the ... menu at the end of their row and choose Remove from organization. They lose access to the organization and every project at once.
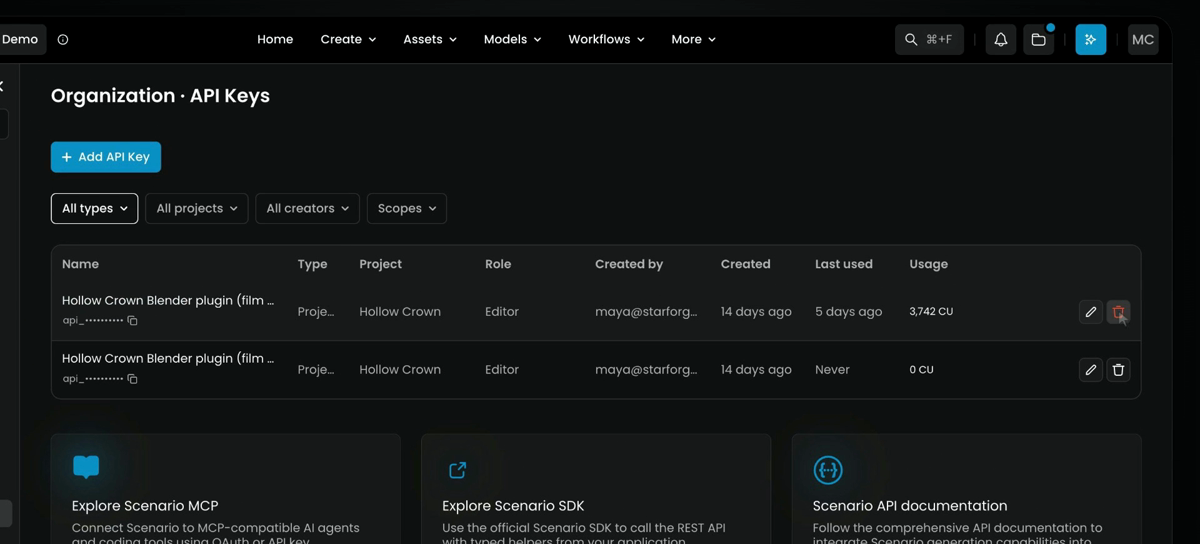
Then go to Organization › API Keys and delete or rotate any key they used. Keys aren't tied to a login, so they keep working until you do. The list shows each key's Project, Role, Created by, Last used and Usage, so you can find their keys by creator. The bin icon deletes a key; it's immediate and can't be undone.
Step 7: Turn on single sign-on
On Enterprise, your team can sign in with their company account through single sign-on (SSO). It uses SAML 2.0, and works with Okta, Microsoft Entra ID, Google Workspace, OneLogin and most other providers that support SAML.
It isn't a switch in Settings: Scenario turns it on for you. Contact your account manager, then:
- Set up Scenario in your identity provider. You need admin access to your provider and to Scenario, and the ID of the default project new users land in.
- Test it with one admin and one member before anyone else.
- Tell the team the date. From then on, members are redirected to your provider's sign-in page. Their projects, models and assets stay as they were.
Admins keep password sign-in as a fallback for troubleshooting; members must use SSO. The full guide is in the Help Center under SSO and SAML Setup.
Sign-in moves to your provider, but membership and API keys stay in Scenario. Automatic provisioning (SCIM) isn't available yet, so when someone leaves:
- Unassign them in your provider.
- Remove them in Members.
- Delete their keys.
Step 8: Give a partner a project of their own
Agencies and freelancers get a project of their own. Members see every project they're added to, so never add a partner to your main one.
- Create a project for the job with the + at the top of the Projects column in the pill.
- Invite them as a Member with only that project (Step 1 to Step 3).
- Set their project role: Contributor if they'll make things, Viewer if they'll only review.
- Set the project's limits: a spend cap under Project › Usage limit, and only the models agreed for the job under Project › Models.
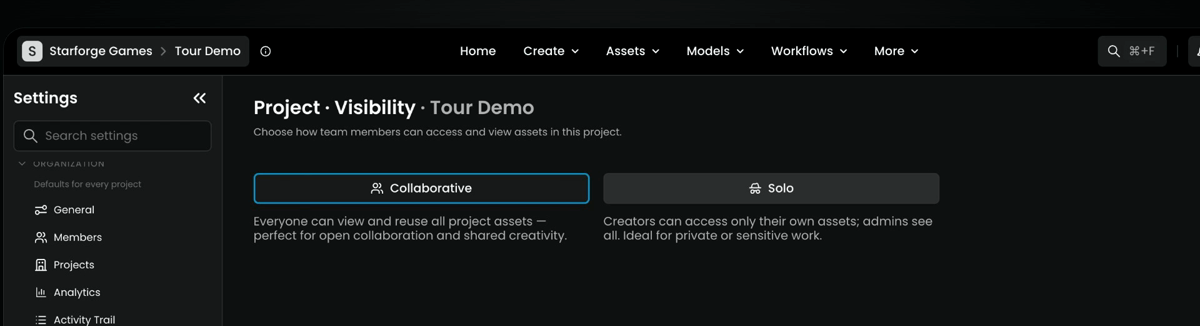
If it fits your needs, open Project › Visibility and switch from Collaborative to Solo: for example, when several freelancers share one project, or for private or sensitive work. Each person sees only their own work, while admins still see everything.
| Visibility | Who sees what | Use it for |
|---|---|---|
| Collaborative (default) | Everyone can view and reuse all project assets | Open collaboration and shared creativity |
| Solo (Enterprise) | Creators see only their own assets; admins see all | Several partners in one project, private or sensitive work |
Step 9: Close the job
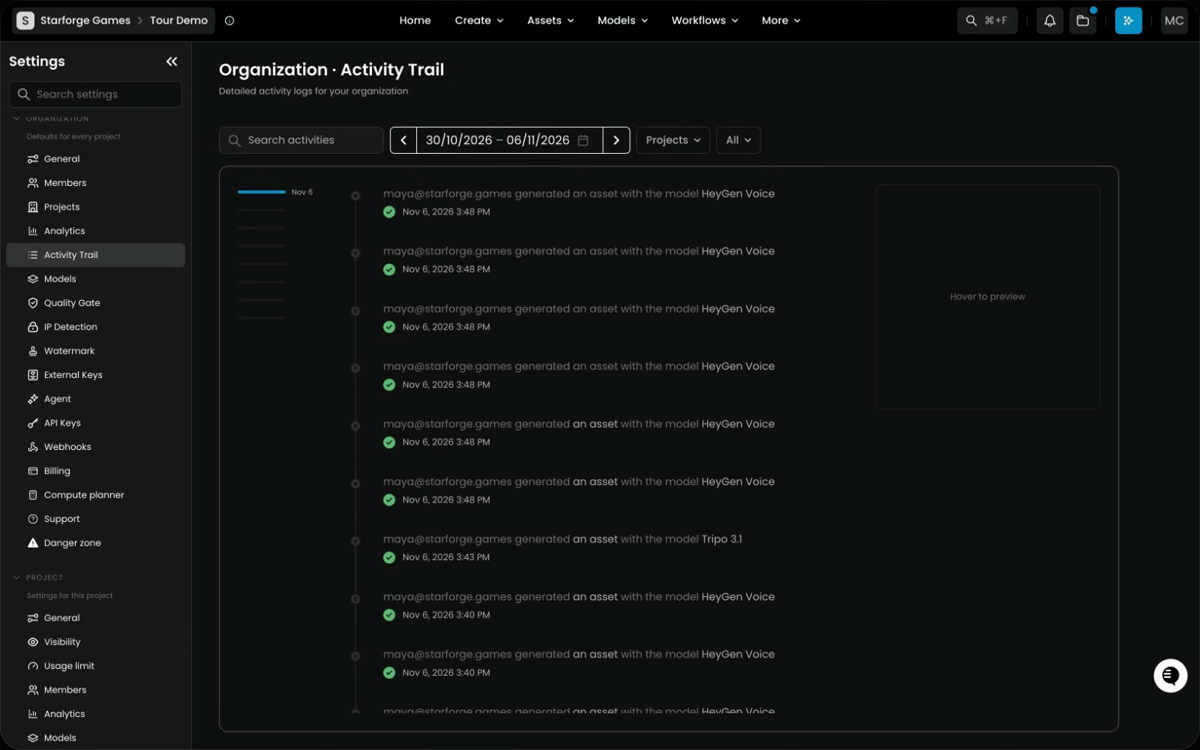
When the job ends, remove their people and their keys, then open Organization › Activity Trail to check what they made and deleted. Filter it by date range, by Projects and by type of activity, or search it.
Roles at a glance
| Level | Role | Can |
|---|---|---|
| Organization | Admin | Billing, members, organization settings, models, projects; promote and remove people |
| Organization | Member | Join projects; no organization settings |
| Project | Owner | Manage the project's members and settings, see its analytics, delete it |
| Project | Contributor | Generate, train, import and edit assets |
| Project | Viewer | View the project and its assets only |
Give people the least access they need, and review organization and project members on a regular schedule.
Common problems
| What you see | What to do |
|---|---|
| An invited person sees no projects | Add them to a project under Project › Members, or pick projects when you invite |
| You can't invite more people | All seats are used; an Admin adds seats under Organization › Billing |
| You can't change your own Admin role | There must be one admin; promote someone else first |
| A former teammate's integration still runs | Their API key is still active; delete it under Organization › API Keys |
| A partner sees other partners' work | Switch the project to Solo, or give each partner their own project |
| A partner sees your main project | They were added to it; remove them from that project's Members |
| SSO users land in the wrong project | Check the default project ID set up with Scenario |
What's next
Your team is in, with the right roles. Next, Model access chooses which models your team can use, per organization and per project, and connects your own provider keys.