

Build a sequence of shots from a shot list
Plan the shots, lock references and stills first, generate one clip per shot with matching settings, then cut, sound and finish the sequence.
- Guide
- Step 1 Learn
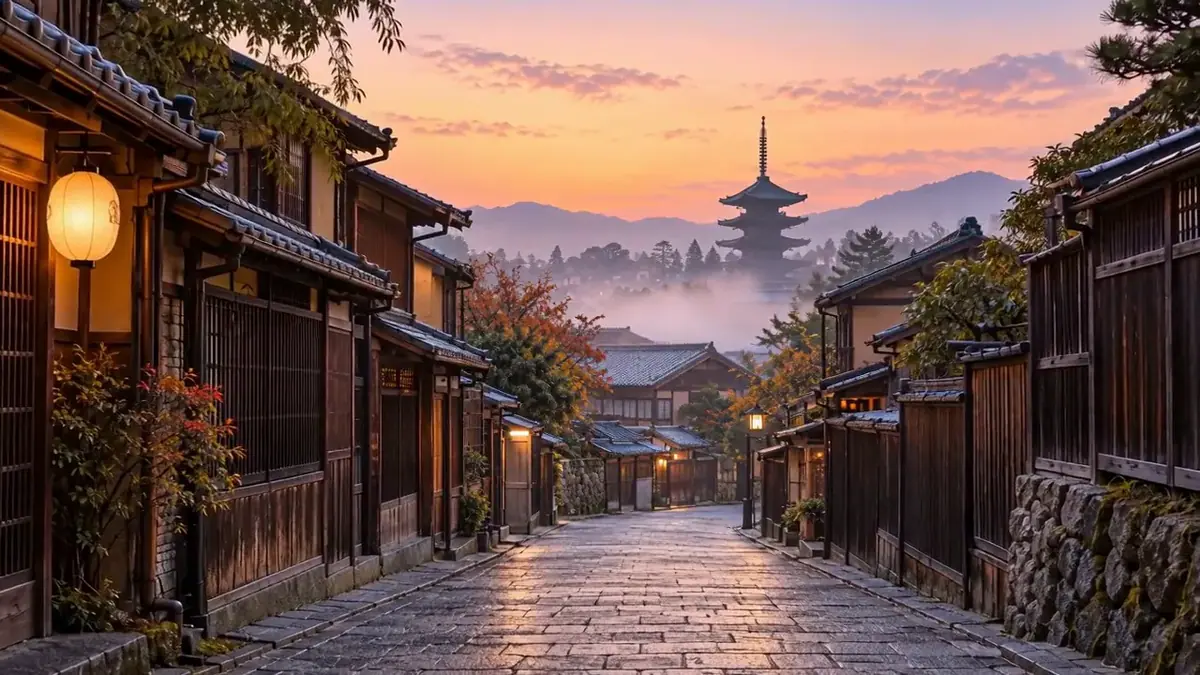
A video model makes one shot at a time, so a sequence that holds together comes from the plan around the models, not from one clever prompt. This lesson builds a 15-second, three-shot sequence for Northvane, a fictional airline: a sunset flight that lands on a Kyoto dawn. You plan the shots, lock every look as an approved still, generate one clip per shot, then cut, sound and finish the sequence.
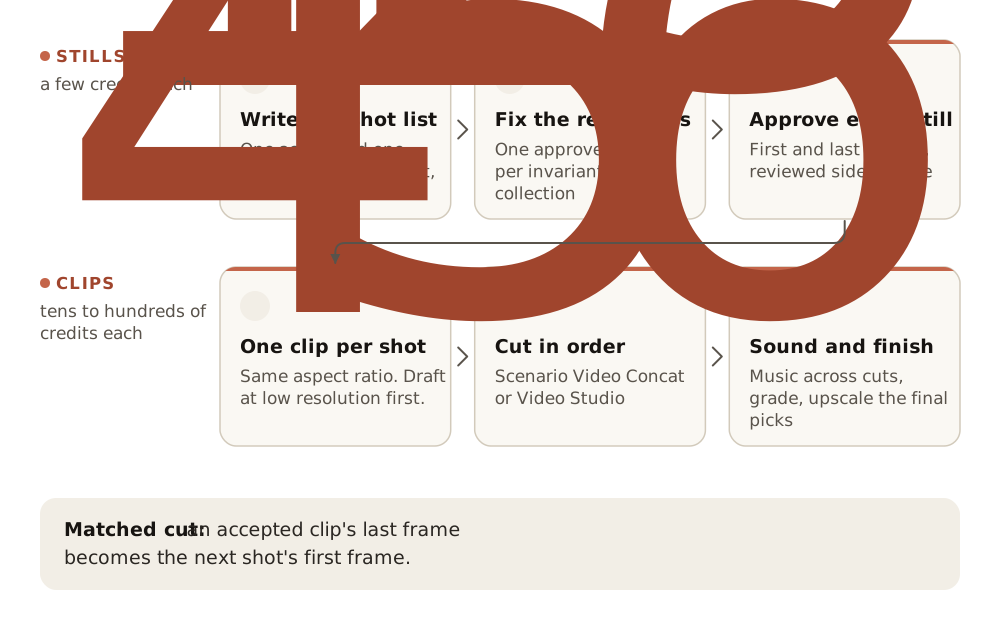
Quick version
- Write a shot list: one row per shot, with one action, one camera move and 3 to 8 seconds each.
- Make one approved reference image for everything that must stay the same, and keep them in one collection.
- Generate and approve the first frame of every shot (and the last frame where a shot needs one), and review them side by side.
- Generate one clip per shot from those stills, with the same aspect ratio and matching settings.
- Conform the clips, cut them in order, add sound across the cuts, grade, and upscale the final picks only.
Before you start
- A script or a one-line story. Here it's "a sunset flight to a Kyoto dawn", 15 seconds. For a longer piece, start from the script and let a language model draft the shot list for you to edit: see Storyboard from script.
- Credits for several clips. Clips are most of the cost of a sequence, and you'll reject some. The price of each run shows on the Generate button before you click.
- Where things live. Stills come from Create › Images, clips from Create › Videos (see Generate video). Grid Maker, Video to Image Sequence, Scenario Video Concat and Scenario Video Studio are tools you pick like any model; Video tools lists them.
- The key idea. Changing a look on a still costs one image. Changing it after you animate costs a whole clip. So every look is decided on a still, and a clip only adds motion.
Step 1: Write the shot list
One row per shot: what it shows, one action, one camera move, a duration of 3 to 8 seconds, what anchors it (a first frame, or a first and a last frame) and the model. A beat that needs two actions becomes two shots.
| # | Duration | Shows | Action | Camera | Anchor | Model |
|---|---|---|---|---|---|---|
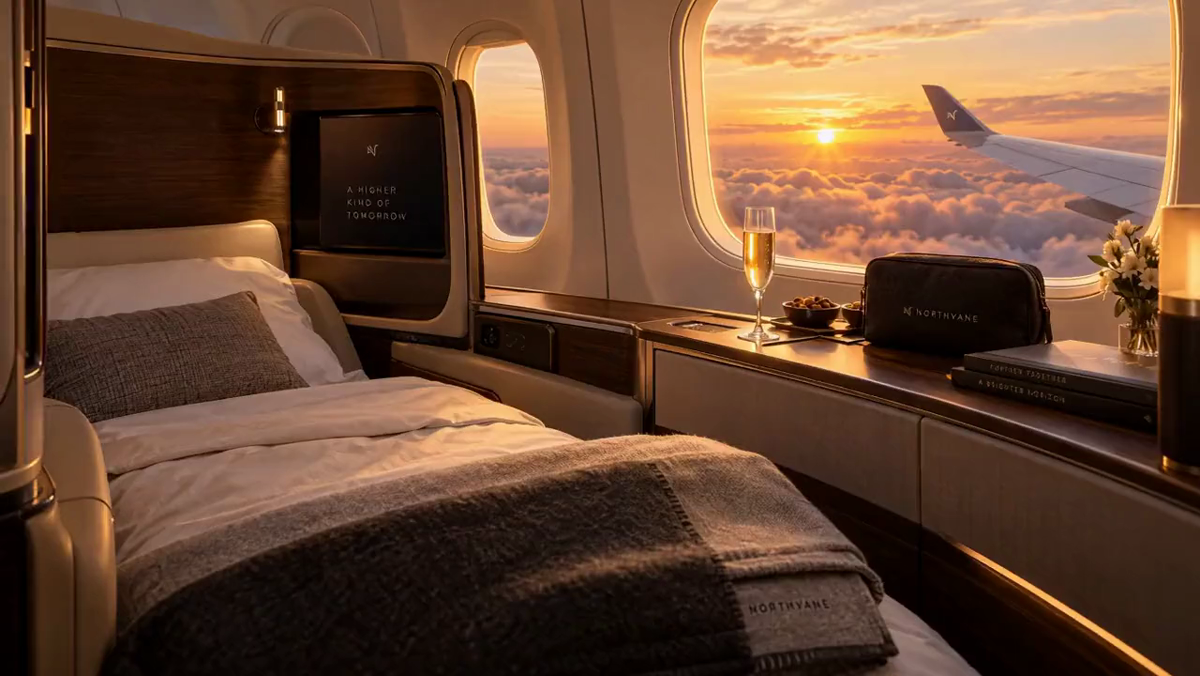
| 1 | 5 s | The suite in flight at sunset | The sun sinks behind the clouds, the light on the bed deepens | Very slow push-in toward the window | First frame | Minimax H3 |
| 2 | 5 s | The arrival lounge | Sunset fades to night, the lamps and runway lights come on | Static | First and last frame | Wan 3.0 |
| 3 | 5 s | A Kyoto lane at dawn | The lantern sways, mist drifts over the rooftops | Slow push-in toward the pagoda | First frame | Minimax H3 |
The light runs from sunset to night to dawn: that progression is the story, and every later check comes back to it.
Step 2: Decide what stays fixed
List the invariants, the things a viewer would notice if they changed between shots:
- The character: face, hair and outfit.
- The product and its label (here, the Northvane name and logo on the bedding, the bag and the tail).
- The location's layout.
- The palette and the light.
- The aspect ratio and frame rate.
Make one reference image for each, approve it, and keep them together in a collection. Every still in the next step is made from these files, never from text alone.
Step 3: Make and approve every still first
Generate the first frame of every shot, and the last frame where the shot list asks for one, with an image model (see Generate images). Use the reference collection as references, and fix any detail with an edit before you go on (Edit images).
In the example, the stills were:
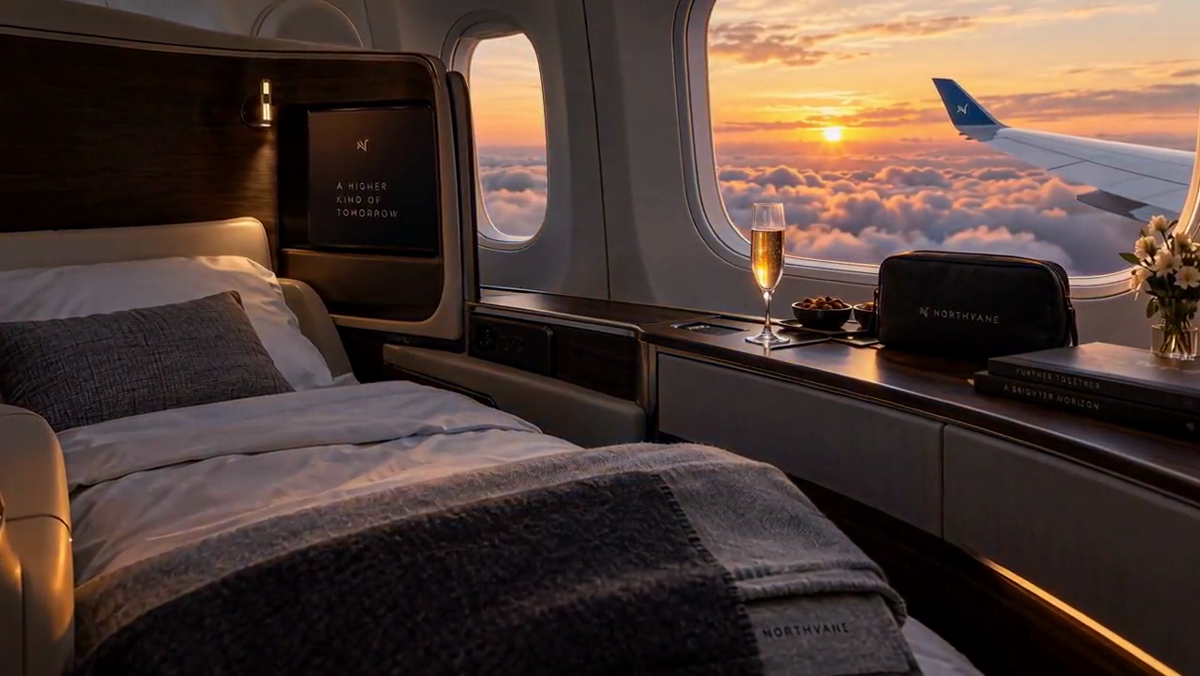
- Shot 1: the approved suite at sunset.
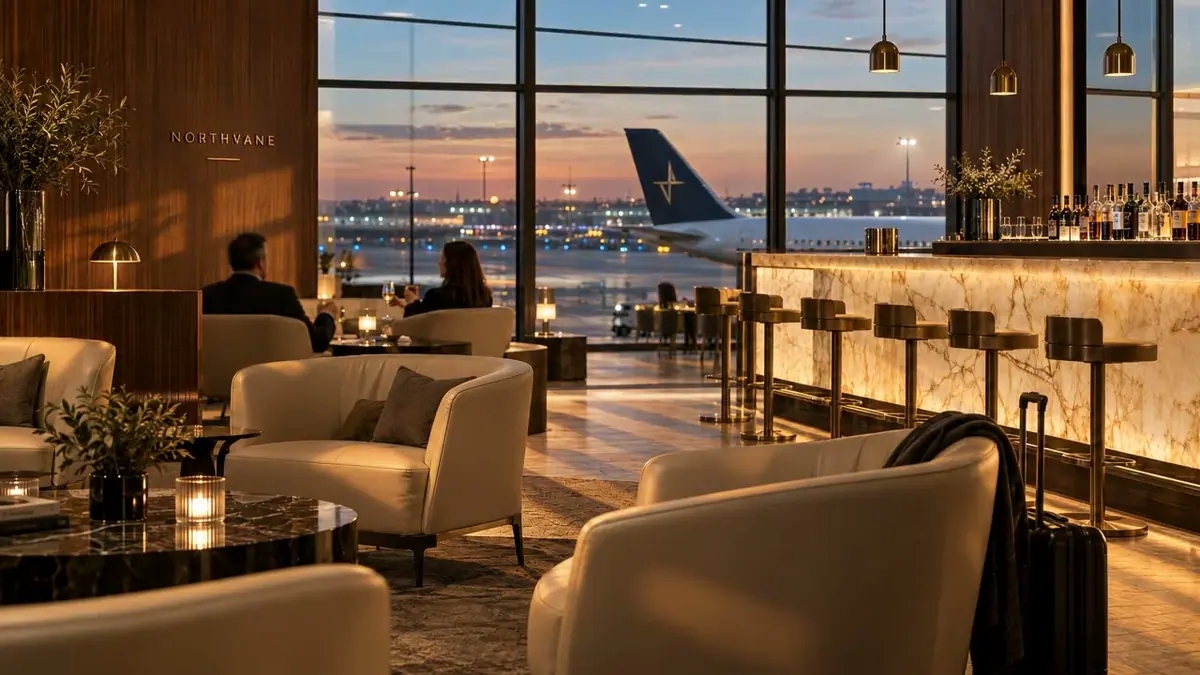
- Shot 2: the lounge at sunset as the first frame, and the same lounge at night as the last frame.
- Shot 3: the Kyoto lane, recomposed to 16:9 with GPT Image 2.5 Sunburst (two options in about 35 seconds, one kept).
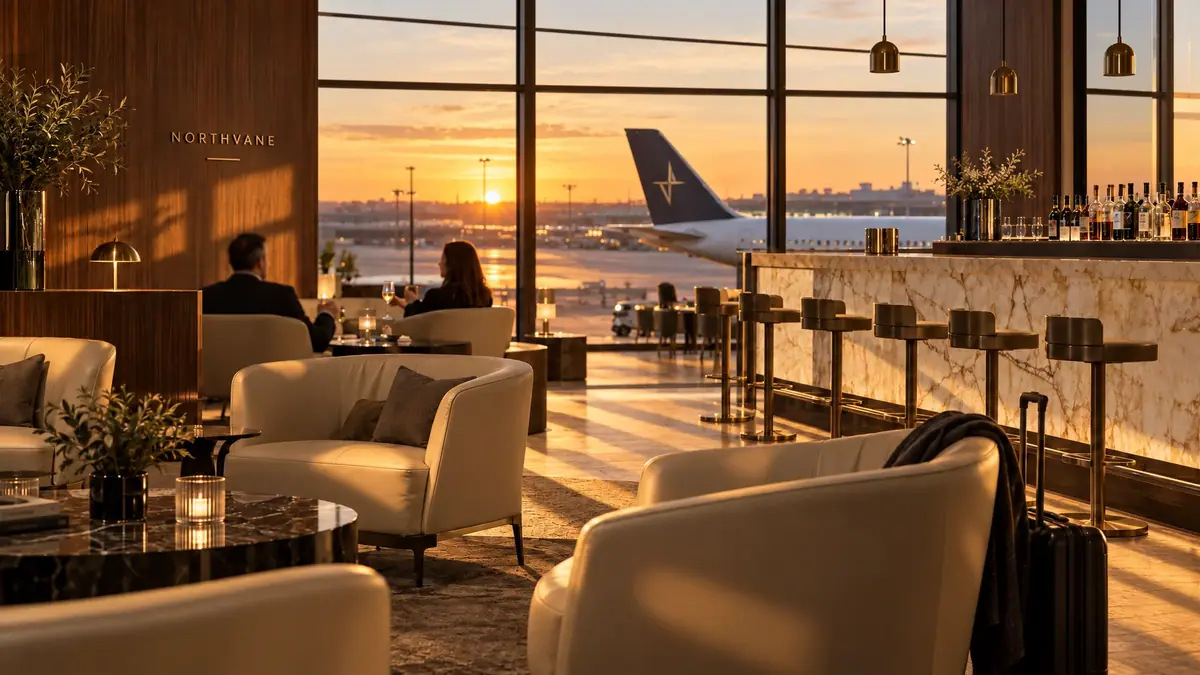
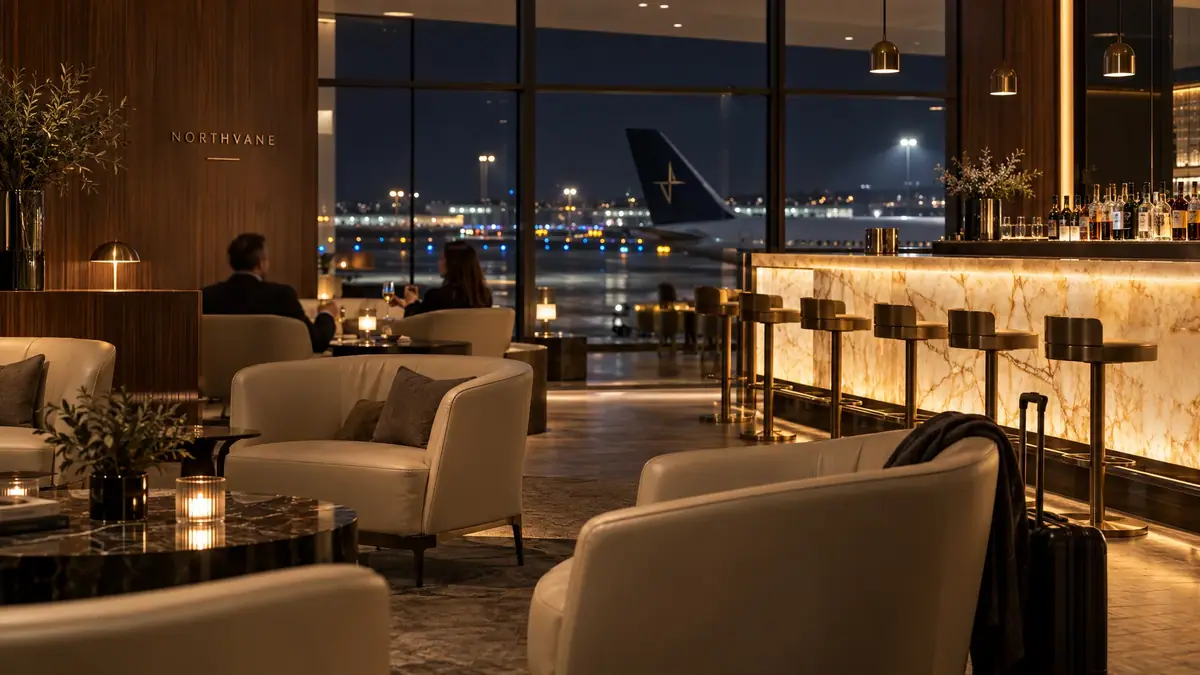
The two lounge frames show why a first and last frame pair works for a change of light: everything stays where it is, and only the light moves.
The approved still was the lounge at night; GPT Image 2.5 Sunburst turned it into the same room at sunset, with the night still as the reference. The prompt, as run:
The same airport lounge from the reference image, same camera position, same framing, same furniture, same people in the same places, earlier the same day at sunset: warm low sunlight streams through the floor-to-ceiling glass and lays long golden stripes across the floor and the cream leather armchairs, the sky outside is orange and pale blue, the parked aircraft is lit by the sun, the pendant lamps and the bar lights are switched off, the room is lit only by daylight. Keep every object, its position and its color exactly the same. Wide 16:9 frame. Keep the small NORTHVANE wordmark on the wall exactly as it is; no other text. Style: premium travel advertising, warm and calm, realistic materials.
Now review the stills as a sequence. Lay them side by side, or assemble them into one board with Grid Maker (set Columns, Rows and Padding, then generate). Ask three questions: does the light progress, will the cuts match, and is every recurring thing the same?

Only when the board reads as one piece do you start on clips.
Step 4: Generate one clip per shot
Open Create › Videos and work through the shot list one row at a time:
- Choose the model from the shot list.
- Load the approved still as First Frame, and as Last Frame if the row lists one.
- Write the prompt with the shot formula: start state, one action, end state, camera, sound. See Prompt video.
- Set Duration and Resolution from the shot list. Leave Aspect Ratio on Auto so the clip takes the shape of the first frame.
- Draft at a low resolution if the model has one, check the motion, then render at the final setting.
- Step through the accepted clip before you start the next shot.
Keep settings consistent across shots: the same aspect ratio, a similar resolution, and the same model for shots that cut together directly, when you can. Mixed models are fine, as in the example, if you grade them together at the end.
In the example, each Minimax H3 shot took about 3 minutes at 768P, and the Wan 3.0 lounge shot was made from the first and last frame pair. Shot 1 was accepted with a note: the asked-for push-in came out as a slow drift toward the window, which still works as an opening.
Shot 2 ran on Wan 3.0, 5 seconds at 720P, with the sunset still as First Frame and the night still as Last Frame. The prompt, as run:
Time passes in the airport lounge. The low sunset light through the glass fades steadily over the whole shot into a dark blue night, the sky outside darkens, the runway and apron lights come on one by one, and the pendant lamps, the table lamps and the candles in the lounge glow warmer as the room darkens. The two travelers at the far table sit still, talking quietly. Nothing else in the room moves. Static camera, locked-off tripod shot, same framing from start to end. Sound: soft lounge room tone, the distant hum of a jet engine outside. No music, no speech.
Two ways to connect shots
- Chain from the last frame. For continuous action across a cut, the last frame of an accepted clip becomes the first frame of the next shot. The steps are below.
- Generate several shots in one run. Kling V3 has a Multi Prompt section: you add up to five shot prompts, each with its own Shot Duration, and the clip's total duration is their sum. Leave the main Prompt box empty when you use it. An end image doesn't work with Multi Prompt, only with a single prompt. Check each internal cut as carefully as you would a separate clip.
Chain shots from the last frame
- Accept clip 1, then extract its last frame with Video to Image Sequence, or locally:
ffmpeg -sseof -0.1 -i shot-1.mp4 -frames:v 1 shot-2-first.png. - Inspect that frame at full size like any still: a soft face or a broken hand in it carries into the next shot. Fix it with an edit before you use it (Edit images).
- Load it as First Frame of shot 2, with the shot 2 prompt, and generate.
- Repeat shot by shot. Small changes add up along a chain, so compare every few shots with the approved reference stills, and re-anchor from them when the character drifts.
Step 5: Cut, sound and finish
- Conform the clips to one size and frame rate. Models return different sizes and frame rates; see Upscale and finish video.
- Assemble them in order with Scenario Video Concat (2 to 50 clips, with a choice of transitions), or on a timeline in Scenario Video Studio (up to 50 layers, for titles, overlays and layered audio). See Compose with Image Studio and Video Studio.
- Add music and sound across the cuts, so the sound carries the viewer over each one. See Sound effects and foley.
- Grade the shots to match, then upscale the final picks only, once the cut is approved.
Watch the video: https://ufgc0c9mhl4ueq76.public.blob.vercel-storage.com/academy/1f31925e32af1481dc58d6c29a26f593f0110992f53cf6a177c755a53027318f.mp4
watched in order at full speed, the shots read as one piece: the character and product match between shots, the light and color progress logically, cuts land on movement or on matched frames, and sound carries across the cuts without jumps.
a character's outfit or face changes between shots, one shot is visibly sharper, darker or warmer than its neighbors, a cut jumps because frames don't match, or one shot's motion style (camera drift, speed) clashes with the rest. Fix the one shot, not the sequence.
Tools for each stage
| Stage | Tool | What it does |
|---|---|---|
| Review the stills | Grid Maker | Assembles images into one board; you set Columns, Rows, Padding and the background color |
| Chain shots | Video to Image Sequence | Extracts frames from a clip, including the last one |
| Several shots in one run | Kling V3, Multi Prompt | Up to five shot prompts, each with its own Shot Duration |
| Trim a clip | Video Cut | Keeps the segment between a start and an end time; audio is kept by default |
| Split a long clip | Video Split | Cuts at a list of timestamps; N cut points give N+1 clips |
| Join clips | Scenario Video Concat | 2 to 50 clips in order, with transitions |
| Compose | Scenario Video Studio | A timeline with up to 50 layers for video, images, titles and audio |
| Animate frames | Sequence-to-Video | Turns ordered images into an MP4 or GIF at a frame rate you set |
Every tool makes a new asset and leaves the source as it was, so you can always go back a step.
Make it repeatable
- The shot list is the spec. Keep it in the project with the reference collection, the approved stills and the accepted clips, named by shot number.
- Loop over the shot list in a workflow for a series in the same format (one per product, one per episode): each row's still, prompt and settings in, one clip out. See Batches, loops and logic.
Common problems
| What you see | What to do |
|---|---|
| The character drifts from shot to shot | Animate from approved stills, not from text, and make every still from the same reference set |
| One shot looks different from the others | Grade it to match, or regenerate its still with the neighbors as style references |
| A cut jumps | Chain from the previous clip's last frame, or cut on movement instead of on a still moment |
| The character drifts further with every chained shot | Re-anchor: make the next first frame from the approved reference stills, not from the last frame |
| The camera move you asked for came out weaker | Accept it if it still serves the shot, or name the move earlier and more plainly in the prompt; see Direct the camera and the motion |
| A shot needs a beat the model can't do | Split it into two simpler shots, or drive the motion with a reference video (Reference to video) |
| Clips don't line up when you join them | Conform them to one size and frame rate before you cut |
| The sequence costs more than planned | Count the rejects per shot. Approve stills before clips, draft at a low resolution, and upscale only the final cut |
What's next
This is the last lesson of the course. To run the whole method on a bigger piece, follow Long video from guided frames or Game trailer cinematic, and start from Storyboard from script when you have a script rather than a shot list.