

Pick an image model family for the job
The image model families as of October 2026, what each does well, and how to shortlist two or three for your brief.
- Guide
- Step 1 Learn
On this page13 sections
- Before you start
- Step 1: Open the model library
- Step 2: Answer the three questions
- Step 3: Try a new model
- Step 4: Generate with the same prompt and size
- Step 5: Compare the two images
- Step 6: Find a model for another job
- Step 7: Add the reference and generate
- The model library filters
- Image model families compared
- Tips for a fair test
- Common problems
- What's next
Scenario has more than 750 models, and the right one depends on the job. This lesson narrows them down with the filters of the model library, tests a new model against the one you used before with Compare Images, then finds a different model for a second job: the same character, in a new scene, made from his image.
Quick version
- In the image panel, click the model's name, then View model library.
- Tick the job under Capabilities, what you start from under Input kind, and set Budget and Speed.
- Hover a model to read its details, then click Use this model.
- Generate with the same prompt and size, select both images and click Compare Images.
- For a new job, clear the filters and start again: the right model changes with the job.
Before you start
- Have an image to compare against. This lesson tests models on the character from Generate images, made with GPT Image 2.5 Sunburst. Any image you made with a known prompt works.
- Where it lives: Create › Images opens the image panel. The model sits at the top of the left column.
- Three questions decide the model: what the job is, what you start from, and what you can spend. The model library has a filter for each.
- Change one thing at a time. To judge a model, keep the prompt and the size the same, so only the model changes.
Step 1: Open the model library
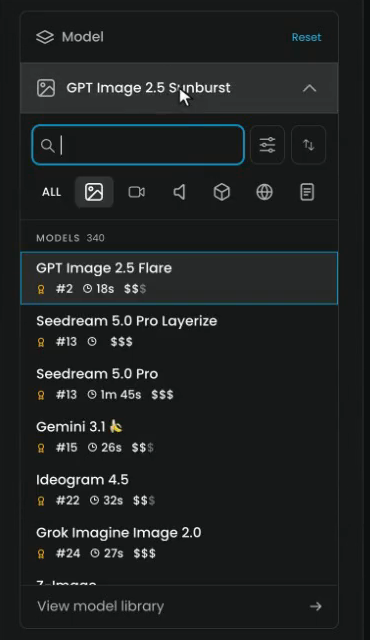
In the image panel, click the model's name at the top, here GPT Image 2.5 Sunburst. A short list opens, with a search box, a row of icons to filter by what a model makes (images, video, audio, 3D and more), and each model's rank and typical time. At the bottom, click View model library.
The library opens as Choose a model: every model in Scenario, from Scenario, partners and your team. The filters on the left answer the three questions.
Step 2: Answer the three questions
What is the job? That's Capabilities: make an image from text, edit one, upscale it, remove a background, turn it into a vector, and more. Each capability shows how many models can do it. Click Show all to see the full list. The first job here is a character from a text prompt, so tick Text to Image.
What do you start from? That's Input kind. Here, just a prompt, so leave it. If you start from reference images, tick Image, then check in the model's details how many references it can use.
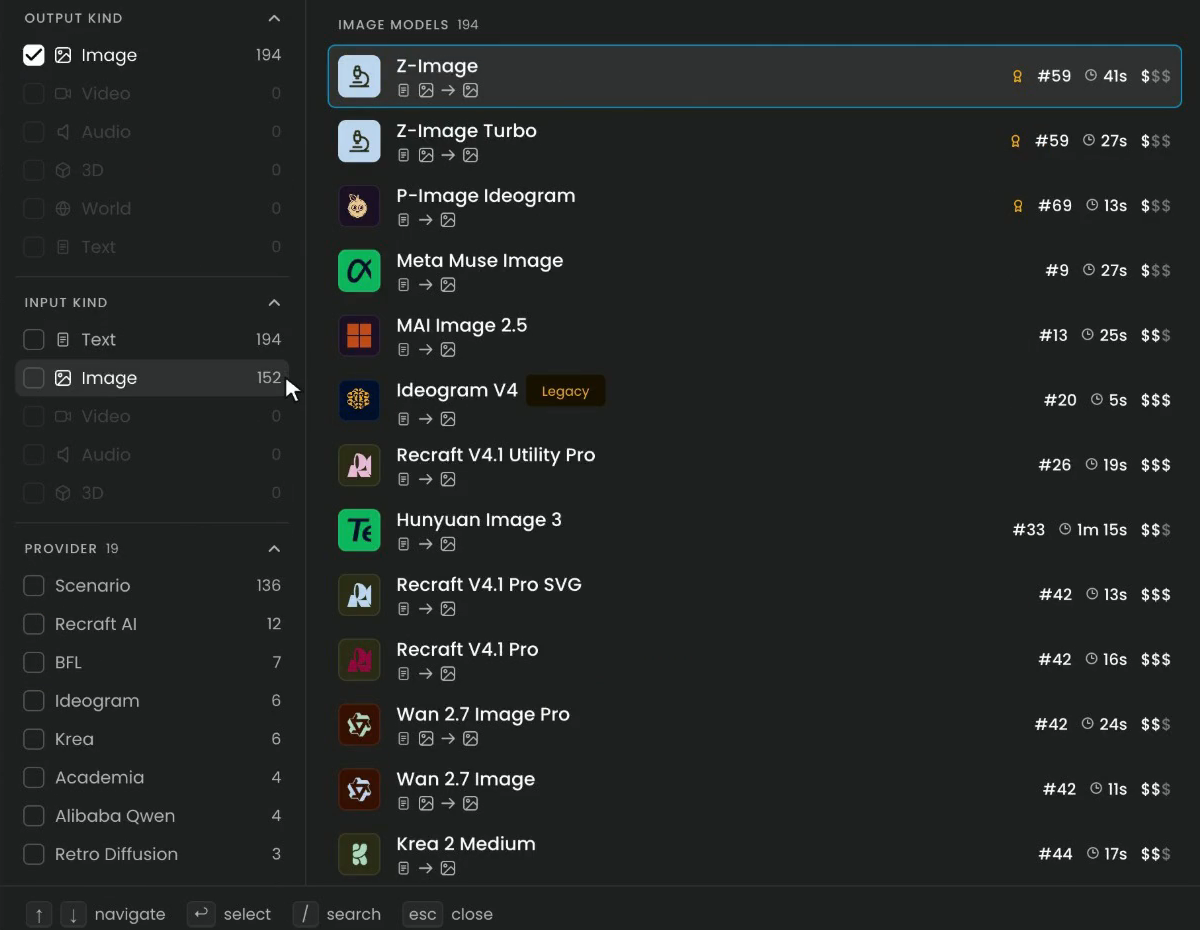
What is your budget? Under Budget and speed, Budget sets the maximum cost, from $ to $$$. For one great image, you can spend more. For lots of images, a cheaper model keeps the cost down. The Speed slider below sets how long a model may take to make an image, from seconds up to Any speed.
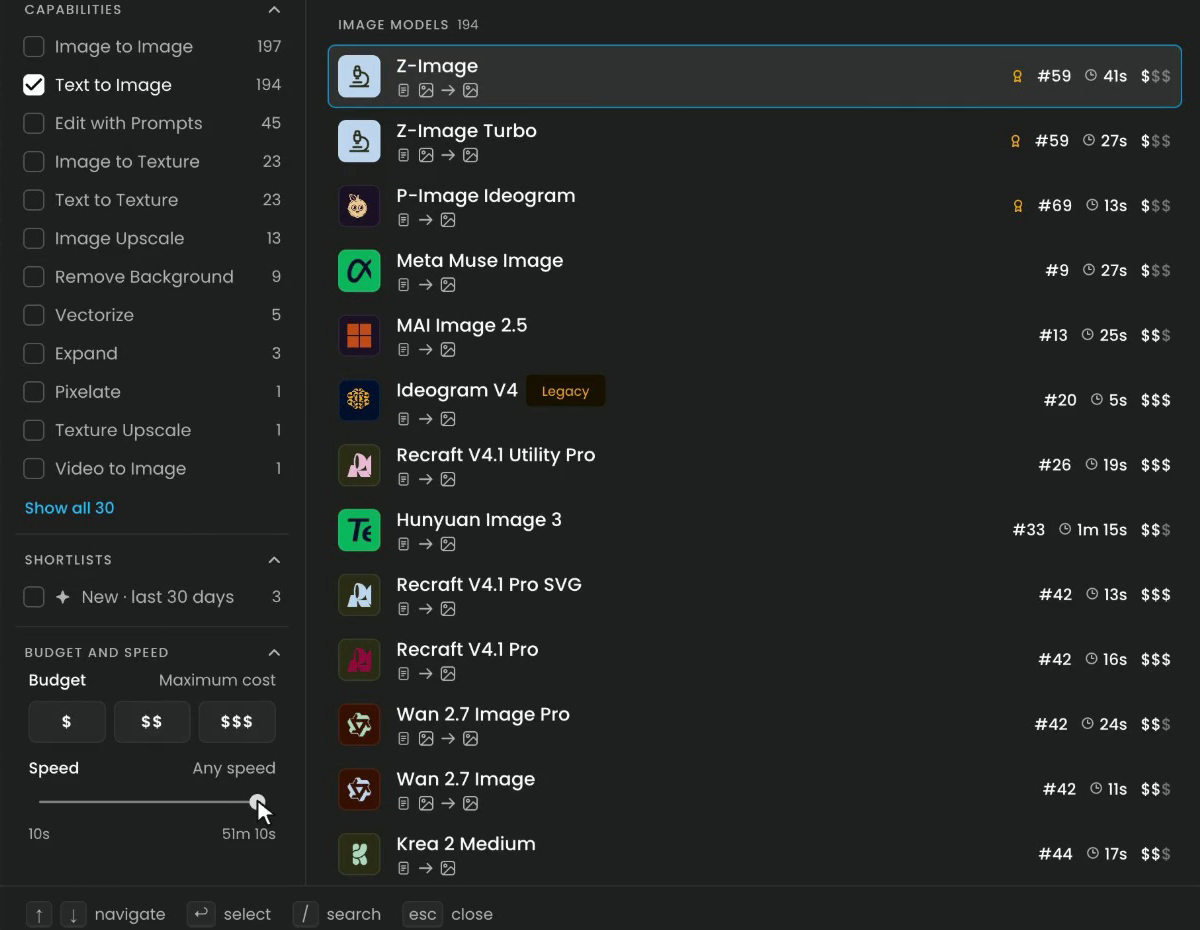
Every filter you tick shows as a chip above the list, with the number of models left.
Step 3: Try a new model
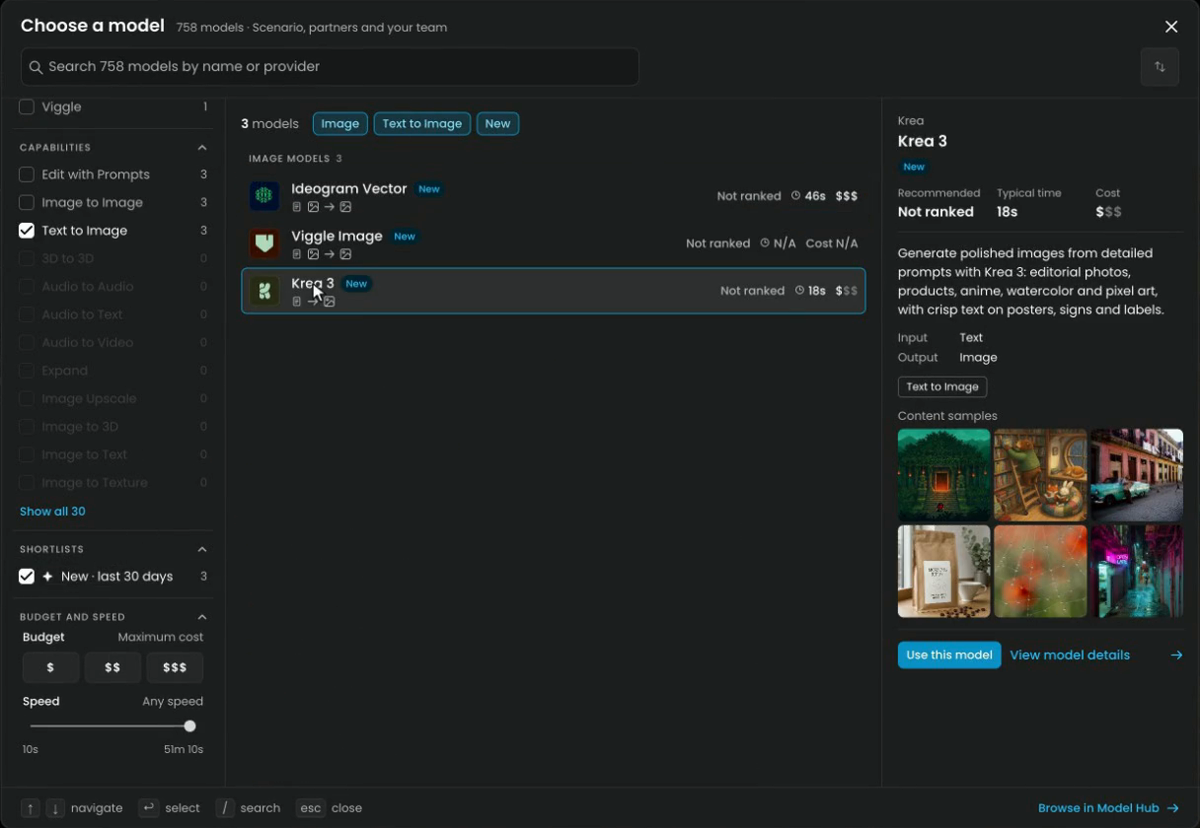
To see the most recent image models, tick New · last 30 days under Shortlists. With Text to Image still ticked, three models are left. Krea 3 is one of them.
Hover a model to see its details on the right:
- Recommended: its rank. New models may show Not ranked.
- Typical time: how long one image usually takes.
- Cost: its cost tier, from $ to $$$. The exact cost shows on the Generate button.
- A short description, its Input and Output, its capabilities, and Content samples made with it.
Krea 3 takes text only and makes polished images from detailed prompts, from editorial photos and products to anime, watercolor and pixel art. Click Use this model.
To read everything about a model before you pick it, click View model details, or Browse in Model Hub at the bottom of the library.
Step 4: Generate with the same prompt and size
The prompt stays in the panel when you switch models, so only the model changes. The settings do change: each model has its own. For Krea 3:
- Model: the engine. Berry (quality) is for quality, Jam for speed.
- Image Size: match the image you compare against. The first image was 16:9, so pick 16:9 (1024x576).
- Reasoning Level: leave it at Low. Raise it when a prompt packs in a lot of text or detail.
- Negative Prompt and Seed: leave them empty.
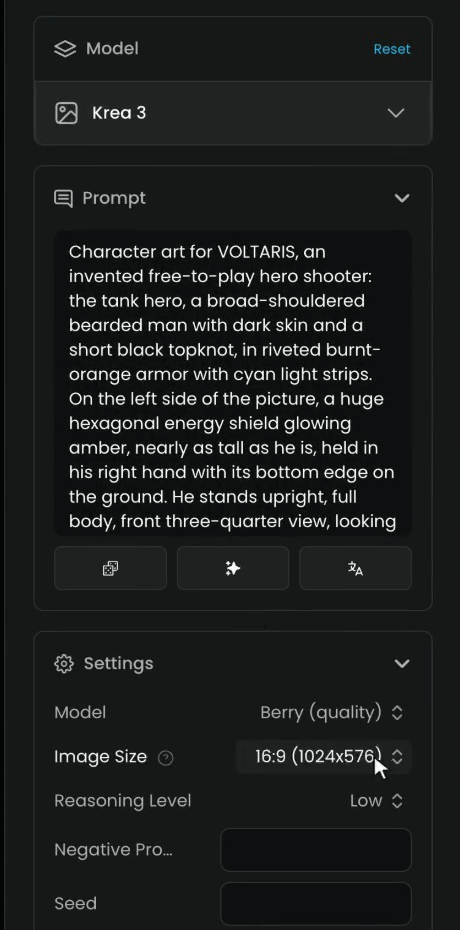
Click Generate. The cost shows on the button before you click.
Step 5: Compare the two images
When the Krea 3 image is ready, select it and the image from before: click the circle in the corner of each one in the Session. A bar appears at the bottom with 2 selected. Click Compare Images.

Compare Images opens on Side by Side, with each model's name under its image.
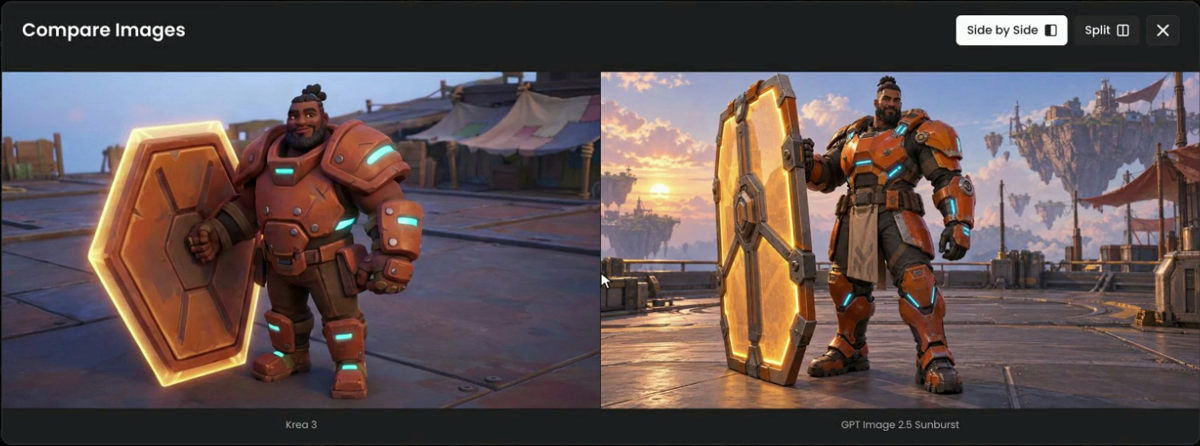
Click Split to lay one image over the other, then drag the line to see what each model did differently: the build of the character, the shield, the light, the background.
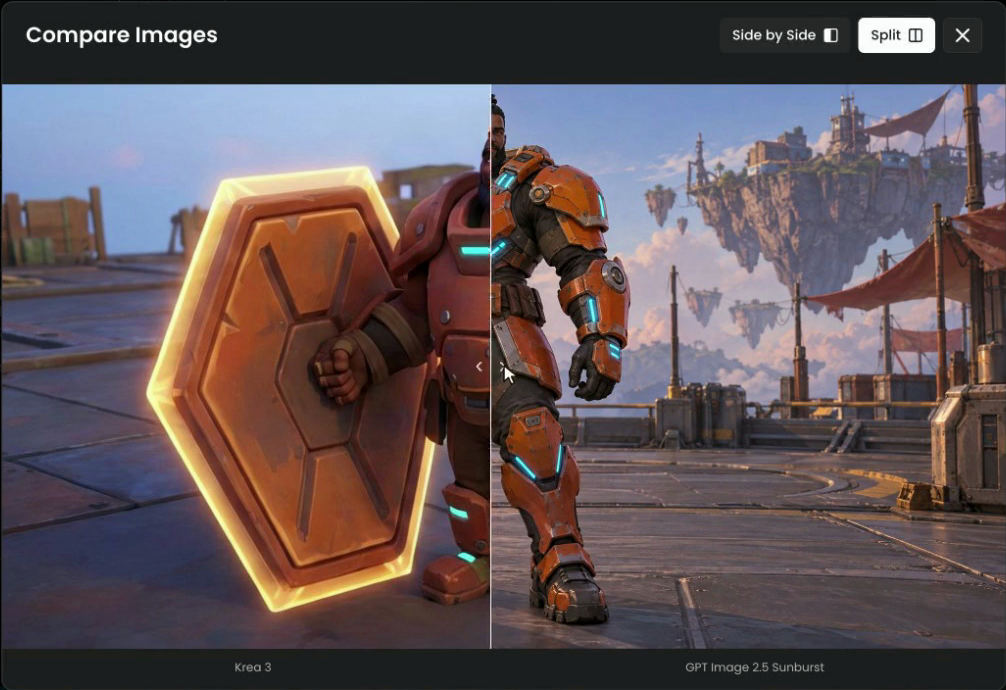
Here, Krea 3 made a chunkier, more cartoon-like character, and GPT Image 2.5 Sunburst a taller, more detailed one. Neither is wrong: the one that fits your brief wins.
the model follows every part of the prompt you care about (subject, pose, framing, style), at the size you need, within your budget and time.
it drops or changes something the prompt asked for, its style doesn't fit the project, or it costs or takes more than the job allows. Try the next model on your shortlist.
Step 6: Find a model for another job
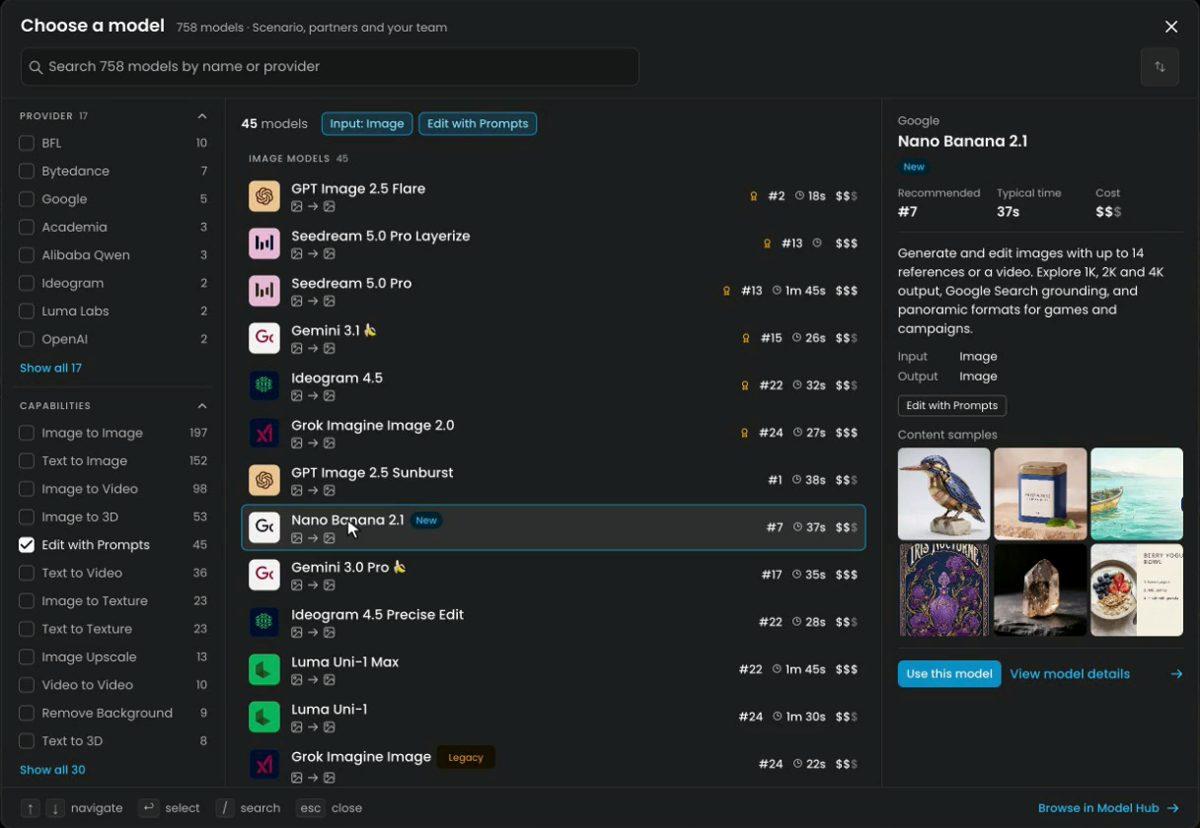
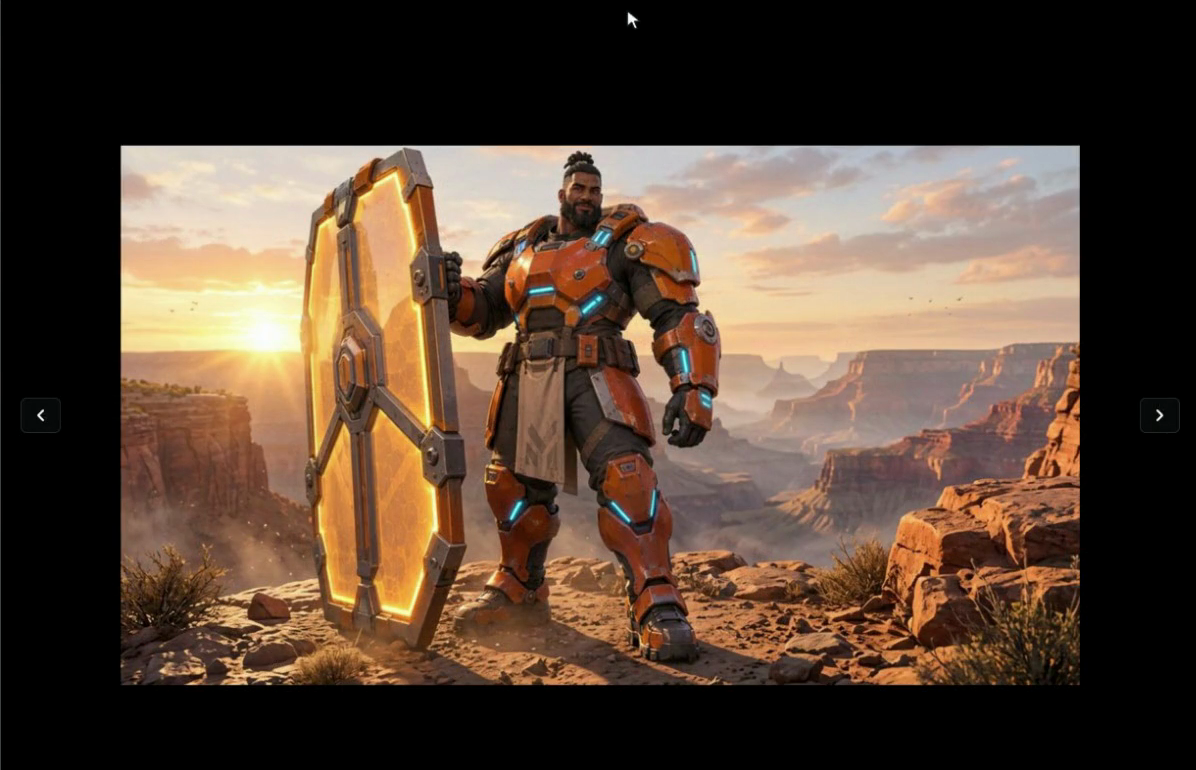
The second job is the same character in a new scene, made from his image. The job and the input have changed, so the model has to change too.
- Open the model library again and clear the filters.
- You start from an image: tick Image under Input kind.
- The job is to edit it with a prompt: tick Edit with Prompts under Capabilities.
The list changes. Krea 3 is gone, because it only reads text. Nano Banana 2.1 generates and edits images with up to 14 references, and it keeps a character as he is. Click Use this model.
Step 7: Add the reference and generate
- Open Reference images and click Select from Library.
- Pick the character from the first lesson and click Confirm. The image shows under Reference images.
- Replace the prompt with what changes, and what must stay.
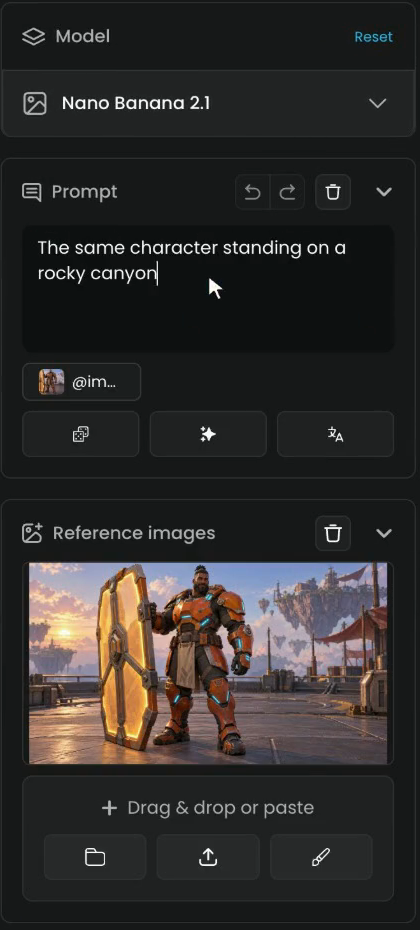
The prompt the film uses:
The same character standing on a rocky canyon ridge at sunrise. Keep his armor, shield and pose.
Click Generate. The same character stands in a new scene.
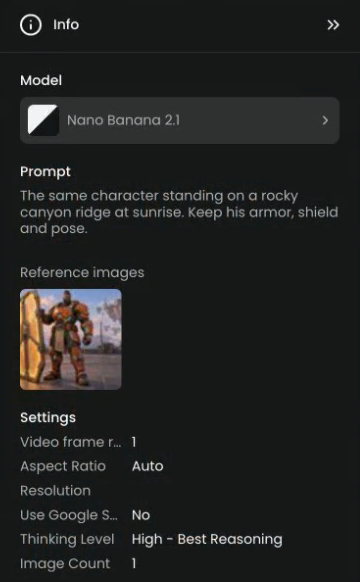
The Info panel next to the image shows the model, the prompt, the reference image and every setting, so you can reload the setup for the next version.
The model library filters
| Filter | What it answers | Example |
|---|---|---|
| Capabilities | What the model does | Text to Image, Edit with Prompts, Image Upscale, Remove Background, Vectorize, Pixelate |
| Output kind | What it makes | Image, Video, Audio, 3D, World, Text |
| Input kind | What you give it | Text, Image, Video, Audio, 3D |
| Provider | Who made it | Scenario, Recraft AI, BFL, Ideogram, Krea and more |
| Shortlists | A ready-made selection | New · last 30 days |
| Budget | The highest cost tier you accept | $, $$, $$$ |
| Speed | The longest typical time you accept | From seconds to Any speed |
The search box at the top finds a model by name or provider.
Image model families compared
These are the models this lesson meets, with what their details and the Knowledge Center say they do best.
| Model | Starts from | Best for |
|---|---|---|
| GPT Image 2.5 Sunburst | Text or images | Detailed, precise images |
| GPT Image 2.5 Flare | Text or images | Fast, high-quality everyday content, from social posts to product shots and quick concepts |
| Nano Banana 2.1 | Text, up to 14 references, or a video | Keeping a character or product as it is in new scenes; panoramic and very tall formats |
| Krea 3 | Text only | Polished images from detailed prompts, with crisp text on posters, signs and labels |
| Ideogram 4.5 | Text or images | Posters, logos and packaging with accurate text; edits with up to four references and a mask |
| Z-Image | Text or images | Photorealistic images, with text in English and Chinese |
| MAI Image 2.5 | Text or images | Photorealistic generation and editing |
| Krea 2 Large | Text | Photograph-grade results with grain and motion blur |
| Krea 2 Medium | Text, style references | A chosen illustrated or anime look |
| Recraft V4 SVG and V4 Pro SVG | Text | Real vector files (SVG) for logos and icons |
| Retro Diffusion Plus | Text | Pixel illustrations, character portraits and scenes |
Models come and go every month. Treat this table as a starting shortlist and check the library's New · last 30 days before a big project.
Tips for a fair test
- Keep the prompt, the size and the image count the same. Otherwise you compare settings, not models.
- Test on your real brief, not on the model's samples. A model that shines on landscapes may miss your character's details.
- Shortlist two or three models, not ten. Generate each once, compare, and keep the winner.
- Start with a base model. If none fits a project's style after a few tries, a trained model may be the answer. See Give a whole team one brand look.
- Check what a model accepts. The details show its Input; a text-only model ignores reference images.
Common problems
| What you see | What to do |
|---|---|
| The model you want isn't in the list | A filter hides it. Clear the filters, or search by name |
| The library shows no models | Two of your filters exclude each other. Untick one |
| The new model ignores your reference image | It only reads text. Filter by Input kind › Image and pick another |
| The two images can't be compared fairly | Match Image Size and the prompt, then generate again |
| Compare Images doesn't show | Select exactly the images you want: the circle in each image's corner |
| The character changed in the new scene | Use a model built to keep a character, such as Nano Banana 2.1, and say what to keep in the prompt |
What's next
You can pick a model for the job. Next, write prompts that get the most out of it in Write better prompts. For images with words in them, see Text and typography in images. To run a full model test for a team, follow Run a model shoot-out for your studio.