

Content and security
What you own, where data goes, and the controls that watermark, check and gate what your team generates.
- Tutorial
On this page12 sections
- Before you start
- Step 1: Choose what IP Detection looks for
- Step 2: Turn on enforcement
- Step 3: Turn the check off for one project, if you need to
- Step 4: Write a brand brief for Quality Gate
- Step 5: Score every new image
- Step 6: Read a score
- Step 7: Set a watermark
- Step 8: Send your security team to the Trust Center
- Step 9: Restore what was deleted by mistake
- Common problems
- What's next
Every company asks two questions: can we control what gets made, and what happens to our data? This lesson sets up the three content controls in the Starforge Games organization, IP Detection, Quality Gate and Watermark, then shows where your security team finds Scenario's security information, and how to get back something deleted by mistake.
Quick version
- IP Detection blocks: turn on the built-in filters you need, add up to six of your own, then turn on Enforcement.
- Quality Gate scores: write a Brand brief, then turn on Auto-detect on generation to score every new image.
- Watermark marks: set your text or logo, its placement, and turn on Apply to every generation.
- Send your security team to Scenario's Trust Center for the SOC 2 report, the controls and the subprocessors.
- Restore anything deleted by mistake from the trash within 30 days.
Before you start
- You need to be an organization Admin to change these settings. Other members see the pages without the controls.
- All three content controls are Enterprise features. Each one lives under Settings › Organization, with a project version under Settings › Project.
- Turn on only the ones your policy needs. Each tool has one job:
| Tool | Its job | Does it stop a job? | A project can |
|---|---|---|---|
| IP Detection | Checks every job for IP risk before it runs | Yes, when enforcement is on | Only turn the check off |
| Quality Gate | Scores images for AI defects and brand fit | Never | Add its own brief |
| Watermark | Marks every generated image and video | No | Set its own watermark |
- Checks cost compute units. The Estimated cost row at the top of the IP Detection and Quality Gate pages shows what each check costs, in CU, for your current settings.
Step 1: Choose what IP Detection looks for
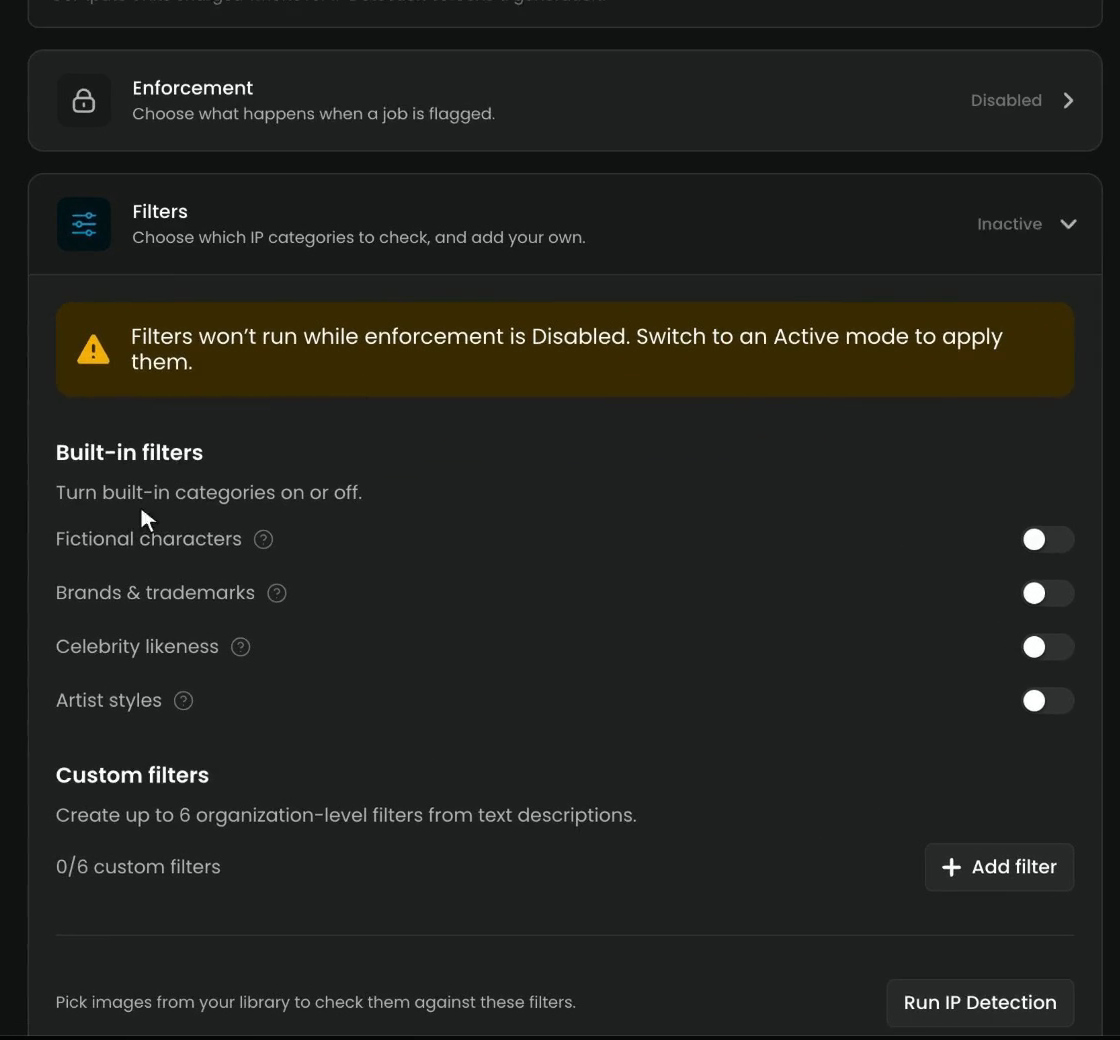
IP Detection checks every job before it runs: it reads the prompt and the input images. Open Organization › IP Detection and expand Filters ("Choose which IP categories to check, and add your own").
Under Built-in filters, turn on what to look for. All four start off:
| Built-in filter | What it catches |
|---|---|
| Fictional characters | Characters from films, games, comics and books, including their signature look; generic archetypes aren't flagged |
| Brands & trademarks | Logos, packaging and product designs owned by a company |
| Celebrity likeness | The face or recognizable look of a real public figure, named in the prompt or in an input image |
| Artist styles | Imitations of the signature style of a named artist |
Under Custom filters, click Add filter to add up to six filters of your own (the counter shows 0/6 custom filters). Give each a name your team will recognize and a plain-language description of what to flag and what not to flag; it can also draft the description from reference images in your library. Run IP Detection, at the bottom, checks images you pick from your library against these filters.
Step 2: Turn on enforcement
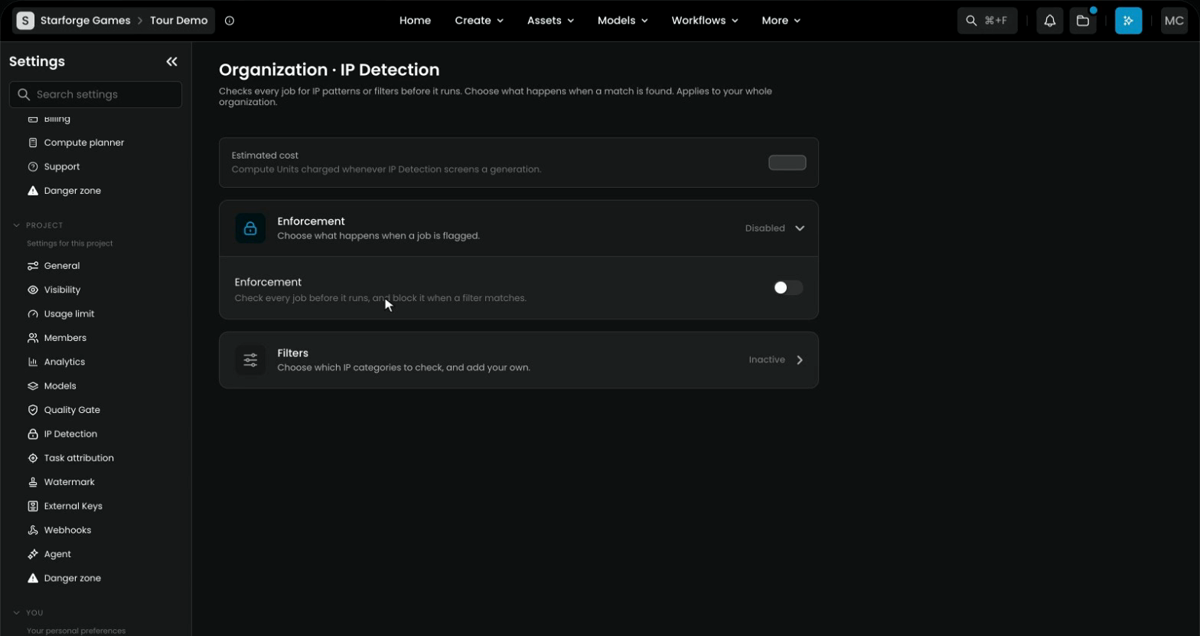
The filters only run once enforcement is on: until then, a yellow banner says "Filters won't run while enforcement is Disabled." Expand Enforcement ("Choose what happens when a job is flagged") and switch it on.
From then on, every job is checked before it runs, and a match blocks the job. A blocked job fails at once with a message about potential IP risk; nothing is generated. The filters apply to the whole organization, in the web app and through the API.
Step 3: Turn the check off for one project, if you need to
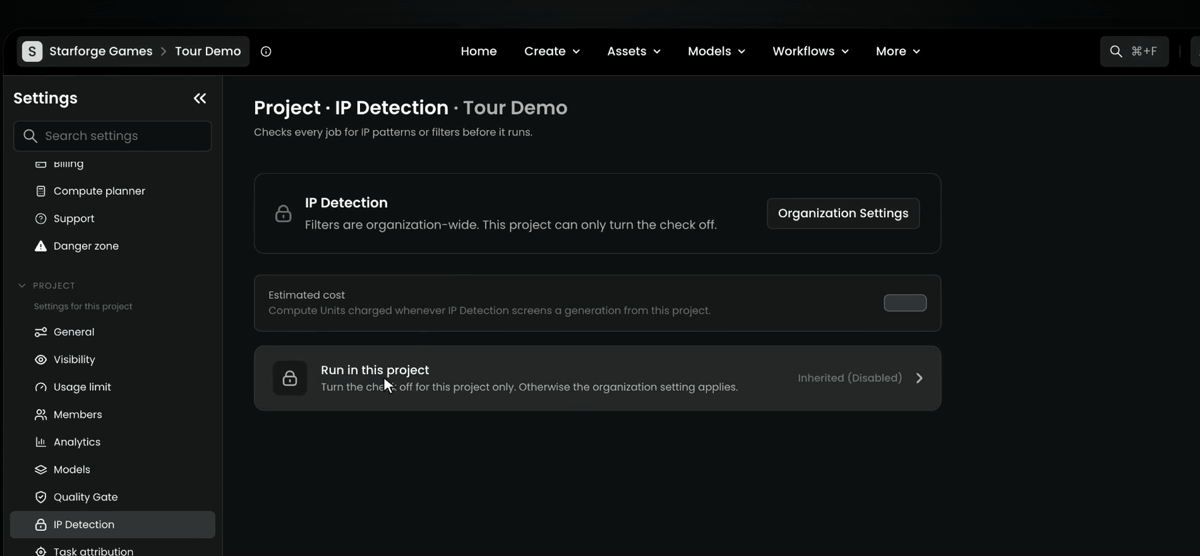
A project can only turn the check off, for licensed work for example. Open Project › IP Detection and expand Run in this project: until you change it, it shows Inherited with the organization's setting. A project can't pick its own filters or make the check stricter, and only an organization admin can change it.
Step 4: Write a brand brief for Quality Gate
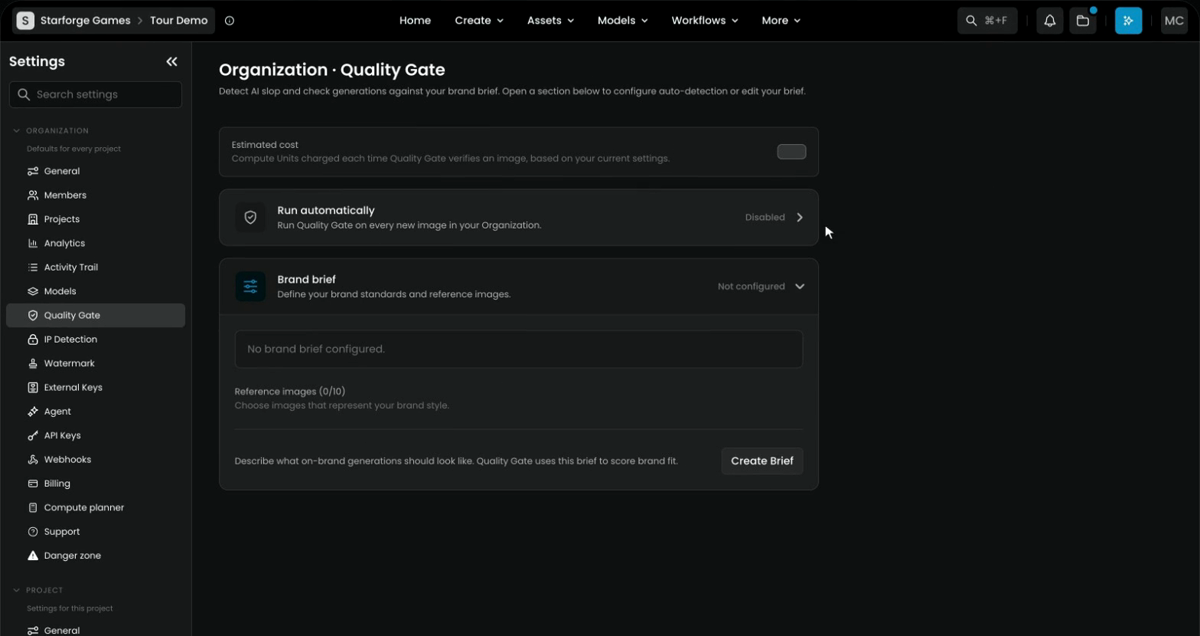
Quality Gate scores each image out of 100, for AI defects and against your brand brief. Open Organization › Quality Gate ("Detect AI slop and check generations against your brand brief"). It has two sections: Run automatically and Brand brief.
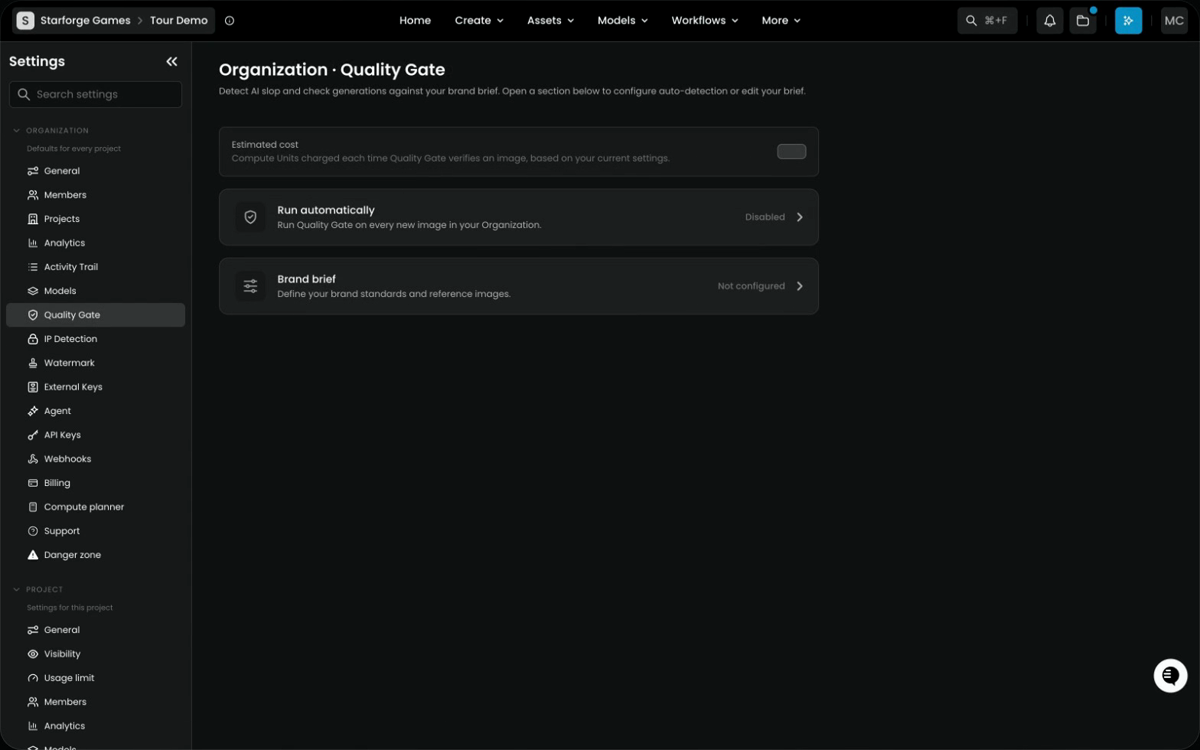
Expand Brand brief and click Create Brief. A brief is:
- A description of what an on-brand image looks like: palette, lighting, rendering style, subject rules, and what should never appear.
- Reference images, up to 10, that show the style to match.
Without a brief, Quality Gate still runs, but it scores AI quality only. A project can add its own brief under Project › Quality Gate, which refines the organization's.
Step 5: Score every new image
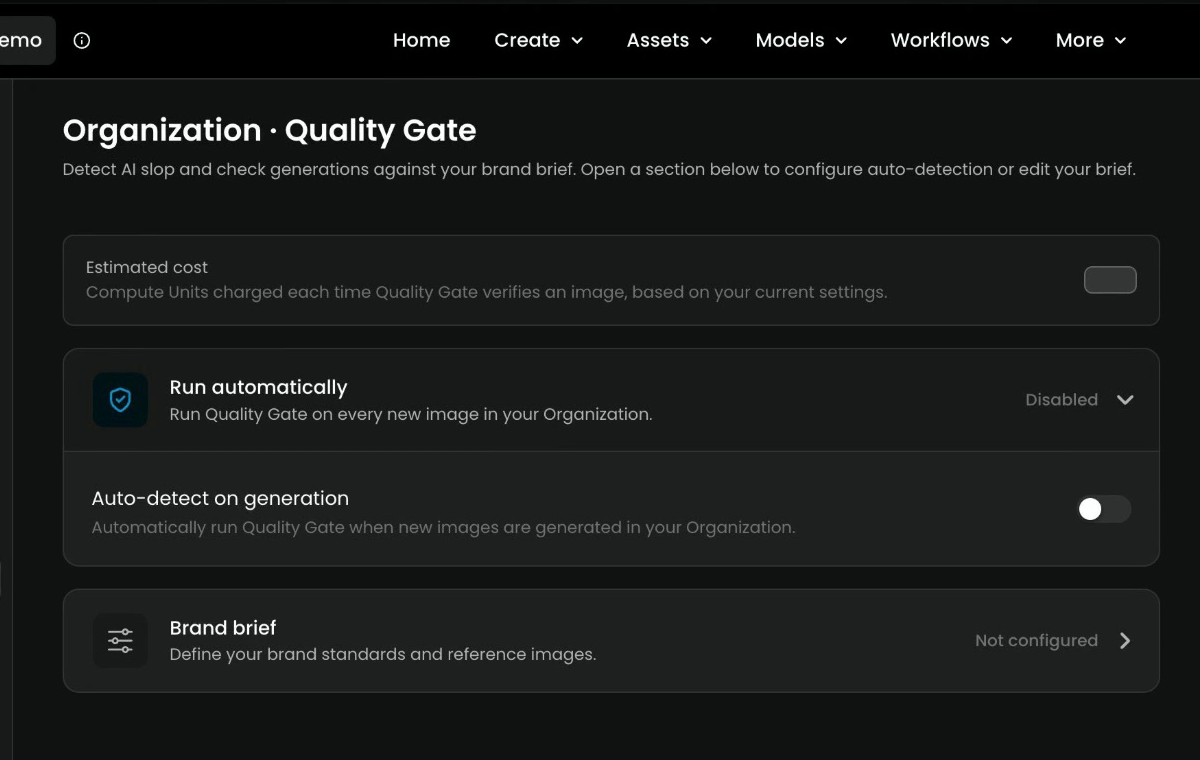
Expand Run automatically and turn on Auto-detect on generation to check every new image generated in your organization. You can also run it on demand on a few images first, to see how your brief behaves.
Quality Gate never blocks anything. Each image gets Pass, Review or Fail; Review means a person should take a look.
Step 6: Read a score
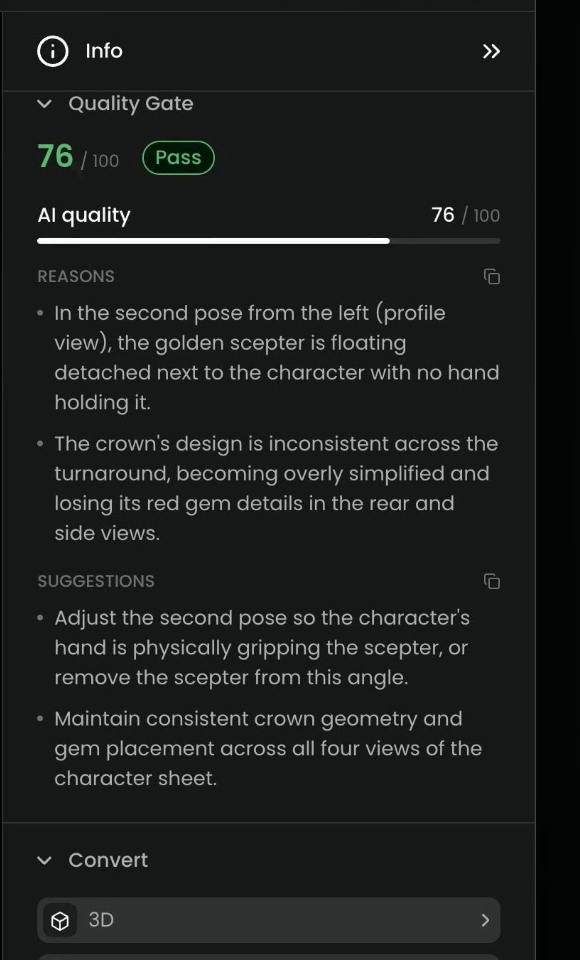
A scored image shows its result in the Info panel, under Quality Gate: here, 76 out of 100, a Pass. Below are the scores per dimension, the Reasons, and Suggestions to fix them.
| Dimension | What it measures |
|---|---|
| Brief compliance | How closely the image follows your brief and reference images; scored only when a brief applies |
| AI quality | Freedom from the usual giveaways: broken hands, garbled text, waxy skin, melted or duplicated detail, incoherent backgrounds |
Sensitivity, set per brief, moves the lines between Pass, Review and Fail without changing the scores:
| Sensitivity | Fail | Review | Pass |
|---|---|---|---|
| Low | Below 40 | 40 to 59 | 60 and above |
| Medium (default) | Below 50 | 50 to 69 | 70 and above |
| High | Below 60 | 60 to 79 | 80 and above |
Step 7: Set a watermark
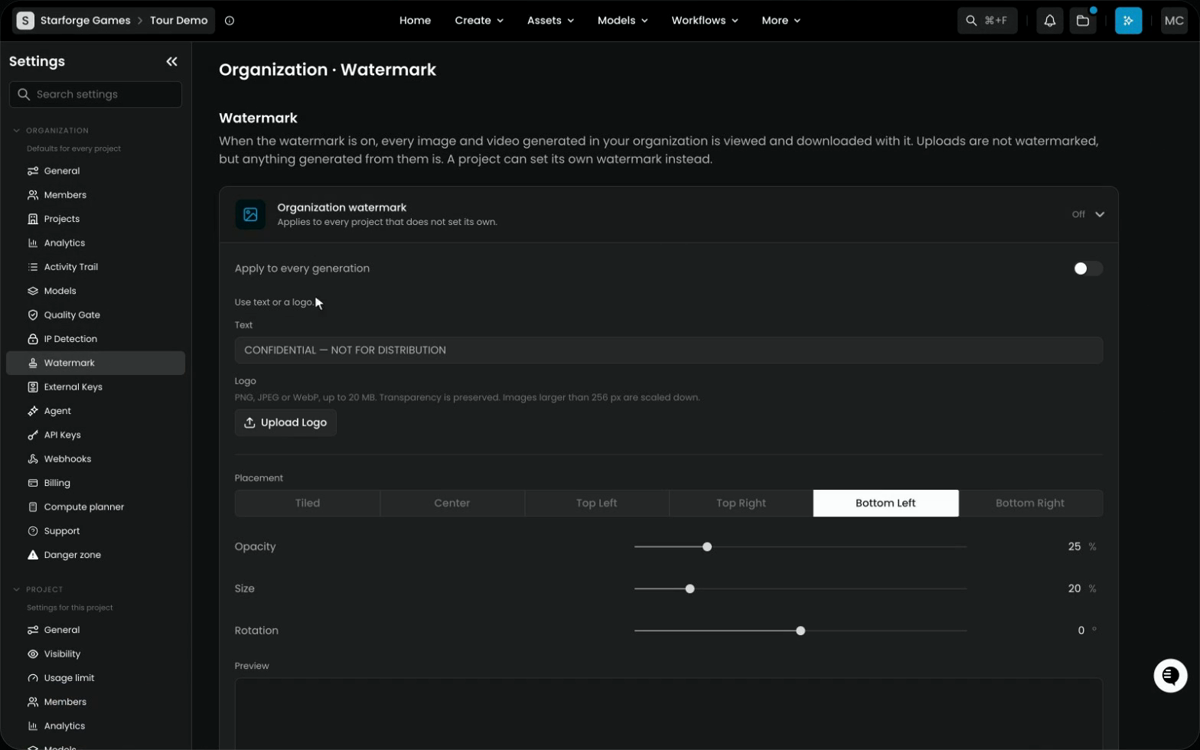
Watermark puts your text or logo on every image and video your team generates, whenever it's viewed or downloaded. Open Organization › Watermark and expand Organization watermark:
| Setting | What it does |
|---|---|
| Text | The words to stamp, for example your studio name or "CONFIDENTIAL" |
| Upload Logo | A PNG, JPEG or WebP logo, used instead of the text; use one with a transparent background |
| Placement | Tiled repeats the mark; Center, Top Left, Top Right, Bottom Left and Bottom Right draw it once |
| Opacity, Size, Rotation | How strong, how wide (as a share of the image) and how tilted the mark is |
| Spacing | For Tiled only: the gap between repetitions |
The Preview updates as you go. Turn on Apply to every generation and save.
Uploads aren't marked, but anything generated from them is. Your originals stay intact, so turning the watermark off serves images clean again. A project can set its own under Project › Watermark, which replaces the organization's for that project.
Step 8: Send your security team to the Trust Center
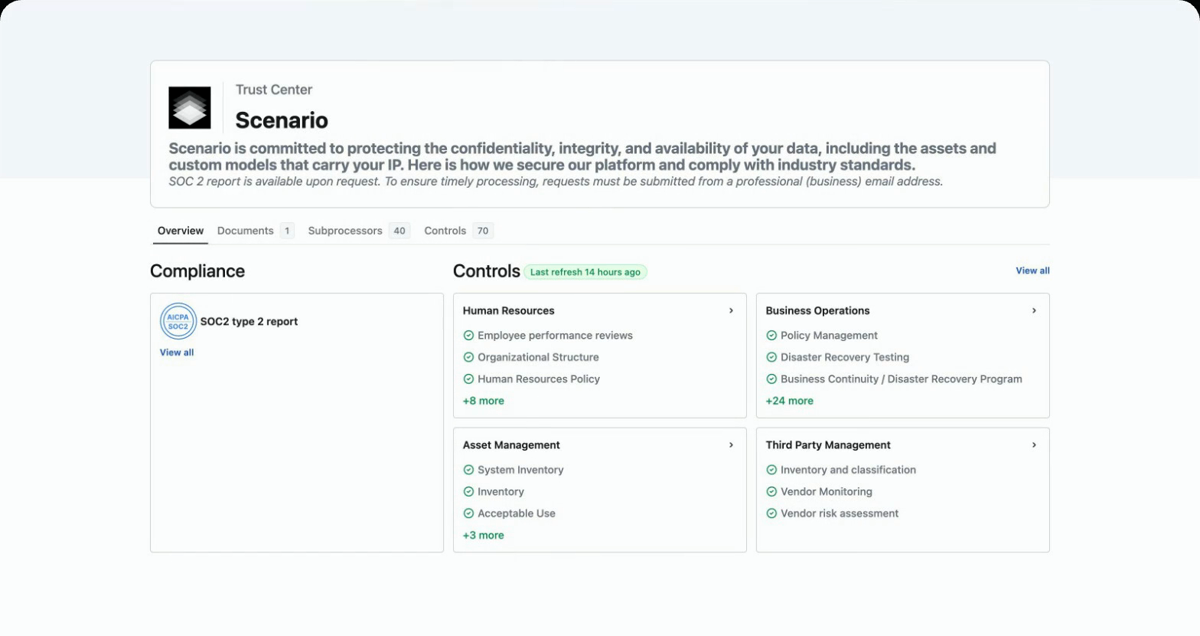
When your security team asks, send them to Scenario's Trust Center, at trust.scenario.com. Scenario holds a SOC 2 Type 2 report.
- Overview shows the compliance report and a summary of the controls.
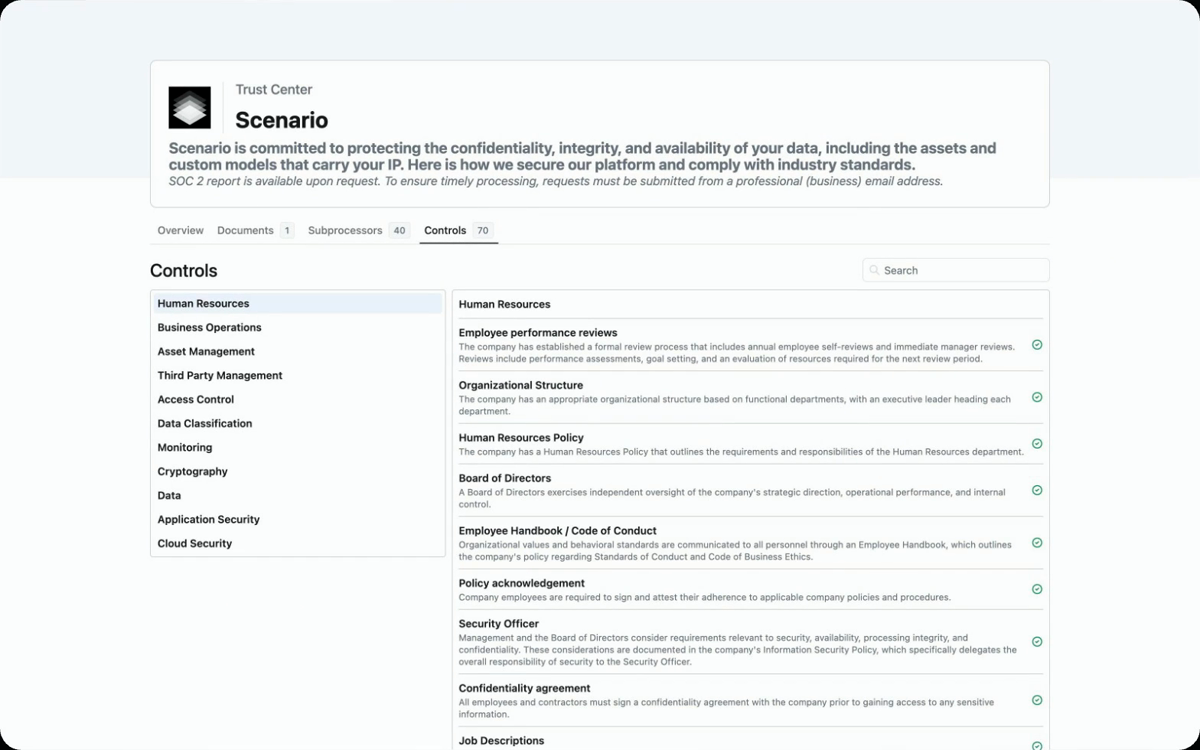
- Controls lists the controls in place, from access control and encryption to monitoring, grouped by area (Human Resources, Asset Management, Access Control, Cryptography, Monitoring, Cloud Security and more).
- Subprocessors lists every subprocessor, what it does, and where. The main infrastructure runs on AWS, in the United States.
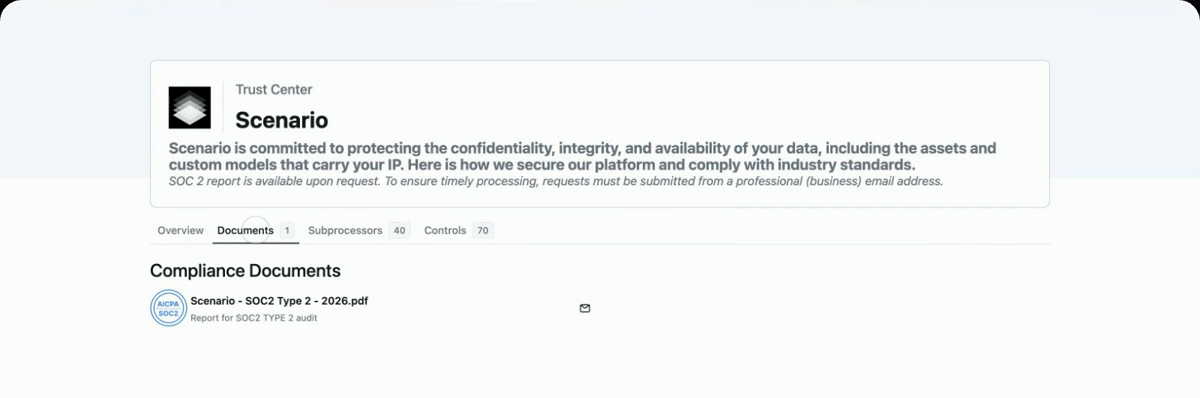
- Documents holds the SOC 2 report. Request it right there, from a business email address.
Step 9: Restore what was deleted by mistake
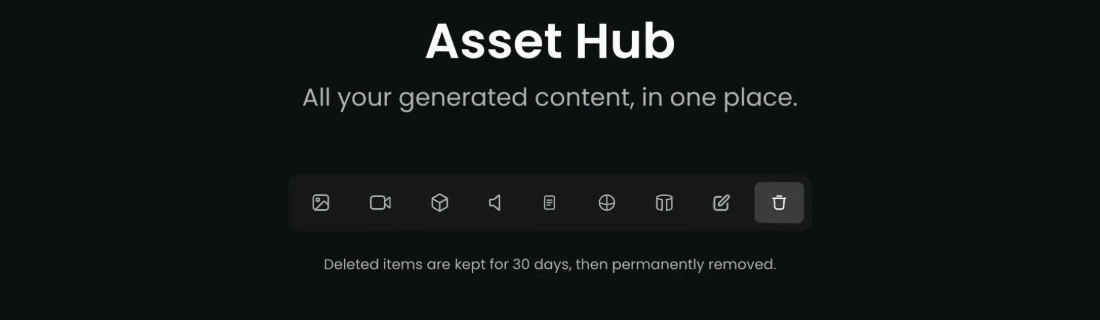
If someone deletes something by mistake, it stays in the trash for 30 days, and you can restore it. Open Assets and click the trash icon, the last of the type filters under the title. Each item shows how many days it has left. After 30 days it's removed for good. Deleting a whole project skips the trash: it removes everything in the project at once.
Common problems
| What you see | What to do |
|---|---|
| IP Detection blocks nothing | Turn on Enforcement, and at least one built-in or custom filter |
| A licensed project keeps getting blocked | Turn the check off for that project under Project › IP Detection › Run in this project |
| A custom filter flags too much | Edit its description to say what should not be flagged; the change applies on the next job |
| Quality Gate scores ignore your brand | Write a Brand brief with reference images |
| Too many images land on Review | Lower the brief's sensitivity, or improve the brief |
| A client project needs another mark | Set a project watermark under Project › Watermark |
| Someone deleted assets by mistake | Restore them from the trash within 30 days |
What's next
Your team's work is now checked, scored and marked. Next, the last lesson, Share and roll out: working as a team, from sharing workflows to guiding the Agent.