

Generate images from the image panel
Use every part of the image generator, from model and prompt to references, size, count, quality and the results view.
- Guide
- Step 1 Learn
On this page12 sections
The image panel turns a written description into new images. This lesson walks through it from top to bottom and makes a game character with GPT Image 2.5 Sunburst: two takes of a tank hero for an invented hero shooter, at 2048 × 1152. Then it shows what you can do with the result.
Quick version
- Open Create › Images.
- Pick a model at the top of the panel. It decides which settings appear below it.
- Write the prompt: subject, pose, background, light, style, and what must not appear.
- Set Image Count, Dimensions, Quality and Background, then click Generate.
- Open a result to read its Info, reuse it, upscale it or edit it.
Before you start
- Where it lives. The image panel is under Create › Images in the top bar. You set everything up in the column on the left, and your images appear on the right, in the Session tab.
- The model comes first. Each model accepts different inputs. When you change the model, the reference and settings sections below it change too, so pick the model before you tune anything else.
- Credits. Every run uses credits. The cost shows on the Generate button and updates as you change the settings.
- What you need. A description of the image you want. A reference image is optional; this lesson doesn't use one.
Step 1: Pick a model
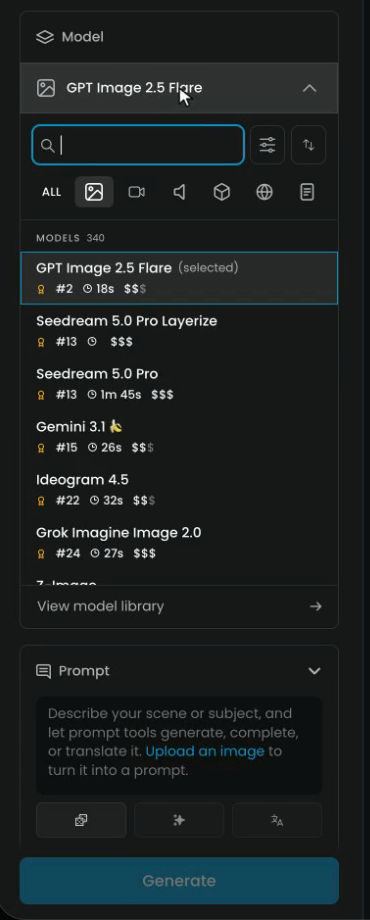
Click the model's name at the top of the panel to open the list.
- Search by name in the box at the top of the list.
- Use the row of icons under it to filter by what a model makes: ALL, images, video, audio, 3D and more.
- Each model shows its rank and about how long a run takes.
- View model library, at the bottom of the list, opens the full library, where you can compare every model with examples.
For this character, pick GPT Image 2.5 Sunburst, a model built for detailed, precise images. The panel opened on its faster sibling, GPT Image 2.5 Flare, which suits everyday work.
Step 2: Write the prompt
The prompt is your description of the image. A clear order helps the model:
- The subject first: who or what, and what they look like.
- The pose and the framing.
- The background.
- The light.
- The style.
- What must not appear.
This is the prompt the film uses. The last paragraph is the game's style. Keep it the same in every prompt for this world, so every image of it looks the same.
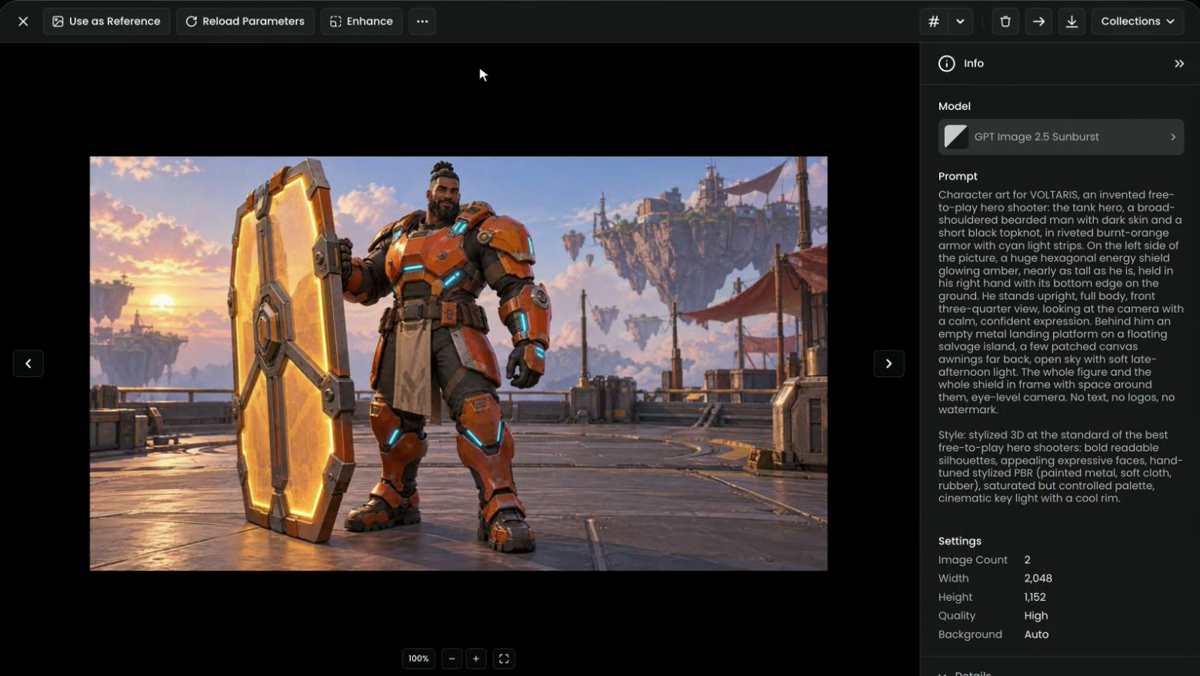
Character art for VOLTARIS, an invented free-to-play hero shooter: the tank hero, a broad-shouldered bearded man with dark skin and a short black topknot, in riveted burnt-orange armor with cyan light strips. On the left side of the picture, a huge hexagonal energy shield glowing amber, nearly as tall as he is, held in his right hand with its bottom edge on the ground. He stands upright, full body, front three-quarter view, looking at the camera with a calm, confident expression. Behind him an empty metal landing platform on a floating salvage island, a few patched canvas awnings far back, open sky with soft late-afternoon light. The whole figure and the whole shield in frame with space around them, eye-level camera. No text, no logos, no watermark.

Style: stylized 3D at the standard of the best free-to-play hero shooters: bold readable silhouettes, appealing expressive faces, hand-tuned stylized PBR (painted metal, soft cloth, rubber), saturated but controlled palette, cinematic key light with a cool rim.
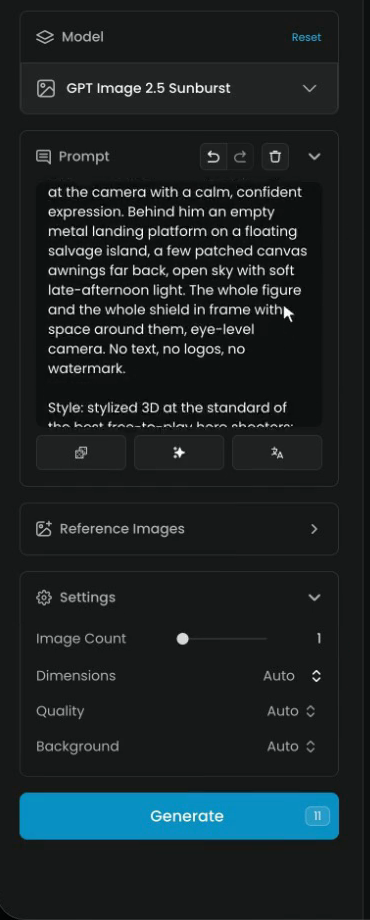
Under the box are three prompt tools:
- The first icon writes a new prompt from scratch, suited to the current model.
- Prompt Spark (the sparkle icon) improves the prompt you wrote, adding detail to a few words or a rough idea.
- The last icon translates your prompt into English.
Above the box, undo, redo and a trash icon let you step back or clear the prompt.
Step 3: Add reference images, if you need them
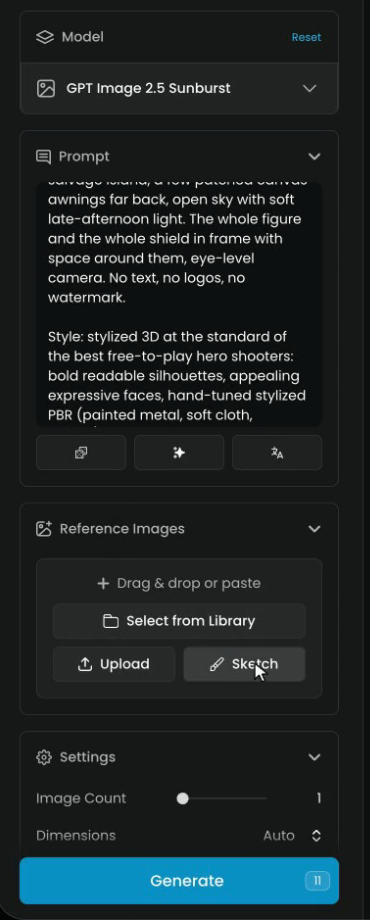
Below the prompt, open Reference Images. A reference shows the model something words can't: a character to keep, a style to match, an object to place. You can:
- Drag & drop or paste an image into the box.
- Select from Library to pick an image you already have in Scenario.
- Upload a file from your computer.
- Sketch a rough guide by hand.
This character doesn't need one, so leave it empty. When you use several, say in the prompt what each one is for, for example "Image 1 is the character, image 2 is the setting". How many references a model accepts depends on the model.
Step 4: Choose the settings
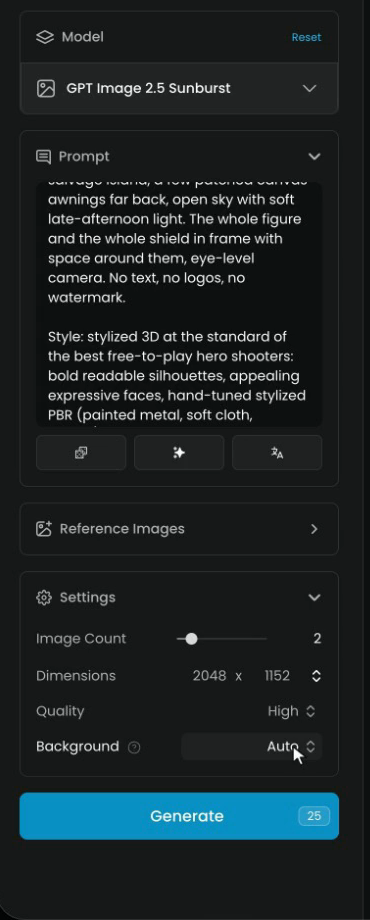
Open Settings. These are the settings GPT Image 2.5 Sunburst shows; another model can show others.
- Image Count is how many images one run makes. Set it to 2, to get two takes of the same prompt to choose from.
- Dimensions sets the size in pixels. Open the presets and pick 16:9, at 2048 × 1152.
- Quality goes from low up to max. Higher looks better and takes longer. High is a good choice for a final; low is enough to test an idea.
- Background stays on Auto. Choose transparent when you need a cutout, like an icon or a sticker.
Each of these is explained in more depth, with the settings of other models, in Image settings explained.
Step 5: Generate
The Generate button shows what the run costs, and it updates as you change the count, the size or the quality. Click it, or press Cmd/Ctrl + Enter.
Your images start in the Session tab, as tiles marked Generating. A detailed image like this takes under a minute. You can keep working on the next prompt while it runs.
Step 6: Open the result
Here are the two takes from the same prompt. Click one to open it full size.
The Info panel on the right shows the model, the full prompt and every setting (here Image Count 2, Width 2,048, Height 1,152, Quality High, Background Auto), so you always know how an image was made. Details, under it, adds the type, the size in pixels and when it was made. Use the arrows on each side, or the strip of thumbnails, to move between images, and the zoom controls under the image to check details.
Step 7: Reuse, upscale or edit it
The bar above the image is where the next step starts.
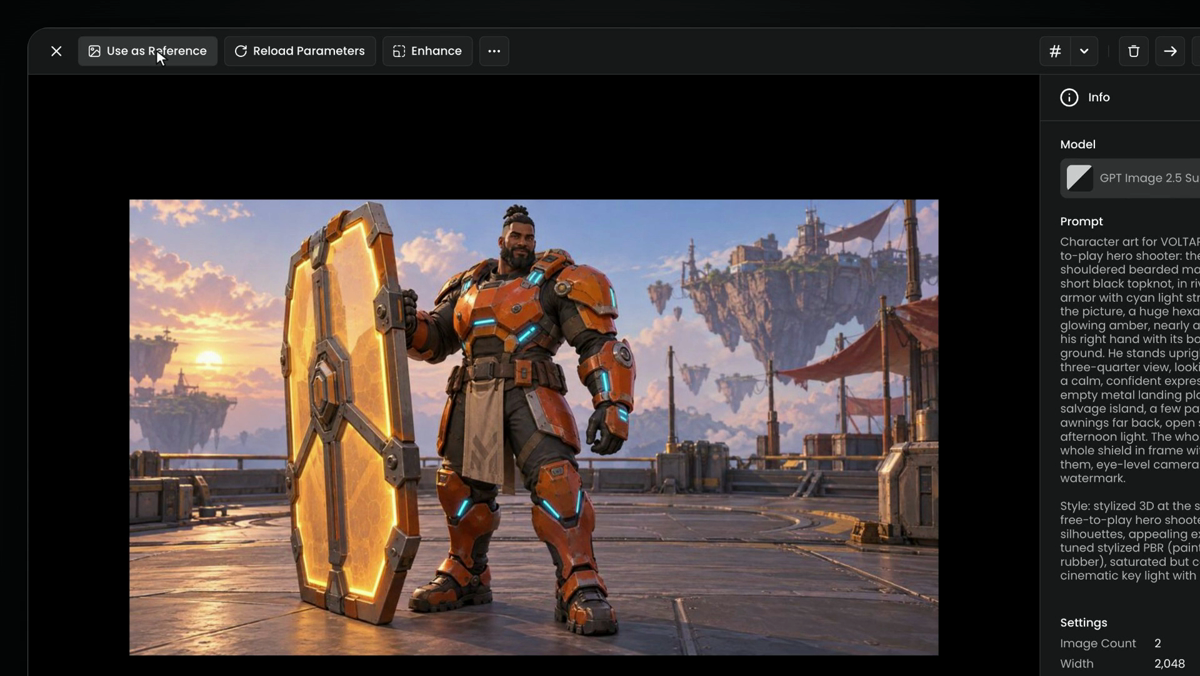
- Use as Reference sends the image back to the panel as a reference, to build the next image on it.
- Reload Parameters restores the exact setup: model, prompt and settings. Change one thing, generate again, and you know what made the difference.
- Enhance upscales it. See Upscale images.
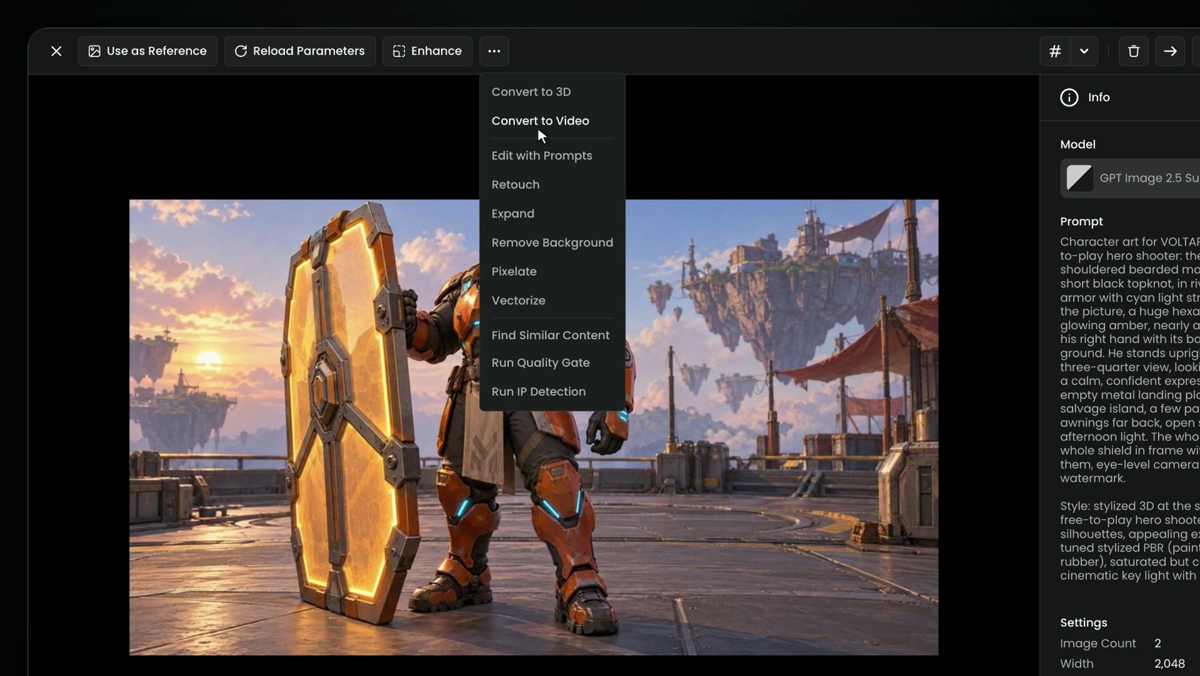
The ... menu next to Enhance holds the other tools: Convert to 3D, Convert to Video, Edit with Prompts, Retouch, Expand, Remove Background, Pixelate, Vectorize, Find Similar Content, Run Quality Gate and Run IP Detection. On the right of the bar are the download icon (PNG, JPEG or WebP), delete and Collections.
Step 8: Find your images in the session
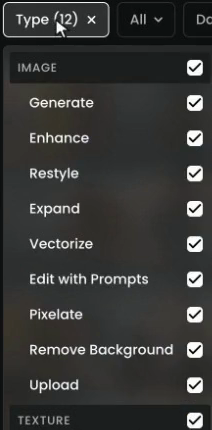
Close the viewer to go back to your session. The filters above the images narrow the view:

- Type shows only some kinds of results: generations, enhancements, background removals, uploads and so on.
- All, Date, Tags, Models and Collections narrow by who made it, when, how it's tagged, which model made it and where it's filed.
- Reset clears the view without deleting anything. Your images stay in your library.
On the right of the filter bar, the slider changes the size of the thumbnails, and the layout icon switches how they're arranged.
the subject matches the prompt (here the armor colors, the topknot, the shield on the left, held in his right hand), the whole figure is in frame, nothing you excluded appears (text, logos, watermarks), and the style matches the rest of your project.
a part of the prompt is missing or swapped, hands or the prop are malformed, the figure is cut off, or text appeared. Change one thing in the prompt or the settings with Reload Parameters, and run it again.
The panel at a glance
| Part | What it does | In this lesson |
|---|---|---|
| Model | The AI that makes the image; decides what the panel shows below | GPT Image 2.5 Sunburst |
| Prompt | Your description of the image, with prompt tools under it | Character, pose, background, light, style, exclusions |
| Reference Images | Pictures that guide the model | None |
| Image Count | Images per run | 2 |
| Dimensions | Size in pixels, from presets | 16:9, 2048 × 1152 |
| Quality | Effort per image; higher is slower | High |
| Background | Full image or cutout | Auto |
| Generate | Starts the run; shows the cost |
Common problems
| What you see | What to do |
|---|---|
| A setting from another lesson is missing | You're on a different model. Each model shows only the settings it accepts. |
| The image ignores part of the prompt | Put the subject first and keep one idea per sentence. Say where things are ("on the left side of the picture"). |
| Text or a logo appears | Add "No text, no logos, no watermark" to the end of the prompt. |
| Two images of the same world look different | Keep the same style paragraph, word for word, in every prompt. |
| The run takes long | High quality and large sizes take longer. Test at a lower quality, then run the final at high. |
| Your images seem gone after Reset | Reset only clears the session view. The images are still in your library. |
What's next
Now that you know the panel, learn what each setting does on different models in Image settings explained, then pick the right model for each job with the Image models guide. To write better prompts, see Prompt images.