

Edit a video
Restyle a clip, replace one element, extend it, reframe it or remove its background, with the model that fits each edit, and check that the motion survived.
- Guide
- Step 1 Learn
On this page12 sections
- Before you start
- Step 1: Trim the clip with Video Cut
- Step 2: Find an edit model in the library
- Step 3: Restyle the whole look
- Step 4: Replace one element
- Step 5: Extend the clip
- Step 6: Reframe to another format
- Step 7: Remove the background
- Other edits: retakes and new angles
- Make it repeatable
- Common problems
- What's next
Regenerating a clip to fix one thing throws away the motion you liked. Edit models keep the motion, the timing and the framing of your clip and change only what you describe. This lesson trims a clip with Video Cut, restyles it with Luma Ray 3.2 Edit, swaps a jacket with Seedance 2.5, adds five seconds with Minimax H3 Max Extend Video, then reframes and cuts out a subject.
Quick version
- Trim the clip to the part you need with Video Cut: most edit models charge by the length of the video.
- Open the model library from the Model card and search for the edit you want: "edit", "extend" or "reframe".
- Load the clip, describe the one change in the prompt, then list everything that must stay the same.
- Set the model's own controls (Edit Strength, Duration, Extension Duration) and click Generate.
- Compare matching frames of the source and the edit before you keep it.
Before you start
- A clip you mostly like. Editing keeps the motion and framing. If those are wrong, generate again instead: see Generate video.
- Where it lives. Every model in this lesson runs from Create › Videos. Click the Model card, then View all models, to open the library and search it.
- Pick the edit by what you want to change: the whole look, one element, the length, the format or the background. Each is a different kind of model.
- Every edit creates a new asset. The source clip stays in your gallery, so keep it as your master and edit copies of it.
| What you want to change | Edit type | Models to shortlist, as of November 2026 |
|---|---|---|
| The look, season, light or style | Restyle | Luma Ray 3.2 Edit, Kling V4 Video Editing, Gemini Omni 1.2 Flash Edit, Runway Aleph 2 |
| One object, outfit or background | Replace | Seedance 2.5 (edit mode), Kling V4 Video Editing |
| One person, from photos | Replace a person | Minimax H3 Max Recast, P-Video 2 Pro Replace |
| The clip ends too soon | Extend | Minimax H3 Max Extend Video, Gemini Omni 1.2 Flash Extend, Seedance 2.5 |
| A few seconds in the middle are bad | Retake | LTX-2.3 22b Retake, Minimax H3 Max Insert Video |
| The format is wrong (16:9 to 9:16) | Reframe | Luma Ray 3.2 Reframe, Minimax H3 Max Reframe Video |
| The subject must go on another background | Remove background | Pixelcut Video Background Removal, Video to Layers, Video Chroma Key (green or blue screens) |
Step 1: Trim the clip with Video Cut
Most edit models bill by the length of the input, and some cap it: Grok Edit Video trims to about 8.7 seconds at 720p, and Gemini Omni 1.2 Flash Edit takes up to 15 seconds. Cut the clip to the part you need first.
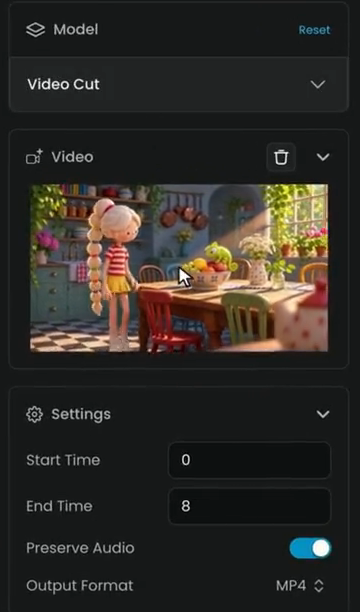
- In Create › Videos, pick Video Cut in the model library and load the clip under Video.
- Under Settings, set Start Time and End Time in seconds. The example keeps the first 8 seconds (0 to 8) of the 15-second kitchen clip from Prompt video.
- Leave Preserve Audio on to keep the sound, and Output Format on MP4.
- Click Generate. The trimmed clip appears as a new video.
Step 2: Find an edit model in the library
Click the Model card, then View all models. Type "edit" in the search box: the library lists the video edit models, here 35 of them, with their provider, rank, typical time and a relative cost. Click one to read what it does in the panel on the right, then Use this model.
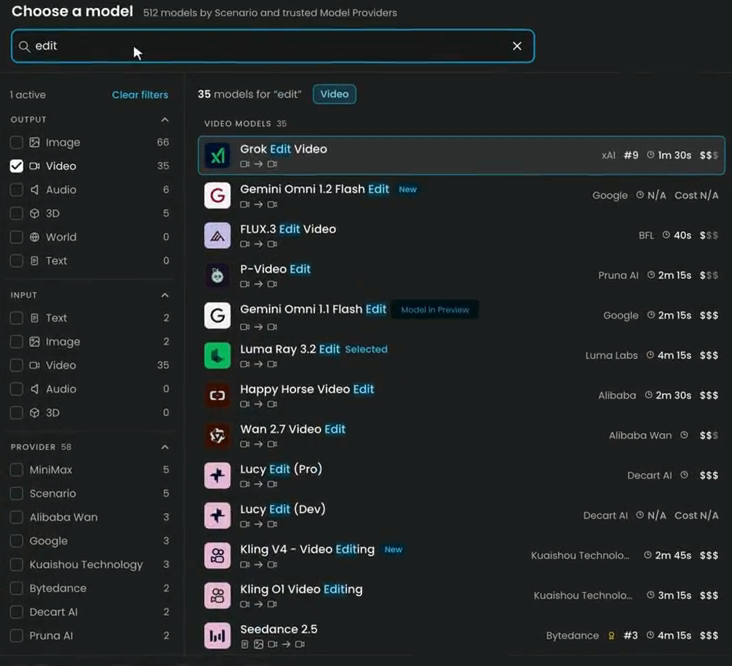
Search "extend" for extension models and "reframe" for reframing models, or type a model's name.
Step 3: Restyle the whole look
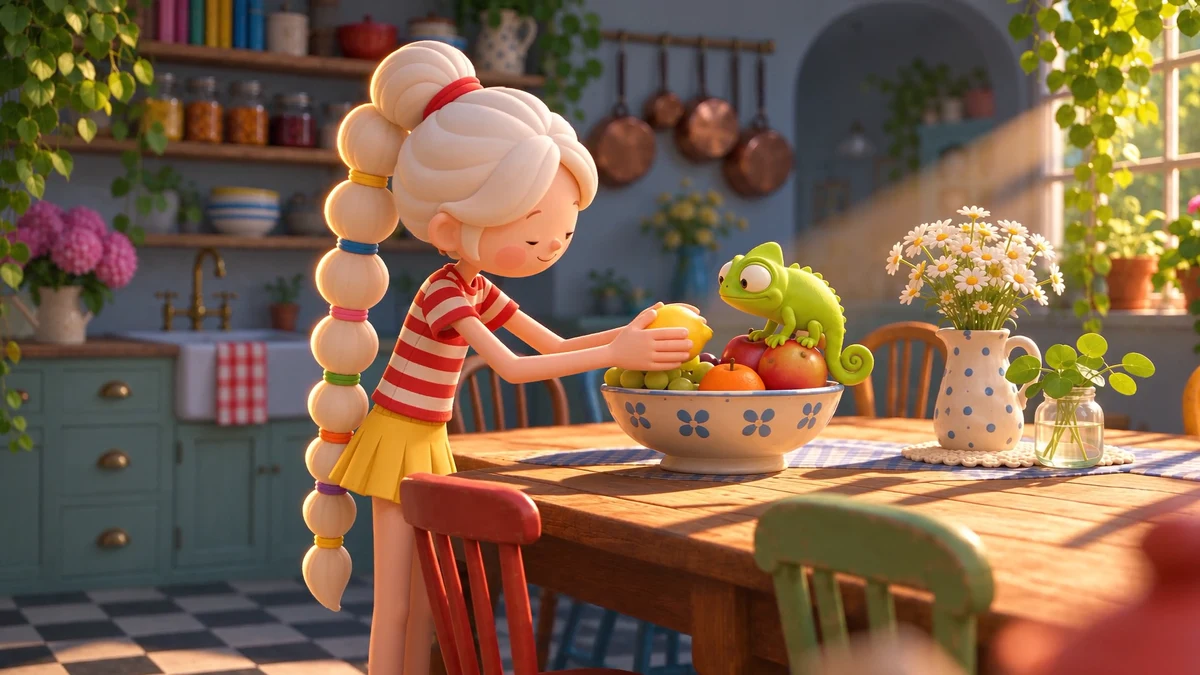
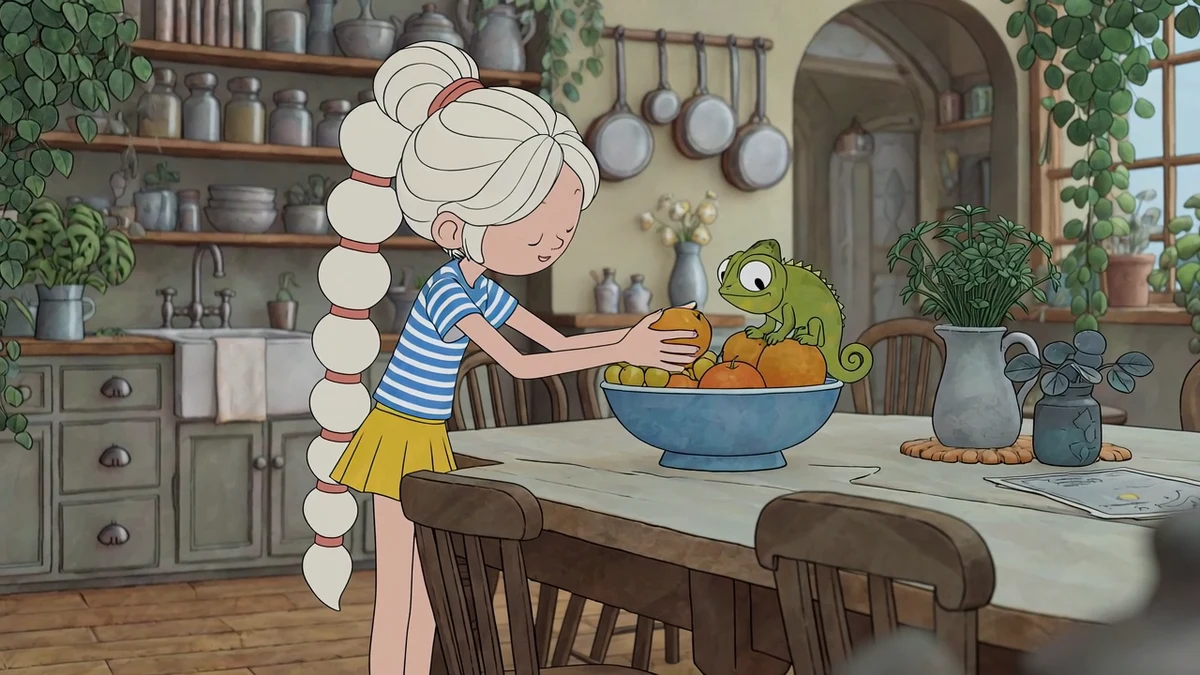
The source is the trimmed kitchen clip: a girl with a long white bubble braid picks up a lemon in a sunny 3D kitchen while her chameleon watches. The goal is a hand-painted watercolor storybook look with the same motion.
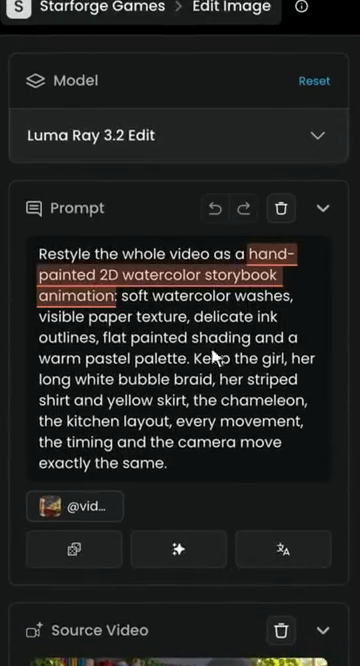
- Pick Luma Ray 3.2 Edit and load the trimmed clip as the Source Video.
- In Prompt, describe the new look, then list everything that must stay the same.
Restyle the whole video as a hand-painted 2D watercolor storybook animation: soft watercolor washes, visible paper texture, delicate ink outlines, flat painted shading and a warm pastel palette. Keep the girl, her long white bubble braid, her striped shirt and yellow skirt, the chameleon, the kitchen layout, every movement, the timing and the camera move exactly the same.
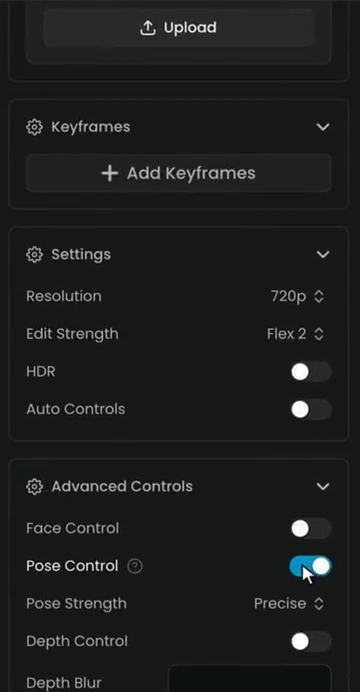
- Under Settings, choose an Edit Strength. It sets how far the edit can move from the source: the Adhere settings stay close, Flex allows more change, and Reimagine changes the most. The example uses Flex 2 at 720p, with HDR and Auto Controls off.
- Under Advanced Controls, turn on Pose Control and Trajectory Control. They keep her movements on the same path as the source. Face Control and Depth Control are there too, for faces and for the depth of the scene.
- Click Generate. The price shows on the button. The edit took about 4 minutes.
The motion and the timing match the source; only the look changed.
Watch the video: https://ufgc0c9mhl4ueq76.public.blob.vercel-storage.com/academy/72d8aca522dca5d698e26a7555c33f23d5960c7622a0e4f7b09824ebb33d55fe.mp4
- Auto Controls or Edit Strength, not both. A run with Auto Controls on and an Edit Strength set fails. Turn Auto Controls off when you choose the strength yourself.
- Kling V4 Video Editing gives a strong full restyle too, and kept the kitchen layout closely. In the same test, Seedance 2.5 restyled only the girl and left the kitchen in 3D, so keep it for changing one element.
Step 4: Replace one element
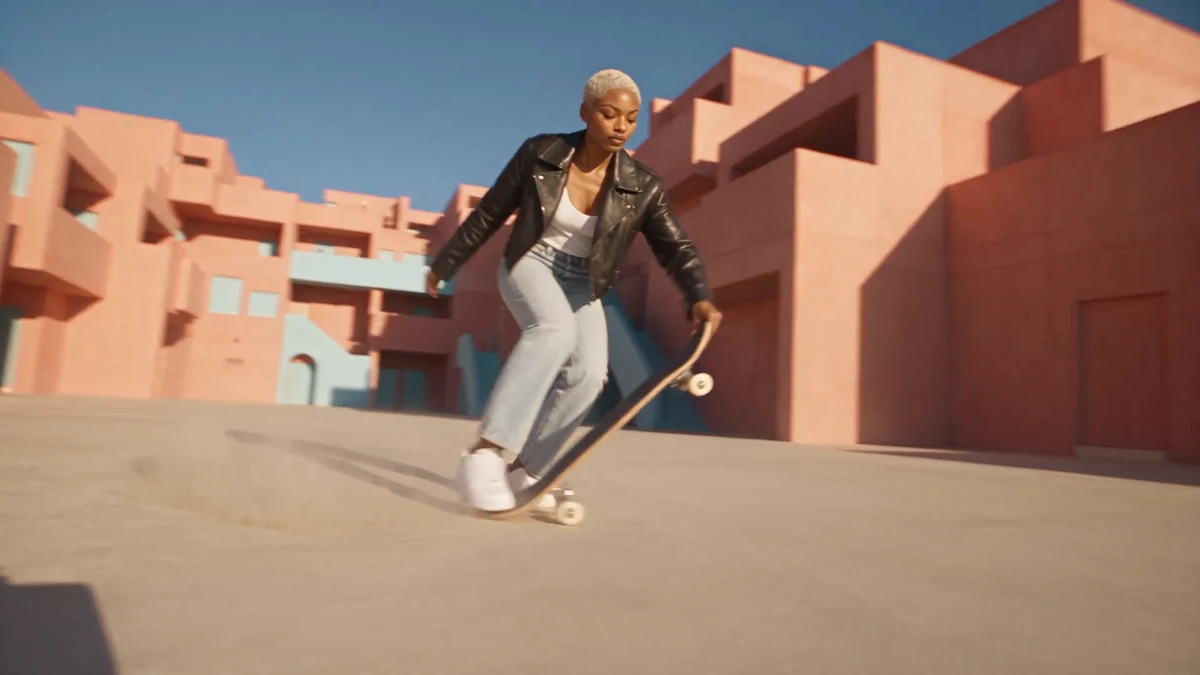
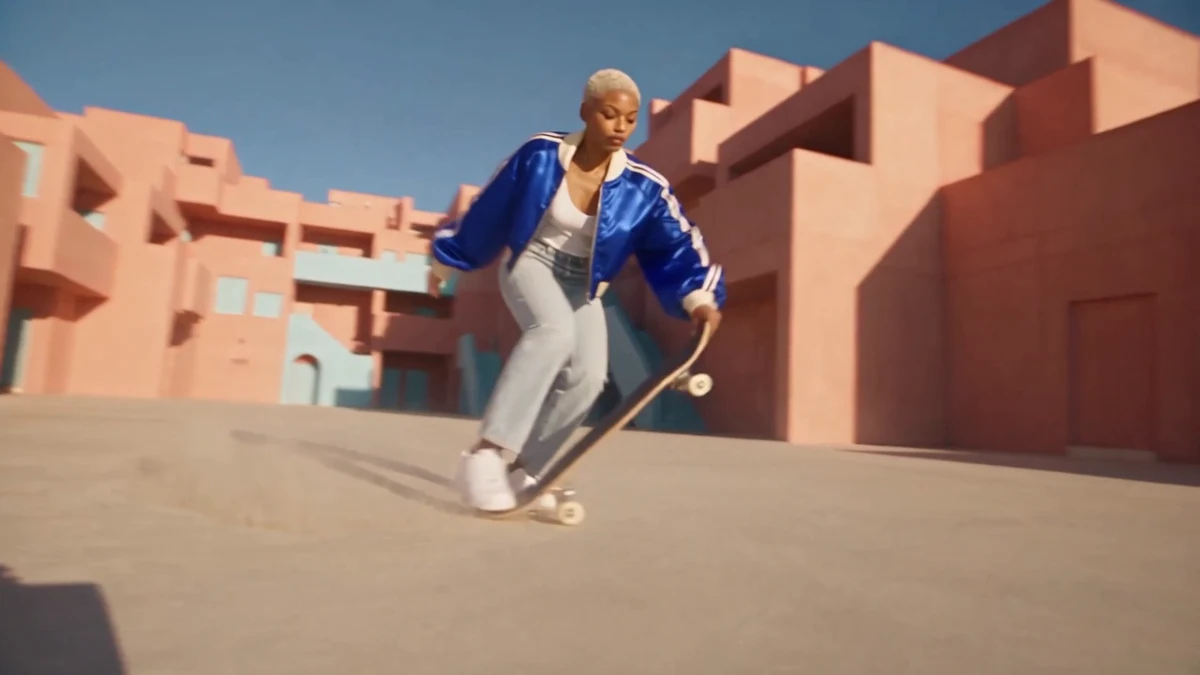
The source is a 9-second fashion shot of a skater riding between pink buildings. The goal is to replace only her black leather jacket with a blue bomber, from a reference image.
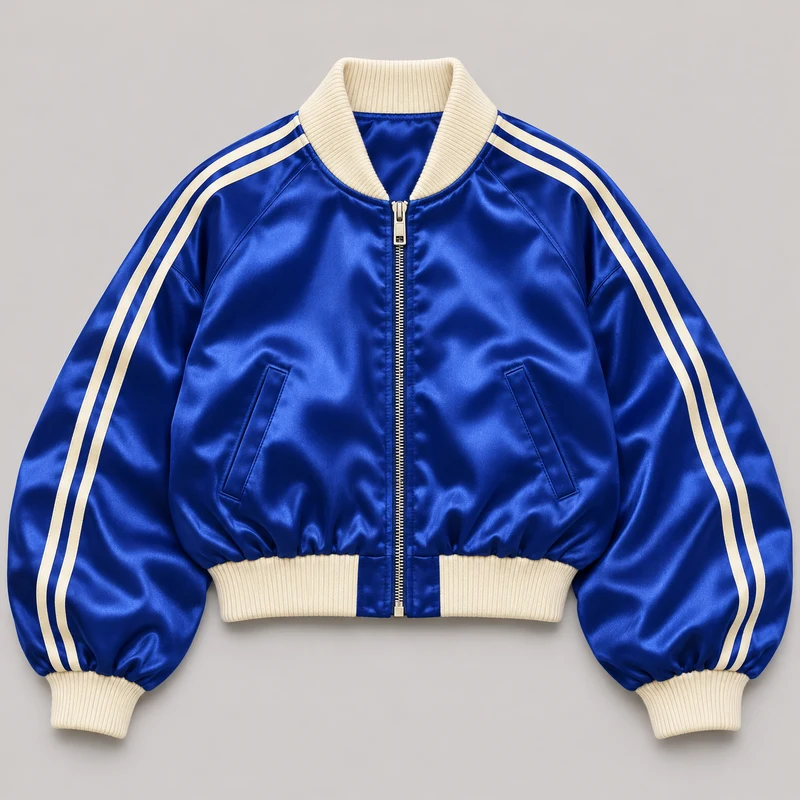
- Open the library again and pick Seedance 2.5. It takes the clip under Reference Videos and the jacket under Reference Images.
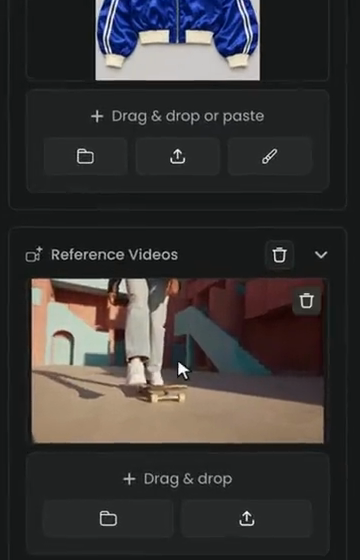
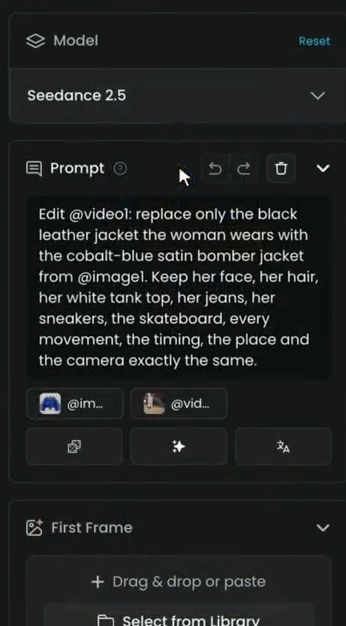
- In Prompt, call them @video1 and @image1, name the one thing to replace, and list what stays.
Edit @video1: replace only the black leather jacket the woman wears with the cobalt-blue satin bomber jacket from @image1. Keep her face, her hair, her white tank top, her jeans, her sneakers, the skateboard, every movement, the timing, the place and the camera exactly the same.
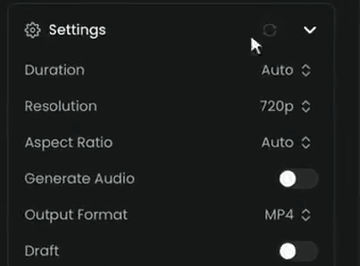
- Under Settings, set Duration to Auto, so the edit keeps the length of the source. The example keeps Resolution at 720p and Aspect Ratio at Auto, and turns Generate Audio off because the sound is added later. Draft stays off.
- Click Generate.
Only the jacket changed, in both shots of the clip.
Watch the video: https://ufgc0c9mhl4ueq76.public.blob.vercel-storage.com/academy/c2b4a56dce407adc541d912775cc1cfd9d5e38d3bcbe90a95d319883380643f0.mp4
- Kling V4 Video Editing makes the same swap well too. There, call the source @Video1 and the image @Image1.
- To replace a person, Minimax H3 Max Recast and P-Video 2 Pro Replace swap people from photos and keep the original motion and sound.
Step 5: Extend the clip
Extension continues a clip from its last frames, guided by a prompt for what happens next. It keeps the look better than a new generation from the last frame, because the model sees the motion leading in.
- Search the library for "extend" and pick Minimax H3 Max Extend Video. Load the full 15-second clip as the Input Video.
- In Prompt, describe only what happens next: here, the chameleon climbs onto her hand.
The green chameleon steps off the fruit bowl onto the girl's open hand and climbs up her arm to sit on her shoulder. She giggles and turns her head to look at it. The camera keeps the same slow, steady movement.
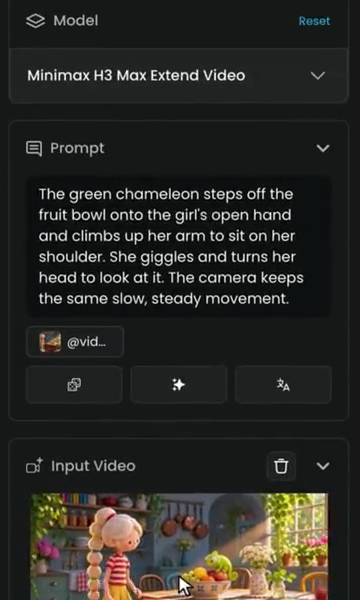
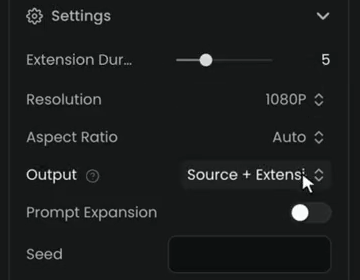
- Under Settings, set Extension Duration (the seconds to add, here 5) and Output: Source + Extension gives you the whole clip back with the new part, or choose the new part only. The example uses 1080P with Aspect Ratio on Auto, and Prompt Expansion off so the prompt runs as written.
- Click Generate.
The new seconds continue from the last frame: the chameleon walks onto her hand.
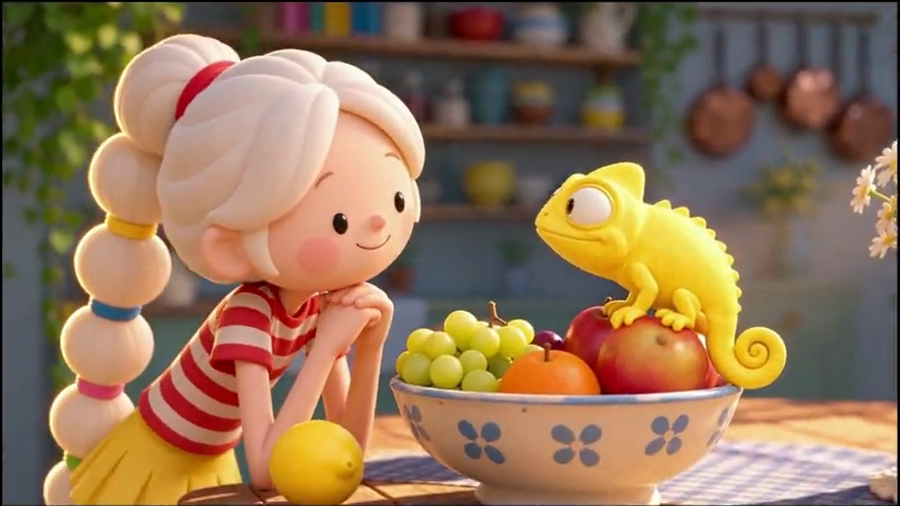
Watch the video: https://ufgc0c9mhl4ueq76.public.blob.vercel-storage.com/academy/097da14a60b189f0426c5dcb6d07a8673242e353b53979945cc99d4e0867e99b.mp4
- Write the next action only, and extend a few seconds at a time: drift builds up with each step.
- Gemini Omni 1.2 Flash Extend continued the same clip well too. Its safety filter blocked the first run because the prompt called the child-like character "the girl"; describing her as "the white-haired figurine character" passed.
Step 6: Reframe to another format
To change the format, a reframe model fits the whole source inside the new shape and generates the missing areas around it. A wide shot turned vertical shows the subject smaller, with new sky and ground. Load the clip, choose the new Aspect Ratio (Luma's reframe offers 9:16, 4:3, 1:1, 3:4, 16:9 and 21:9), and click Generate.
Watch the video: https://ufgc0c9mhl4ueq76.public.blob.vercel-storage.com/academy/3a21a054420048fd9476e4754a82873deffd0c618d5bef66fbc4d2af0e114f62.mp4
- Check faces and small details. Luma Ray 3.2 Reframe offers 1080p only for landscape and square shapes, so vertical outputs are 720p at most. In the same test, Minimax H3 Max Reframe Video at 1080p, upscaled from 768p, blurred her face.
- Check the edges of the new areas for smearing on fast motion.
Step 7: Remove the background
To put the subject on another background, Pixelcut Video Background Removal keeps only the skater, on a transparent background. It needs almost no setup and keeps the edge stable from frame to frame, so hair and limbs don't flicker. Choose WebM VP9 or MOV ProRes 4444 to keep the transparency: MP4 can't carry it. It can also put the subject on a solid color.
Watch the video: https://ufgc0c9mhl4ueq76.public.blob.vercel-storage.com/academy/bd0b7b0cf5edc8531a71d8dc010933b92dcb9cd7ef4221a50ea13ee7742ed592.mp4
- Video Foreground Extractor is the specialist: pick a Matting model for hair and fur or Portrait for talking heads, and export the black-and-white mask too.
- Video to Layers separates several subjects into their own layers plus a clean background plate.
- Video Chroma Key removes a green or blue screen from footage shot against one.
matching frames of source and edit show the same motion, timing, framing and positions, the requested change is present in every frame, and nothing else changed (faces, products, text, audio if it should stay).
the edit flickers between the old and new look, an element you did not mention changed, the motion slowed, sped up or was trimmed, or an extension drifts in style or identity from the source.
Other edits: retakes and new angles
- Retake a few seconds. A retake model regenerates a time range of the clip (picture, audio or both) and leaves the rest untouched: LTX-2.3 22b Retake does this. Minimax H3 Max Insert Video replaces a middle range with a new scene and cuts back to your footage. Use them when one gesture or one line of audio failed.
- A new camera angle. Edit a frame rather than the clip, then animate it. See A longer video from key frames and camera angles.
- 1Extractone frame of the clip
- 2New angleimage model, frame as reference
- 3Animatethe new still as first frame
Make it repeatable
- Fix the edit in a workflow when it applies to many clips (a seasonal restyle of a campaign, a background swap on every product clip): edit prompt fixed, video as input, published as an App.
- Keep the source clips as your masters. A new season is a new run on the same masters. See Make key art and every format from one master.
Common problems
| What you see | What to do |
|---|---|
| The edit changed more than asked | Shorten the prompt to one change and list what stays. Try a model with a dedicated edit mode, such as Seedance 2.5 |
| The edit flickers between the old and new look | Simplify the change, shorten the clip, or try another restyle model |
| The output is shorter than the source | The model capped the input length. Trim and edit in segments, then join them with Video tools |
| The extension drifts in style or identity | Extend in shorter steps, restate the subject's key features in each prompt, or pass a reference image |
| Luma Ray 3.2 Edit fails at once | Auto Controls can't run with an Edit Strength set: turn Auto Controls off |
| No 1080p for a vertical reframe | Luma Ray 3.2 Reframe offers 1080p only for landscape and square shapes; use 720p, then upscale |
| The cut-out has a black background | The file is MP4. Choose WebM VP9 or MOV ProRes 4444 to keep the transparency |
| The job is blocked by a safety filter | Some models refuse prompts that call a young-looking character a girl or a boy. Describe the character instead ("the white-haired figurine character") |
| The failed edit used credits | Failed generations are refunded automatically, except on Grok models. Test on a short trim first |
What's next
Once the edit is approved, finish it: upscale, raise the frame rate and grade it in Upscale and finish video. To join, trim or resize clips, see Video tools. To run one edit across a whole set of assets, see Seasonal and market variants of one approved shot.