

Image settings explained
What each image setting does, its usual range, and which current models expose it, as of October 2026.
- Reference
- Step 1 Learn
The settings under the prompt decide how many images you get, their size, how much effort goes into each one and whether they have a background. This lesson changes them one at a time on GPT Image 2.5 Sunburst to make a transparent cutout of the tank hero from Generate images, then switches to Ideogram 4.5 to show how the settings change with the model.
Quick version
- Pick the model first: the panel shows only the settings it accepts.
- Set Image Count, then the size (Dimensions, or Aspect Ratio and Resolution).
- Set Quality: low to test, high for finals.
- For a cutout, set Background to Transparent and say it in the prompt too.
- On models that have them, turn Magic Prompt off to keep your words, and set a Seed to repeat a result.
Before you start
- Where they are. Open Create › Images. The settings sit in the Settings section, under the prompt and Reference Images, just above Generate.
- The model decides. Each model accepts different settings, so the section changes when you change the model. What you see in the panel is always what the selected model accepts.
- Some settings change the cost. The cost shows on the Generate button and updates as you change settings. Count, size and quality move it; Background does not.
- Change one thing at a time. If you change three settings and the image gets better, you won't know which one did it.
This lesson starts from the tank hero prompt and settings of the previous lesson: GPT Image 2.5 Sunburst, two images, 2048 × 1152, quality high.
Step 1: Image Count
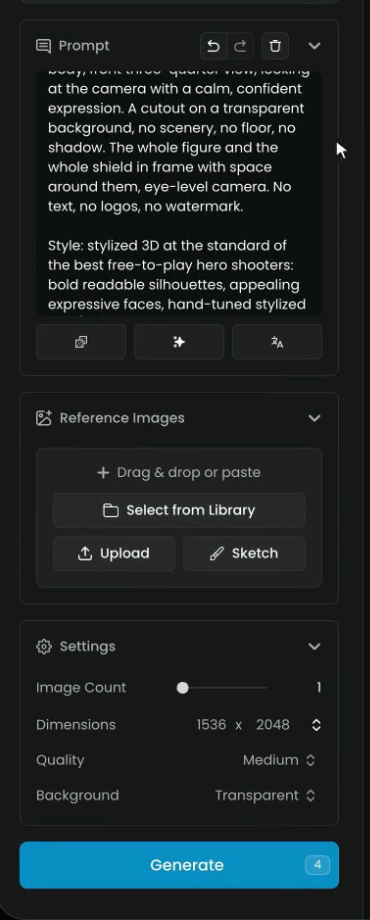
Image Count is how many images one run makes. Drag the slider to 1. The cost on Generate goes down, since you pay for each image.
Make several when you're exploring and want takes to compare. Make one when you know what you want, or when you test one setting change.
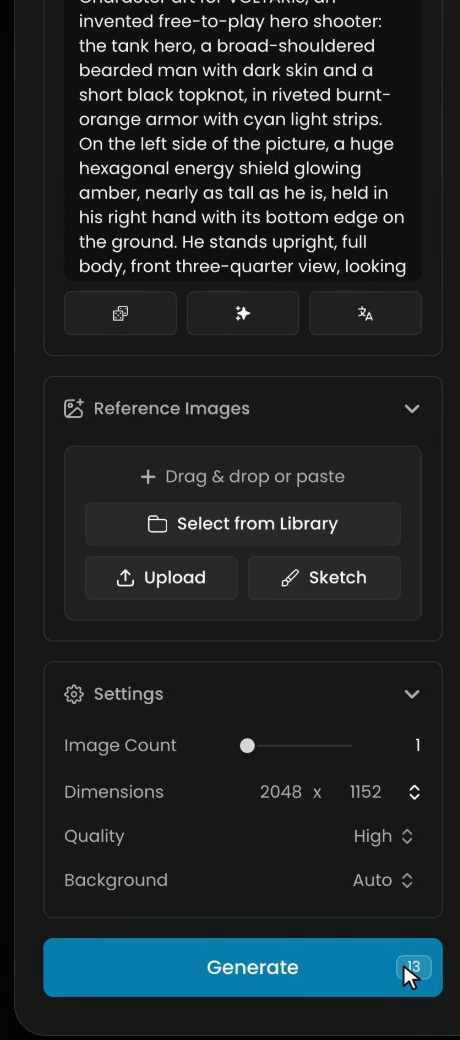
Step 2: Dimensions
Dimensions sets the size of the image in pixels, width × height. Click the arrows next to it to open the presets. Each model offers its own sizes; on GPT Image 2.5 Sunburst they go from tall (9:21, 9:16) through square (1:1) to wide (16:9, 21:9).
Pick 3:4 (1536x2048), a portrait frame that fits a standing character.
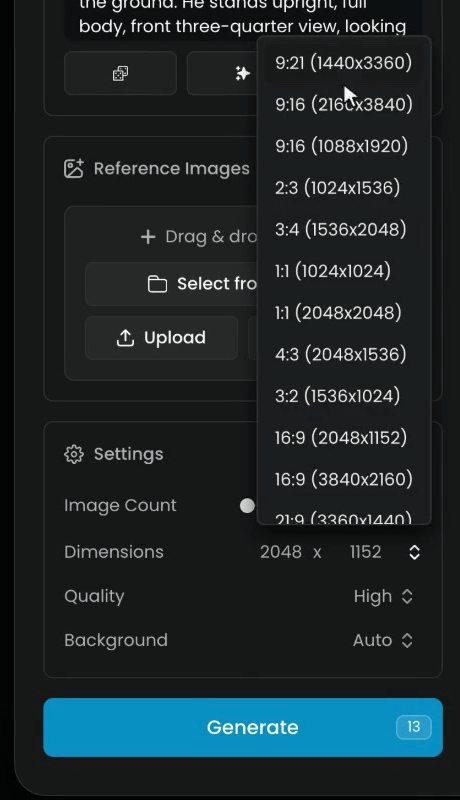
Choose the shape for where the image will go: tall for a phone screen or a full-body character, square for an icon or a post, wide for a banner or a game background. Bigger sizes cost more and take longer. On GPT Image, both sides must be multiples of 16, up to 3840 pixels, and sizes above 2560 × 1440 are experimental, so the presets are the safe choice.
Step 3: Quality
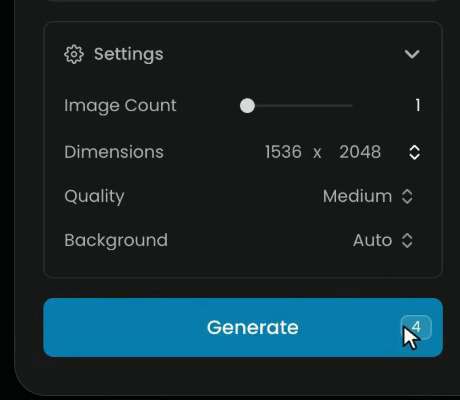
Quality is how much effort the model spends on each image. Click it to step through the levels, from low up to max.
- Auto, the default, lets the model decide.
- Low is quick. Use it to test ideas and prompts.
- Medium covers most work.
- High and above are for finals, and for images with small text, faces or fine detail.
The cost follows the quality. Set it to Medium.
Step 4: Background
Background chooses between a full image and a cutout. It has three values:
- Auto lets the model decide.
- Opaque always draws a solid background.
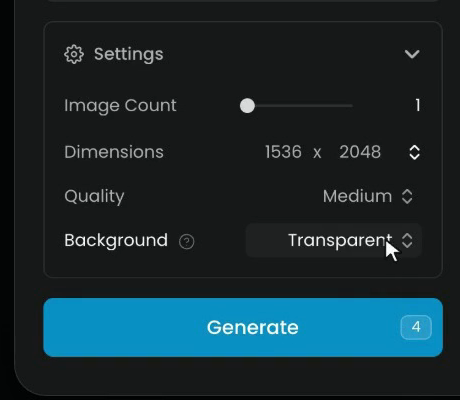
- Transparent draws the subject alone, with a real transparent background, ready to place on anything.
Pick Transparent. This one doesn't change the cost.
Transparent backgrounds work on GPT Image 2.5 Flare and GPT Image 2.5 Sunburst. With most other models, remove the background as a separate step: see Remove and replace backgrounds.
Step 5: Say it in the prompt too
The setting alone isn't enough: if the prompt describes a scene, the model still draws it. Swap the sentence about the landing platform for one that asks for a cutout. This is the prompt the film runs:
Character art for VOLTARIS, an invented free-to-play hero shooter: the tank hero, a broad-shouldered bearded man with dark skin and a short black topknot, in riveted burnt-orange armor with cyan light strips. On the left side of the picture, a huge hexagonal energy shield glowing amber, nearly as tall as he is, held in his right hand with its bottom edge on the ground. He stands upright, full body, front three-quarter view, looking at the camera with a calm, confident expression. A cutout on a transparent background, no scenery, no floor, no shadow. The whole figure and the whole shield in frame with space around them, eye-level camera. No text, no logos, no watermark.

Style: stylized 3D at the standard of the best free-to-play hero shooters: bold readable silhouettes, appealing expressive faces, hand-tuned stylized PBR (painted metal, soft cloth, rubber), saturated but controlled palette, cinematic key light with a cool rim.
Click Generate.
Step 6: Switch to another model
While it runs, look at how another model's settings differ. Click the model name, type "Ideogram" in the search box and pick Ideogram 4.5.
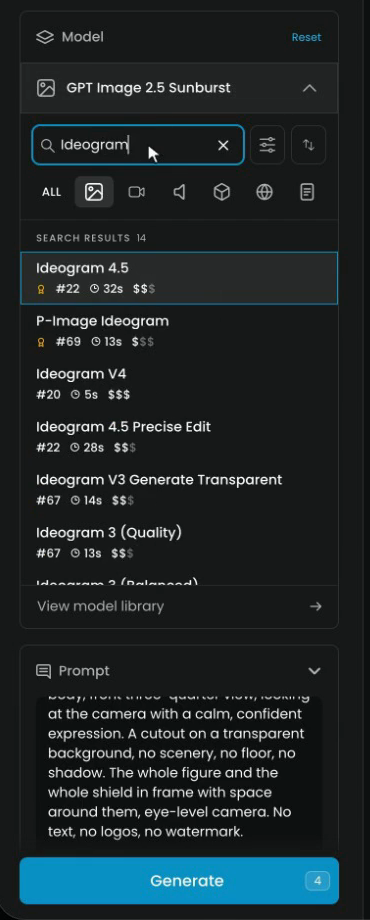
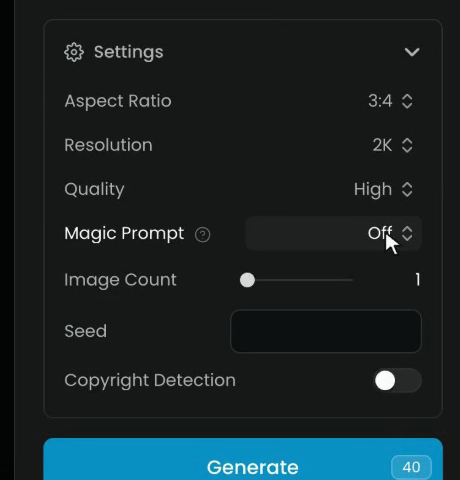
Watch the Settings section change:
- Instead of pixels, this model takes an Aspect Ratio for the shape and a Resolution, 1K or 2K, for the size. Set the ratio to 3:4. The resolution applies once you choose a ratio; on Auto, the model picks the shape.
- Its Quality runs from very low to high. Very low needs a reference image, so use it for edits, not to generate from a prompt alone.
- There is no Background setting, because this model can't make cutouts.
- Magic Prompt lets the model rewrite your prompt before it draws. It helps a short prompt. Turn it Off to keep your words exactly as written, as you should for a detailed prompt or exact text.
- There's also a Copyright Detection switch, which the film leaves off.
Step 7: Seed
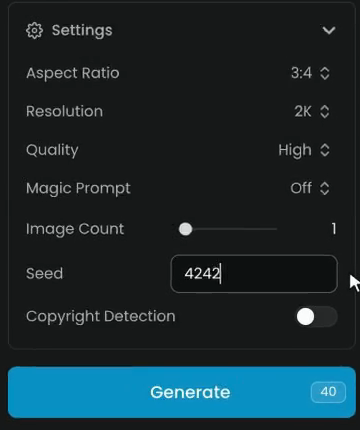
Seed is the starting point of the image. Leave it empty to get a new one each run, or type a number to keep it fixed.
With the same model, prompt, settings and seed, you usually get the same image back. That makes the seed the tool for changing one thing at a time: fix it, change one word or one setting, and compare.
Step 8: Check the cutout
Back in your session, the cutout from Step 5 is ready. Click it to open it. The Info panel confirms the settings: Image Count 1, Width 1,536, Height 2,048, Quality Medium, Background Transparent. It's the same character, with no floor, no shadow and nothing behind him, ready to drop into a menu or a poster.
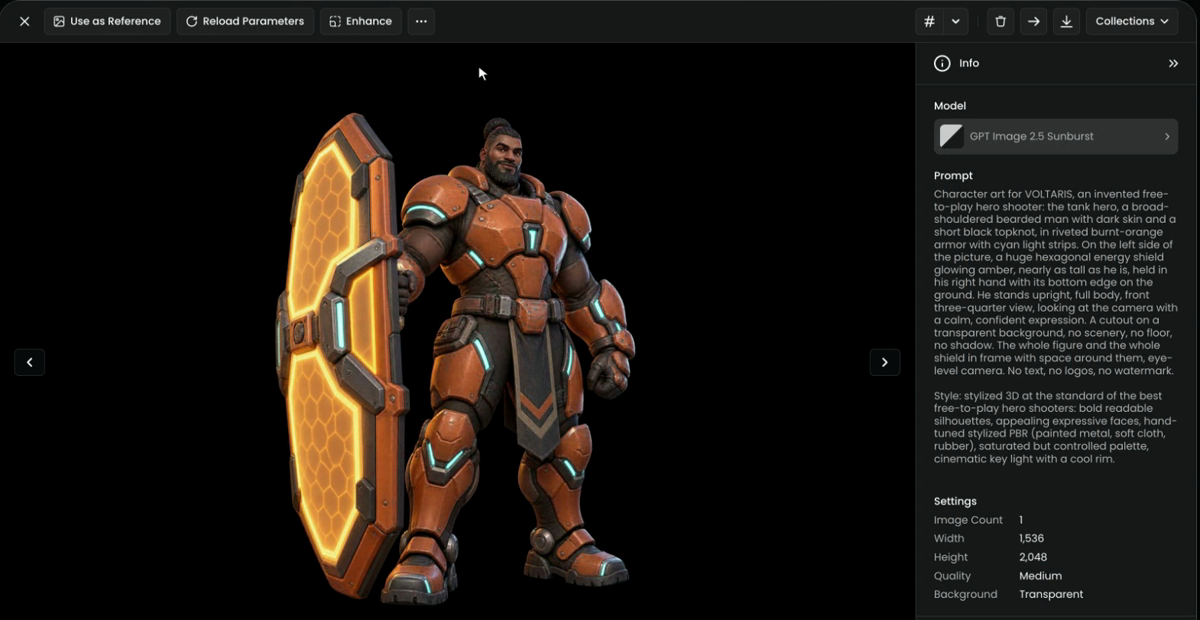
the character matches the one from the full scene, the whole figure and the shield are in frame, and the edges are clean on fine detail (the topknot, the glowing shield rim) when you zoom in.
a floor, a shadow or part of a scene is still there (check the prompt still describes one), parts are cut off, or the edges show halos. Fix the prompt, or remove the background with a dedicated tool instead.
Settings reference
| Setting | What it does | Changes the cost | Seen on |
|---|---|---|---|
| Image Count | Images per run | Yes | Every model (GPT Image up to 10, Ideogram 4.5 up to 8, Nano Banana 2.1 up to 4) |
| Dimensions | Width × height in pixels, from presets or typed | Yes | GPT Image 2.5 Flare and Sunburst |
| Aspect Ratio | The shape, as a ratio such as 3:4 or 16:9 | Through the size it gives | Ideogram 4.5, Nano Banana 2.1 |
| Resolution | The size for that shape: 1K or 2K (Ideogram 4.5); 1K, 2K or 4K (Nano Banana 2.1) | Yes | Ideogram 4.5, Nano Banana 2.1 |
| Quality | Effort per image | Yes | GPT Image (low to max), Ideogram 4.5 (very low to high) |
| Background | Auto, Opaque or Transparent | No | GPT Image 2.5 Flare and Sunburst |
| Magic Prompt | Lets the model rewrite the prompt first: auto, on or off | No | Ideogram 4.5 |
| Seed | Fixes the starting point so a result can be repeated | No | Ideogram 4.5 and many others |
| Thinking level | How long the model plans before drawing: minimal, medium or high | Not covered here | Nano Banana 2.1 |
Some models, mostly Scenario's own and trained ones, also show Sampling Steps (how many passes the model makes; more is sharper and slower), Guidance (how strictly it follows the prompt) and, with a trained style, a LoRA Scale. Start those at their defaults and change them in small steps.
Common problems
| What you see | What to do |
|---|---|
| A setting you expected isn't there | The selected model doesn't accept it. Switch to a model that does, for example GPT Image 2.5 Sunburst for Background. |
| The cutout still has a floor or a scene | Remove the scene from the prompt and say "a cutout on a transparent background, no scenery, no floor, no shadow". |
| The cutout's edges have halos on fine detail | Zoom in and check hair, smoke and thin glowing edges. If they don't hold up, use a background removal model instead. |
| The image doesn't follow your exact words | Turn Magic Prompt off. |
| The same settings give a different image every time | Leave nothing to chance: set a Seed and keep the model, prompt and settings the same. |
| The cost is higher than you expected | Lower Image Count, the size or Quality. Test at low quality, then run the final once. |
| Ideogram rejects very low quality | Very low needs a reference image. Use low or above to generate from a prompt alone. |
What's next
You know what each setting does; now choose the model. The Image models guide compares the main image models and what each is best at. To place your cutout in a new scene, see Remove and replace backgrounds.