

Publish a workflow as an App
Turn a working workflow into an App: pin the inputs and output, mark fields required or optional, write descriptions, add previews, test and share.
- Guide
- Step 2 Repeat
On this page14 sections
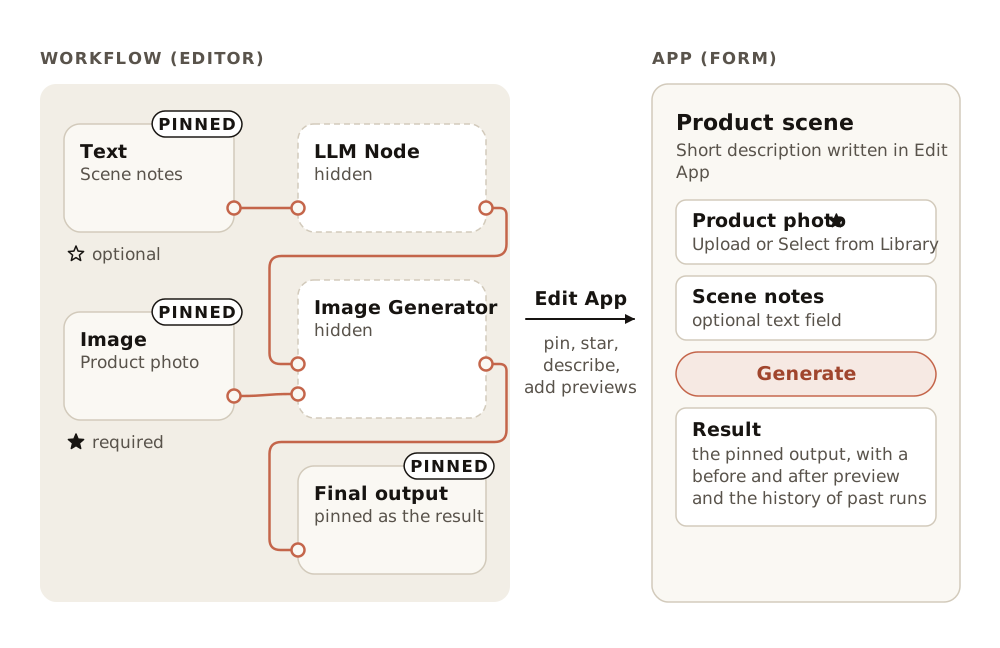
An App is a workflow with a simple form in front of it. People fill in the fields you choose and click Generate; the prompts, models and layout stay fixed inside. In this lesson you publish Anatomy reference sheets as an App with one input (a character image) and one output (the reference sheet), lock the workflow, and run the App as a teammate would, on a character it has never seen.
Quick version
- Open the workflow from the Project tab, click Switch to Edit Mode, then Edit App at the top right.
- Pin the input node the user should fill, and keep its star filled so it is required. Pin the node whose result is the deliverable.
- Click Edit App again. Keep the Name, write a Short Description and a Description, and add an Input Example and an Output Example.
- Click Publish App. Then open the ... menu and choose Lock Workflow.
- Open Workflows › Apps, Project tab, pick a new input and click Generate.
Before you start
- A workflow that already works. An App runs the workflow exactly as it is, so test it first, ideally on more than one input. This lesson uses the finished workflow from Image and Video Studio.
- One good result to use as the Output Example. You can't publish without it. The result of a run on the workflow is fine.
- Where Apps live. Workflows › Apps in the top bar. The Platform tab holds Apps Scenario has built; the Project tab holds your project's own.
| Part of the workflow | In the App |
|---|---|
| A pinned input node | A field of the form: a pinned Image node becomes an image field, a pinned Text node a text field |
| The star on a pinned input | Filled: required. Empty: optional |
| The pinned output | The result the App shows |
| Everything else: prompts, Prompt Builders, models, settings, the layout | Hidden. People running the App can't change it |
Step 1: Turn on App mode
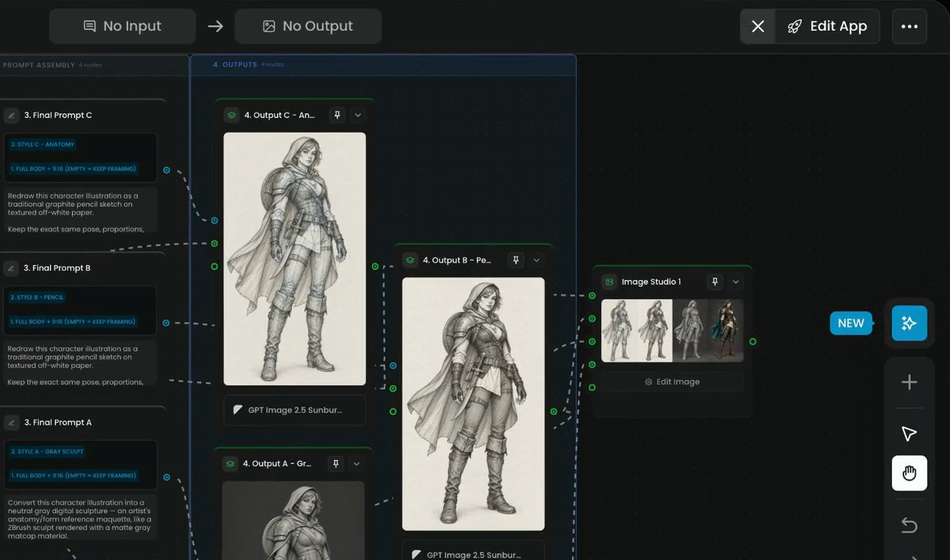
Open Anatomy reference sheets from the Project tab and click Switch to Edit Mode. Then click Edit App at the top right.
The editor switches to App mode. Every node now has a pin, and the top bar shows what the App will have: No Input → No Output to begin with. The X next to Edit App leaves App mode.
Step 2: Pin the input
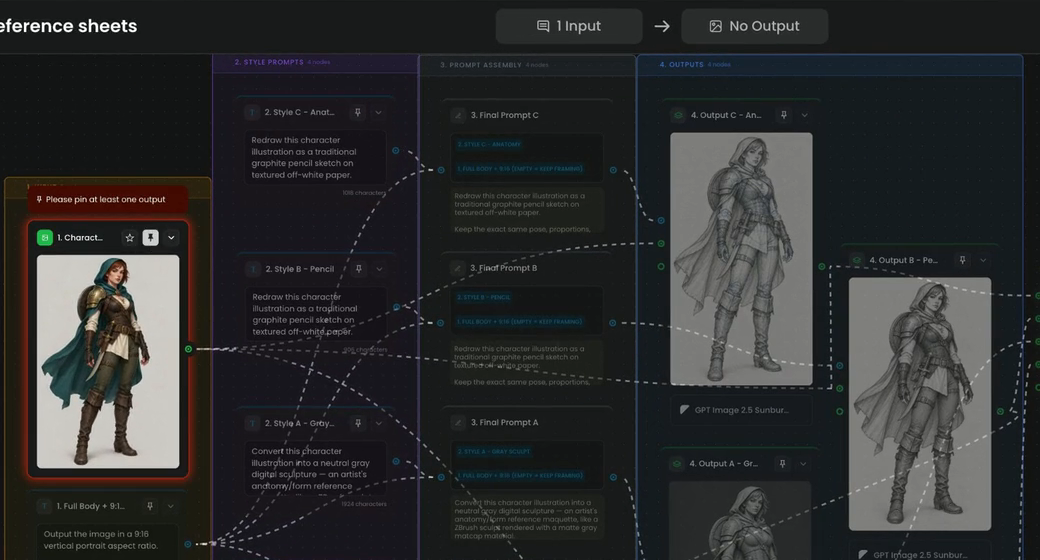
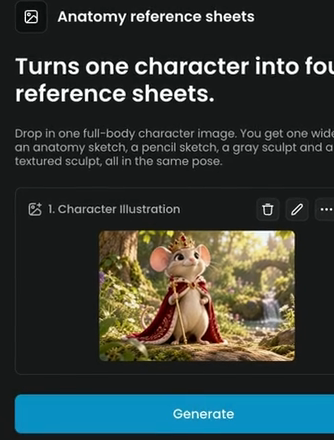
Click the pin on 1. Character Illustration. It becomes the form's only field, and the top bar now reads 1 Input. The star next to the pin is filled, which makes the field required: the App won't run without a character.
Until an output is pinned too, the node shows Please pin at least one output. Every pinned input must lead to a pinned output.
Step 3: Pin the output
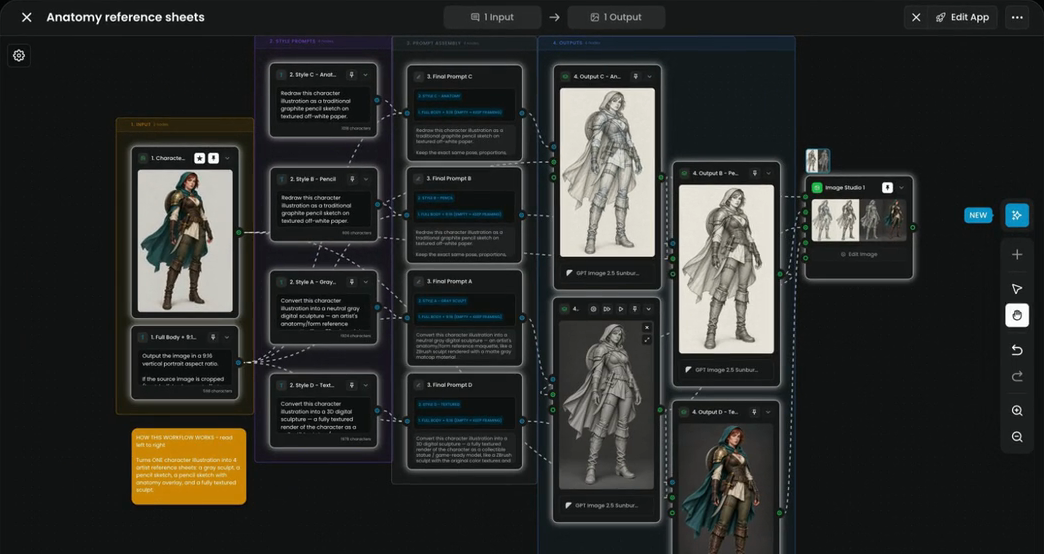
Pin Image Studio 1, the node that makes the reference sheet. The top bar reads 1 Input → 1 Output.
Everything else stays inside: the style prompts, the framing rule, the Prompt Builders, the four generators and the layout of the sheet. People running the App see one field and one result.
Expose as little as possible: each extra field is another way for a run to go wrong.
| Expose | Keep inside |
|---|---|
| The source image or file | The model on every generator |
| A short optional note, only if people need it | The prompts and Prompt Builder templates |
| A choice that really changes from run to run | Quality, dimensions and number of results |
Step 4: Describe it
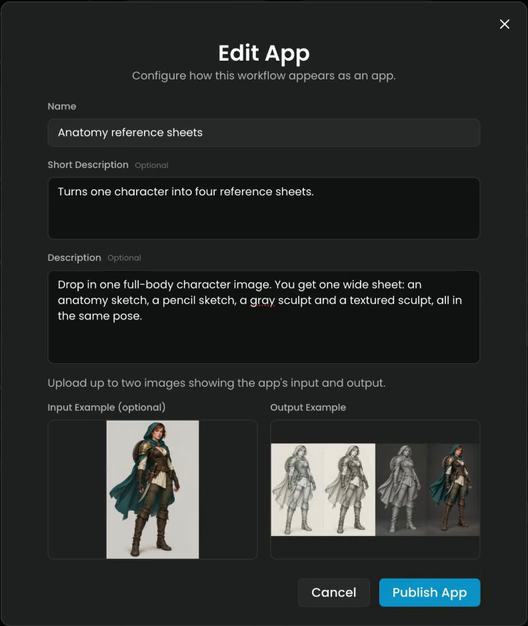
Click Edit App again to open the details. The Edit App dialog says "Configure how this workflow appears as an app."
- Name: keep the workflow's name, Anatomy reference sheets.
- Short Description (optional): one line, shown as the App's heading.
- Description (optional): what the App makes, what to upload and what comes out, in 20 to 30 words.
The film uses:
Turns one character into four reference sheets.
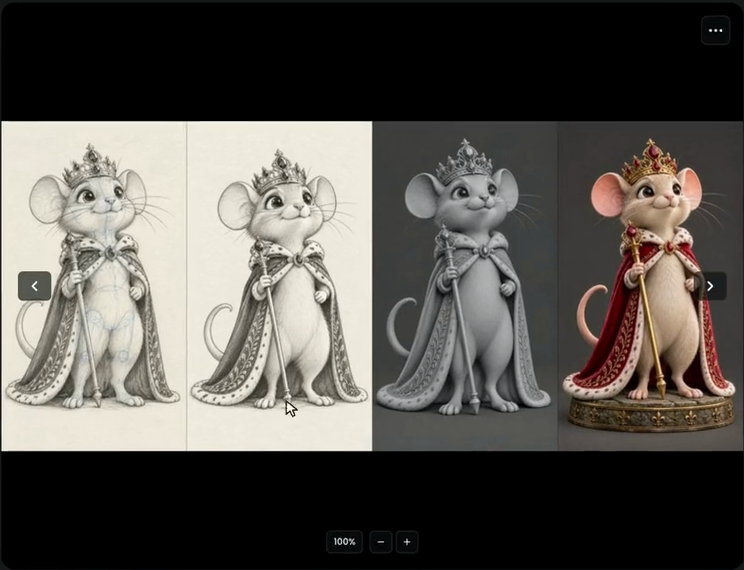
Drop in one full-body character image. You get one wide sheet: an anatomy sketch, a pencil sketch, a gray sculpt and a textured sculpt, all in the same pose.
Step 5: Add examples
Under "Upload up to two images showing the app's input and output", add:
- Input Example (optional): the character, so people see what a good input looks like.
- Output Example: her reference sheet. It's required: Publish App stays unavailable until it's there.
Each slot takes Drag & drop or paste, a pick from your library or an upload.
Step 6: Publish
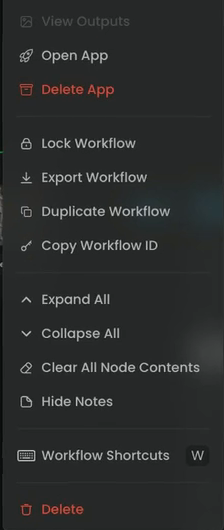
Click Publish App. Cancel closes the dialog without publishing. Once the App is published, Edit App shows a green dot, and the ... menu gains Open App and Delete App.
Step 7: Lock the workflow
Open the ... menu at the top right and choose Lock Workflow. Project members can still run the workflow and the App, but nobody can change the App by editing the graph by mistake.
Step 8: Open the App as the team will
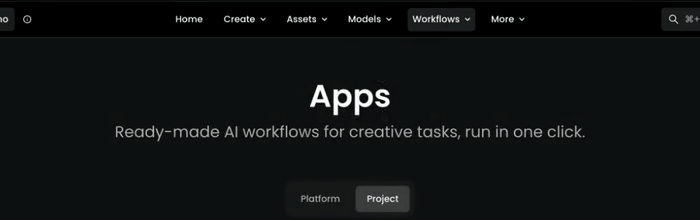
In the top bar, open Workflows › Apps, then the Project tab. Click the App's card.
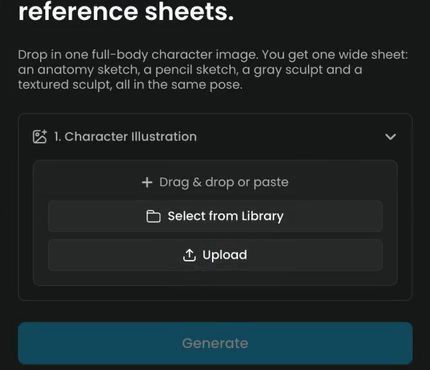
The App opens with your short description as its heading, the description under it, and one field, 1. Character Illustration, with Drag & drop or paste, Select from Library and Upload. Generate stays unavailable until the required field is filled. On the right, the examples show what comes out.
Step 9: Run it on a new character
Pick a character the workflow hasn't seen: here Queen Pip, from the library, with Select from Library. Click Generate. The estimate is on the button.
A couple of minutes later the same four sheets come back for a brand new character, with nothing to set up. The zoom controls under the result let you check the detail. Thumbnails of every result made with the App collect under the main result.
the App shows only the fields you pinned, with clear names; required fields are marked; the examples show a real input and its output; a teammate can run it from the description alone and get a usable result on the first try, on an input the workflow has never seen.
a field is named Image 1 or Text 2; the App exposes a model or setting nobody should change; the description doesn't say what to upload; the result shown is an in-between node, not the deliverable.
Test it like a teammate
Run the App three ways before you share it:
- A good input and nothing else.
- A difficult input: a busy background, an odd angle, a small image.
- The optional fields, if any: empty, then with something unplanned in them.
Fix what breaks inside the workflow, not in the description. If the App needs a person to choose before an expensive step, add an Approval node or Slice Items in Choose mode: the picker also appears in the App during the run. See Approval and review steps.
Share and maintain
- Who sees it. Apps you publish in a project appear on the Project tab of Apps for that project's members. See Run and share Apps.
- Change it safely. To change the App later, edit the workflow behind it (unlock it first), run it on the same inputs as before, and lock it again. To try a new model, work in a duplicate first (Duplicate Workflow) and compare.
- Learn from the platform. Any App on the Platform tab opens its workflow with Edit workflow at its top right, so you can study how it's built and start your own from it.
- Run it from code. An App runs like any workflow, by ID with its input names. See Run workflows from code and agents.
Common problems
| What you see | What to do |
|---|---|
| Publish App is unavailable | Add an Output Example; it's required |
| The node says Please pin at least one output | Pin the node whose result is the deliverable. Every pinned input must lead to a pinned output |
| A field is missing from the App | Its node isn't pinned. Open Edit App and pin it |
| The App shows the wrong result | Another node is pinned as the output. Unpin it and pin the final node |
| Generate stays unavailable | A required field is empty. Fill every field with a filled star |
| Runs fail when an optional field is empty | A node downstream needs text. Give the field a default, or route the empty case with If-Else |
| Results changed after a teammate edited the graph | Lock the workflow with Lock Workflow, and check the models against the version you tested |
What's next
That's the course: you built a real workflow from an empty canvas and shipped it to your team as an App. To share Apps and run them across a project, read Run and share Apps. To start from Scenario's own pipelines, see Platform workflows and templates.